
"
The Largest Car Forum in the Philippines
- Forums
- Discussions
- Events
- Community
Results 1 to 20 of 25
-

 Tsikoteer

- Join Date
- May 2009
- Posts
- 1,990
-
Tsikoteer
- Join Date
- May 2009
- Posts
- 1,990
-
Tsikoteer
- Join Date
- May 2009
- Posts
- 1,990
February 18th, 2011 10:46 AM #3Engine is 4D56Turbo with head gasket problem...Symptom/s:constant bubbling at rad neck, high pressure buildup when cold (cooling system), constant addition of water, overheating.
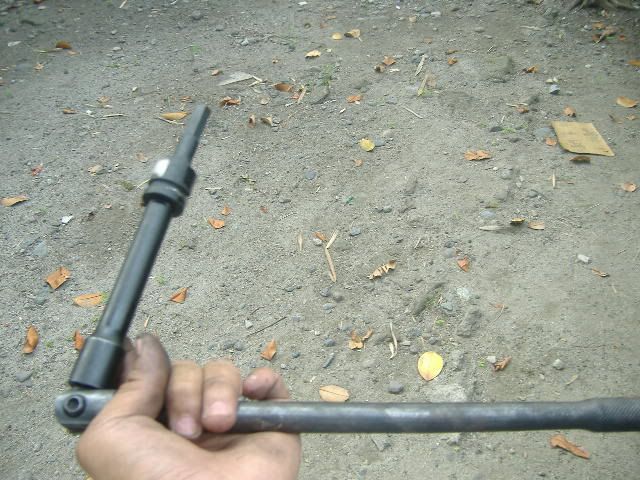
with the workshop manual,some handwritten guides, replacement part, regular handtools and special tools...it can be a DIY job. Anyone who knows how to turn a wrench (those noob like me in this job) aided by mechanical proficiency and safety can also do this job. Special tools include torque wrench (better get the auto click type), 10 mm hex socket, feeler gage and straightedge or any leveling tool.
[URL="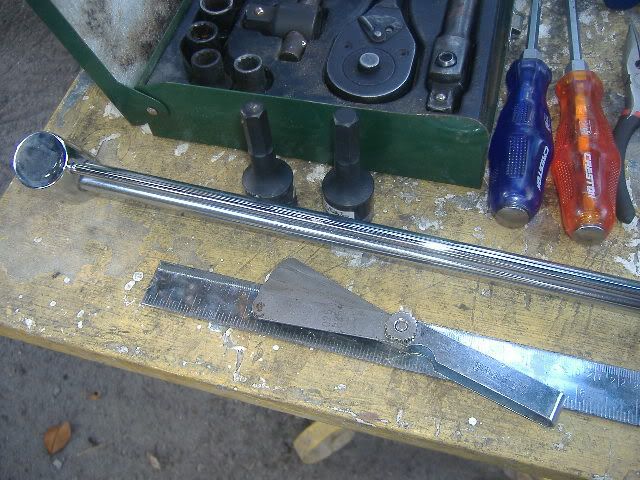 "]
"]
[URL="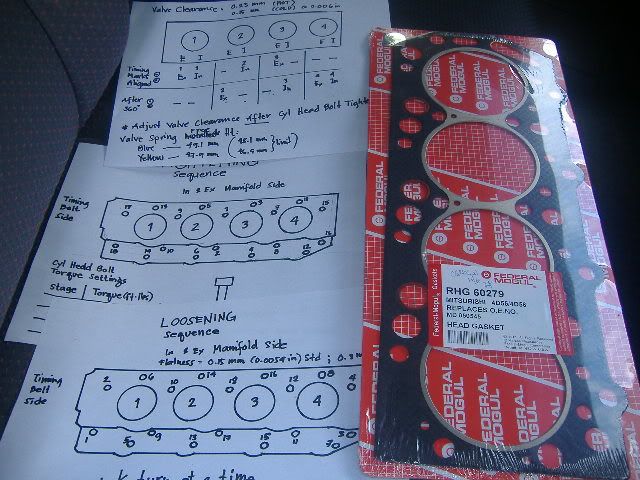 "]
"]
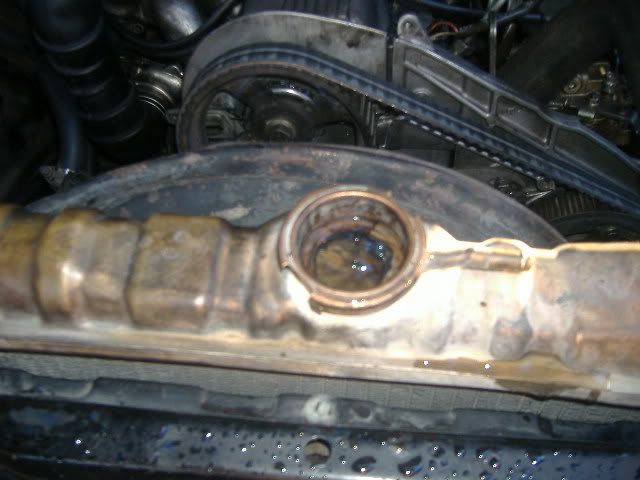
1. Remove upper timing cover, PS & Alt belts, PS pump & bracket, intake manifold, air cleaner, valve cover, lay aside exhaust and turbo assy, as well as the radiator to give you more room to maneuver
[URL="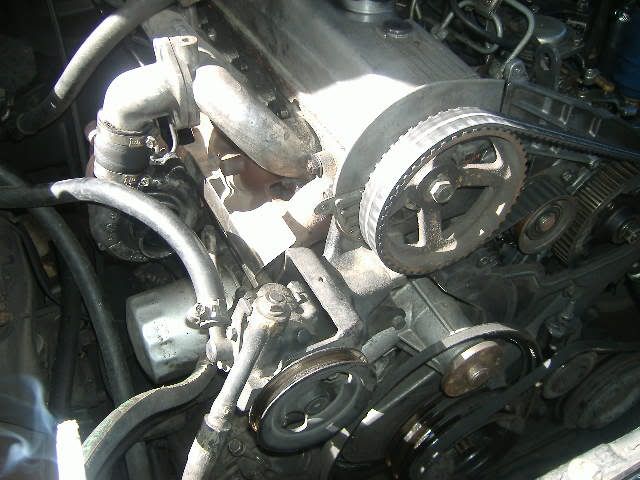 "]
"]
[URL=" "]
"]
[URL="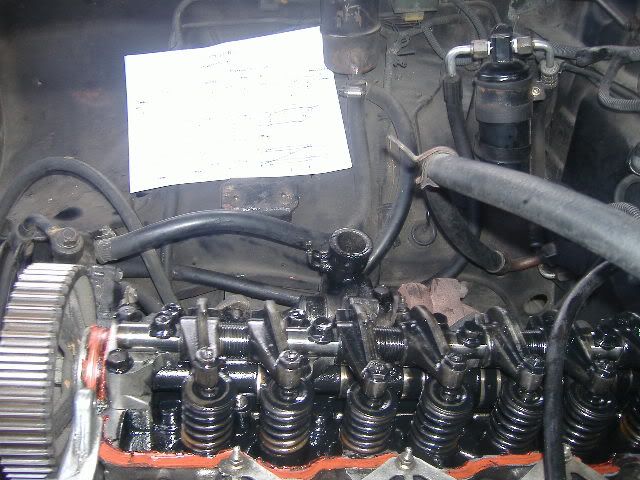 "]
"]
-
Tsikoteer
- Join Date
- May 2009
- Posts
- 1,990
February 18th, 2011 10:54 AM #4Remove injection pipe (dual wrench action) as well as fuel overflow, electrical grounds to cyl head (take note: disconnect battery negative first before any work is done)
[URL="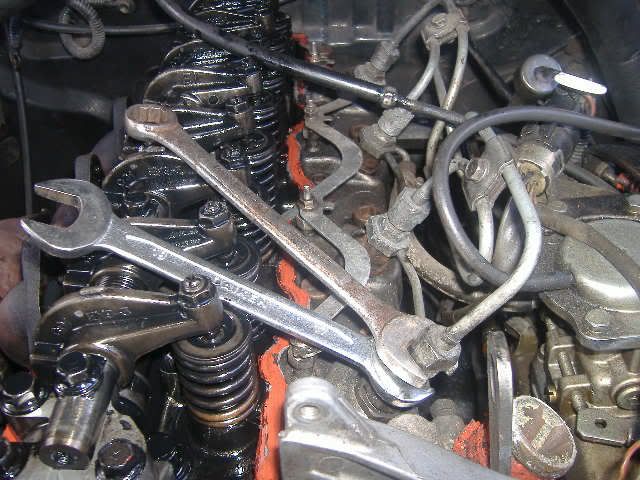
Cover all ports and openings. I used small plastic and tie wires.
[URL="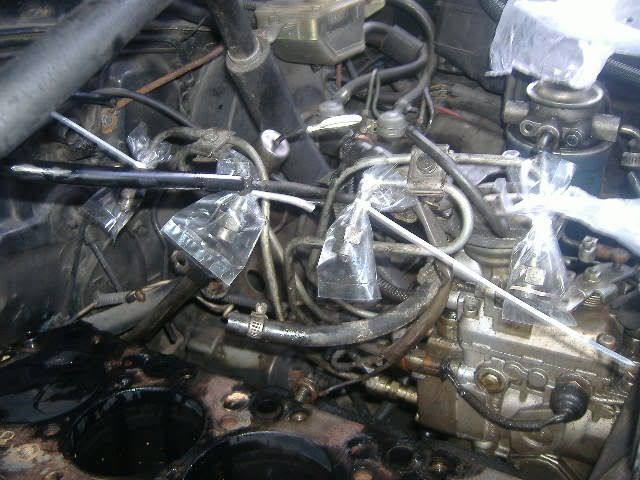
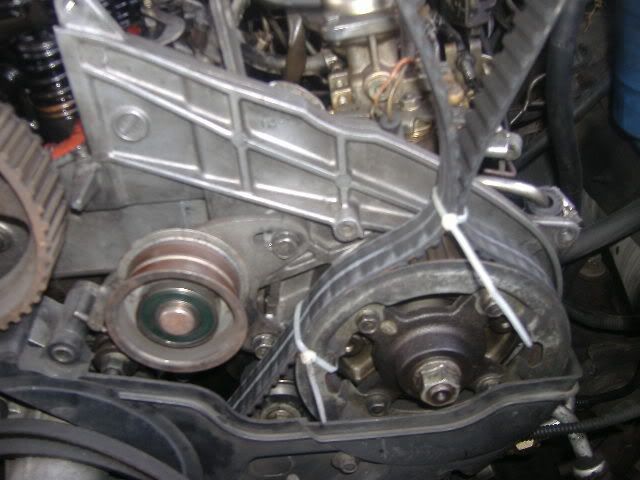
Next align timing marks via the crankshaft nut (19mm):
Camshaft
[URL="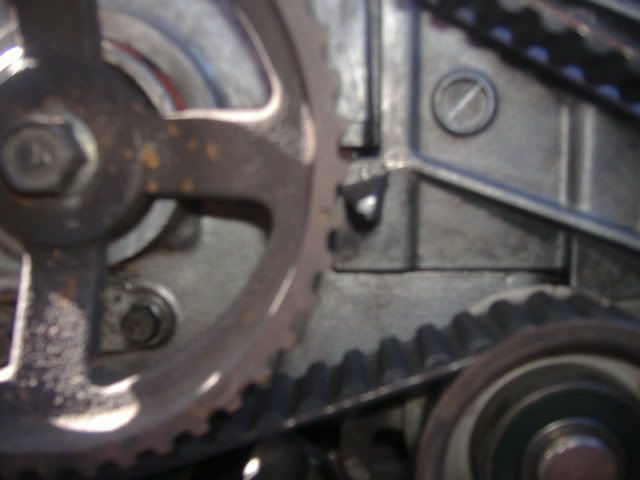
Crankshaft
[URL="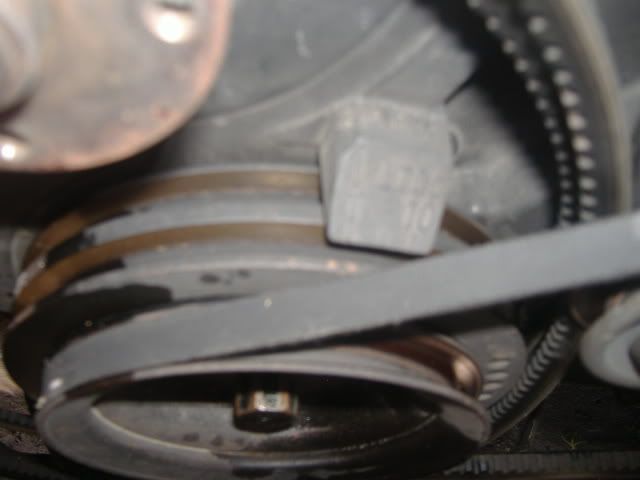
Injection Pump
[URL="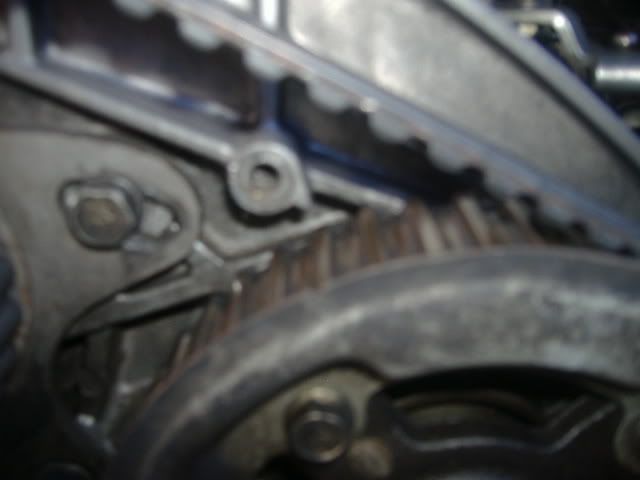
-
Tsikoteer
- Join Date
- May 2009
- Posts
- 1,990
February 18th, 2011 11:04 AM #5Cover timing belt to prevent contamination.
[URL="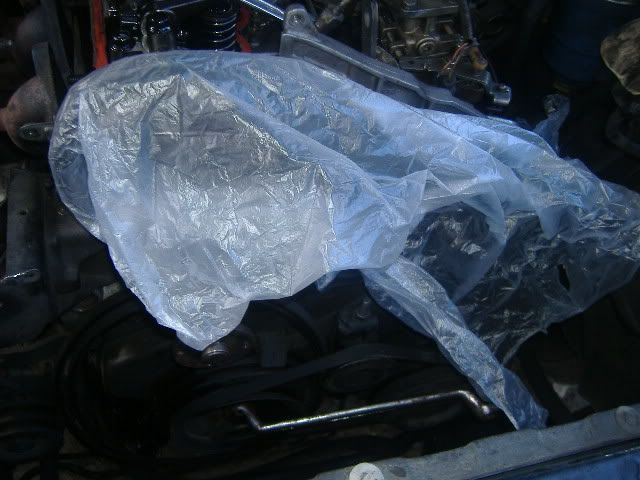
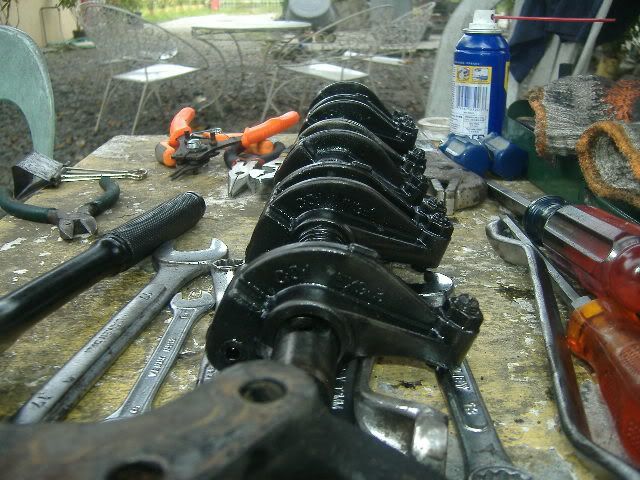
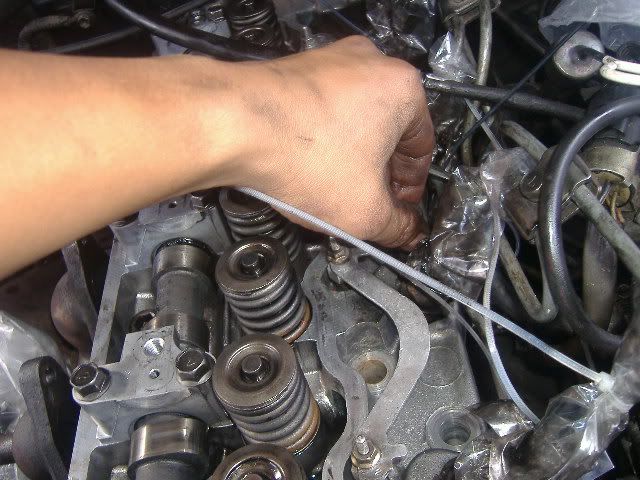
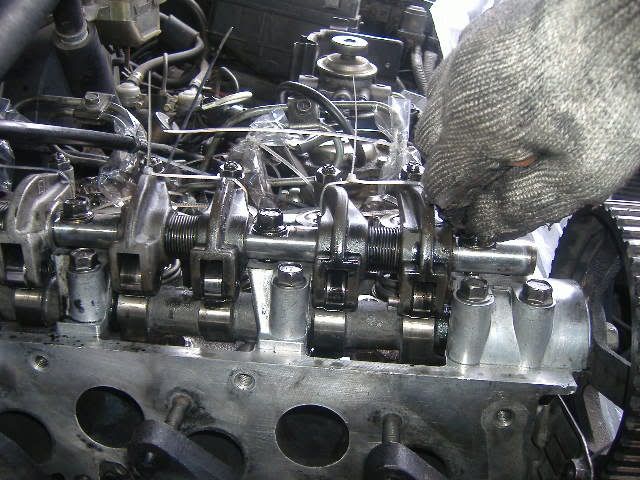
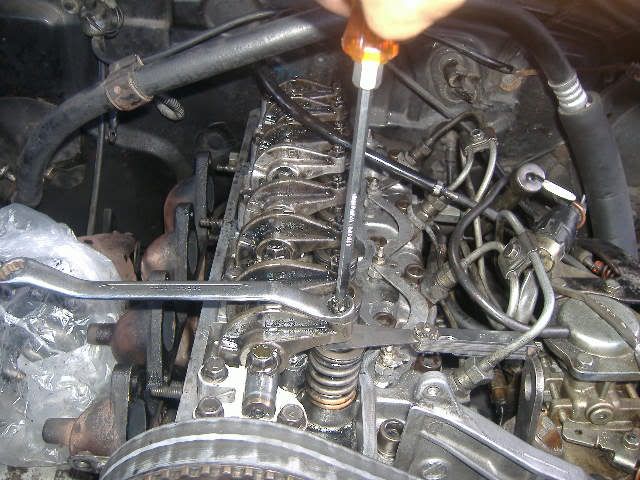
Remove rocker arm and shaft assy. don't lose the washers.
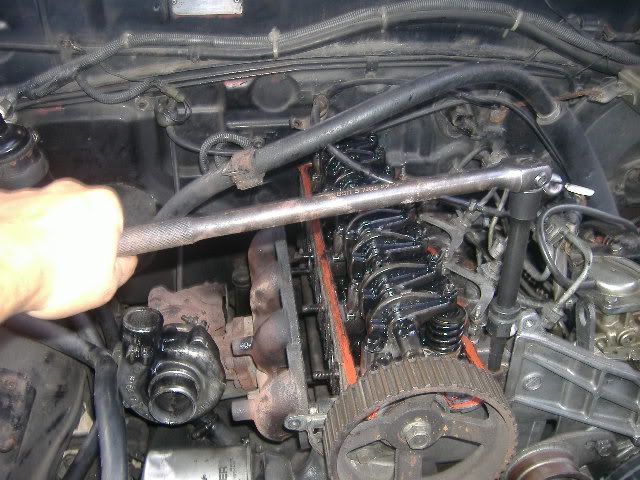
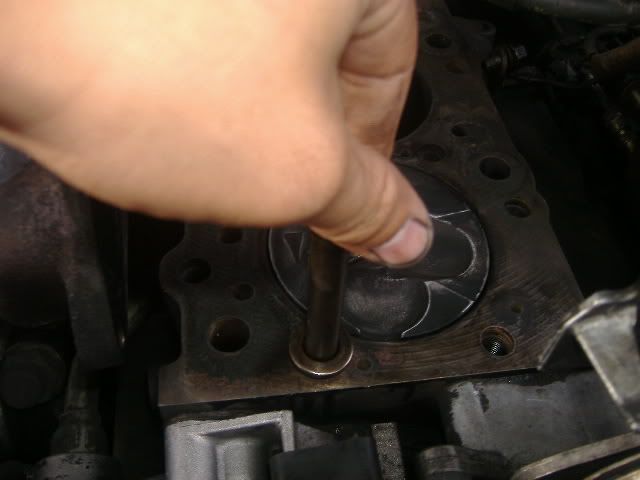
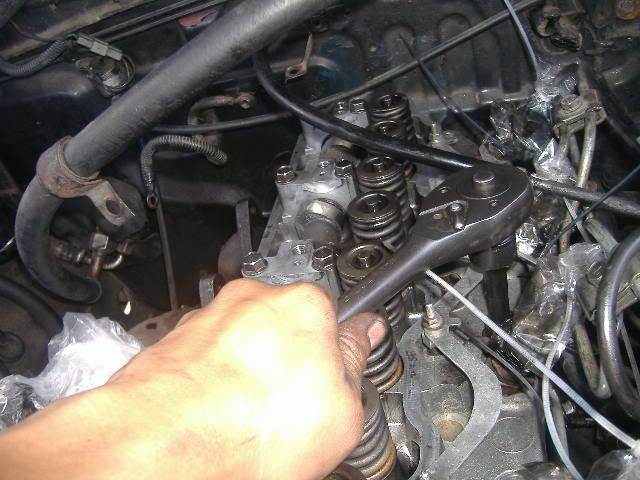
Now use the special tool plus the breaker arm/socket handle and extension
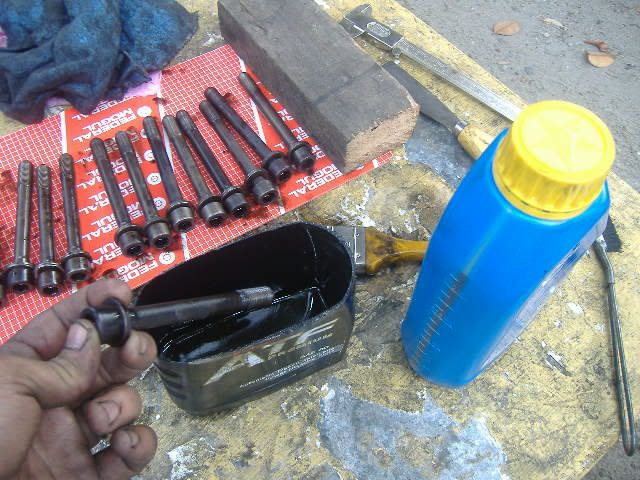
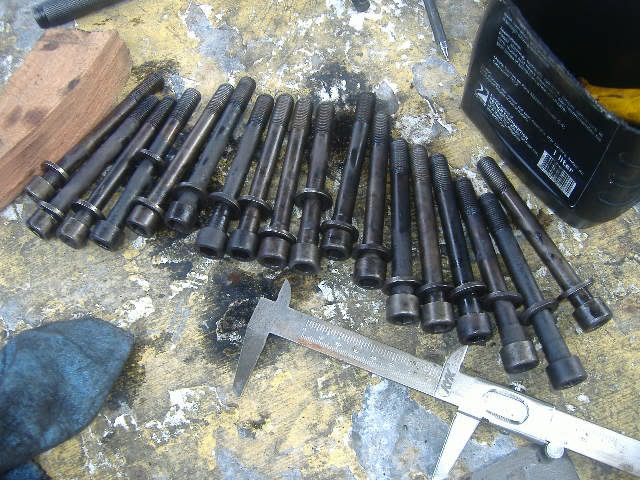
Following the removal guide, remove headbolts starting from the outer moving to the inner bolts alternately (usually moving in circles). Installation would be the reverse: from inner to outer bolts. My headbolts were unusually loose!!!
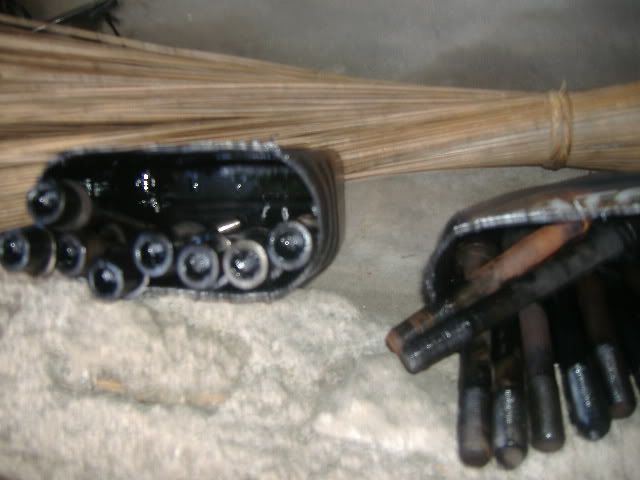
These are the headbolts...some were rusted. could be due to coolant.
-
Tsikoteer
- Join Date
- May 2009
- Posts
- 1,990
February 18th, 2011 11:33 AM #6With the timing belt removed and tied to the Injection Pump, Remove the cylinder head. Don't pry in between block and head. You may damage the sealing surface. What i did is to tap the sides evenly. then using the head casting at the front, tap the head up using a block of wood and hammer. some heads may be difficult to remove but with patience. You may see from the pic that i tapped on the sprocket but it's not.
[URL="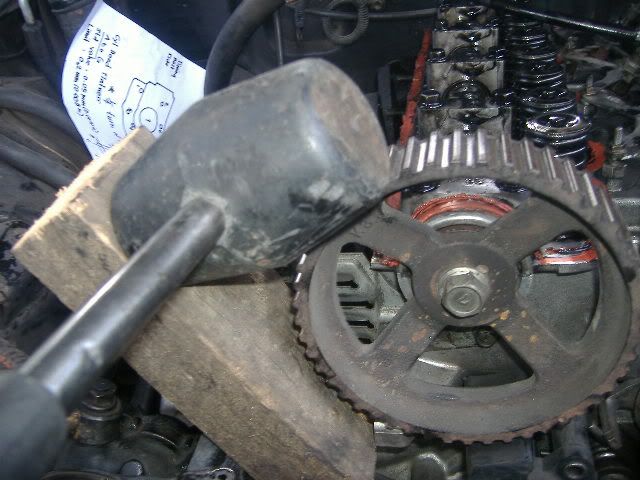 "]
"]
Lift the head vertically. Do not remove it sideways due to protruding headbolt holes at the front and rear. this is the head coated with lovely carbon.....
[URL="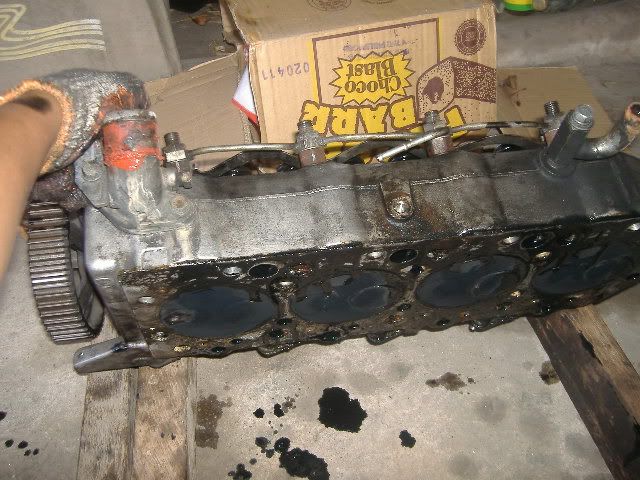 "]
"]
Mcguyver covers on the nozzles to prevent entry of "foreigners"
[URL="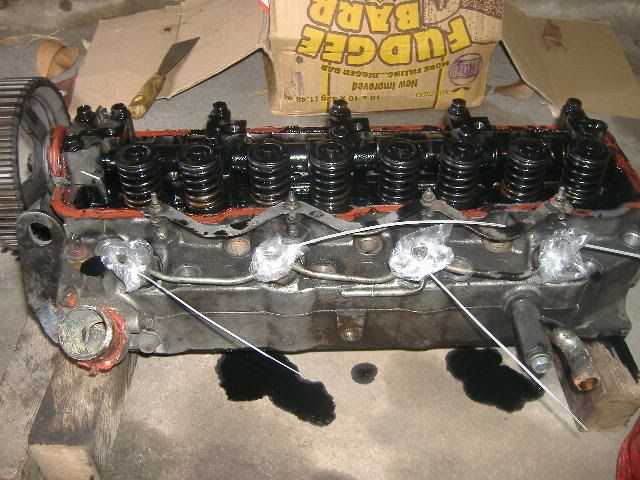 "]
"]
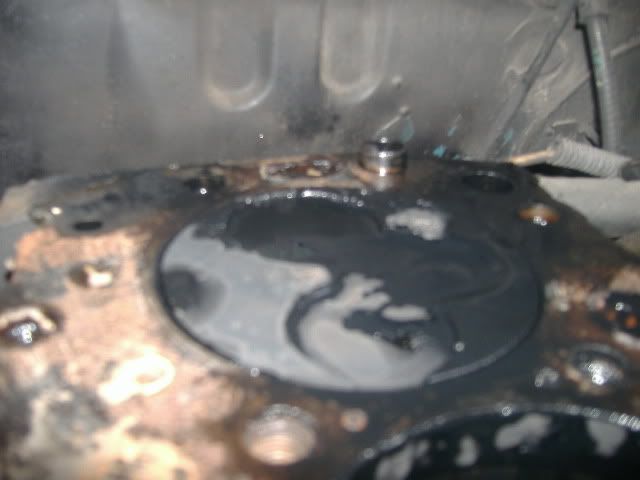
I used gasoline to clean the head as well as the block with the help of a gasket scraper... Now measure any warp on the head using the feeler gage. Standard value for this specific engine is 0.05mm while the limit is 0.2 mm...I also checked airtightness of the valves by pouring gasoline to every intake and exhaust ports. Cyl#4 Intake valve weeps a very little amount. Well, i didn't bother diassembling the valves to grind them....the reason? i don't have that much time and the special tool to do it...besides the machine shop is fully booked.
[URL="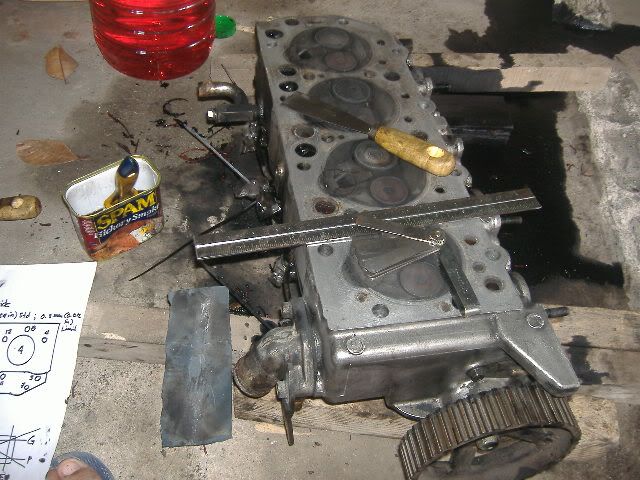 "]
"]
Plus, the head got cracks on the precombustion chamber inserts....these were seen before during the 2nd head gasket replacement done by my mechanic. I still didn't bother to change them.
[URL="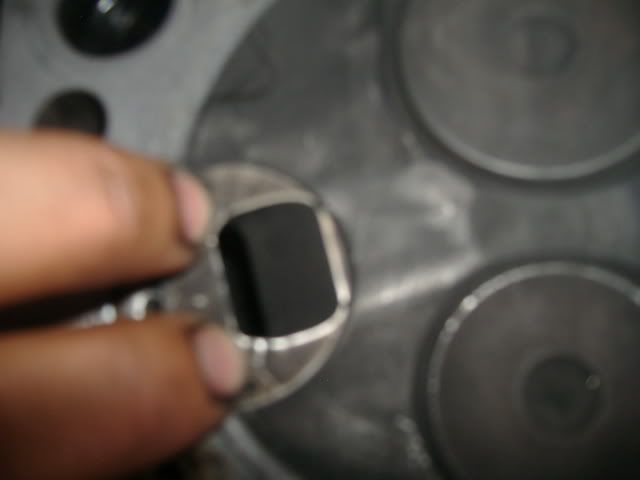
-
Tsikoteer
- Join Date
- May 2009
- Posts
- 1,990
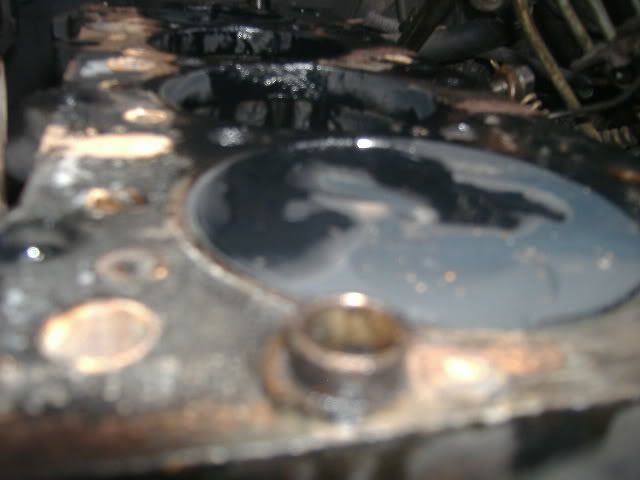
February 18th, 2011 11:41 AM #7This specific engine is 4D56B Turbo....which is a protruding valve...4D56A heads have valves flush with the head surface.
4D56B = early models 1993 and below (not sure) have 136.5 mm length valves
4D56A = late models 1993 and up, have 130 mm length valves
[URL="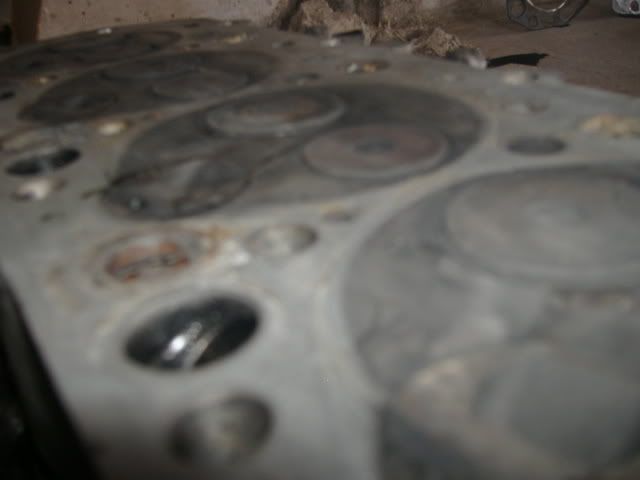 "]
"]
[URL="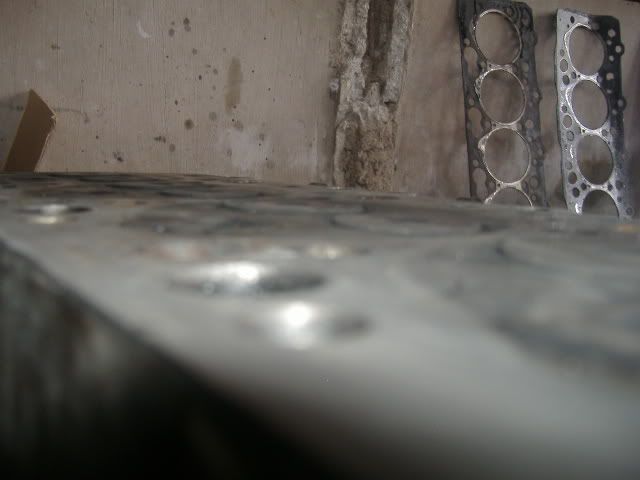 "]
"]
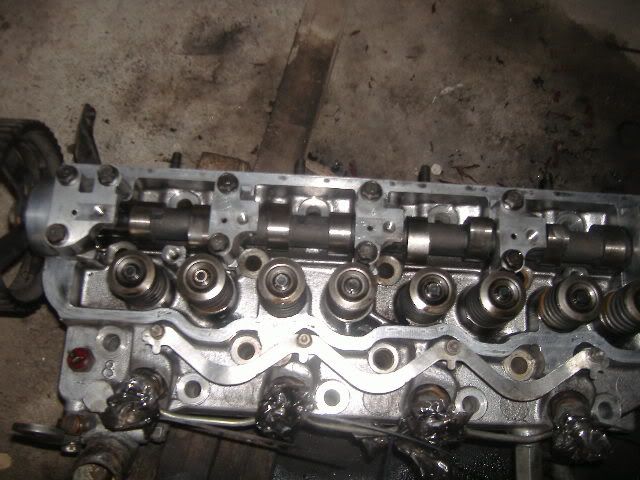
Rocker shaft assy and cyl head assy also cleaned out of debris
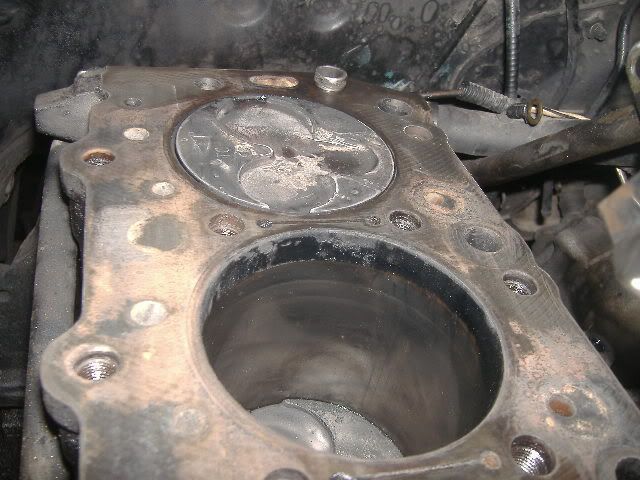
Spot the different head gasket! Alin, alin ang naiba?! middle gasket was coated with gasket shellac. 1st gasket change no shellac. this 3rd time around there will be no shellac. just the gasket.
-
Tsikoteer
- Join Date
- May 2009
- Posts
- 1,990
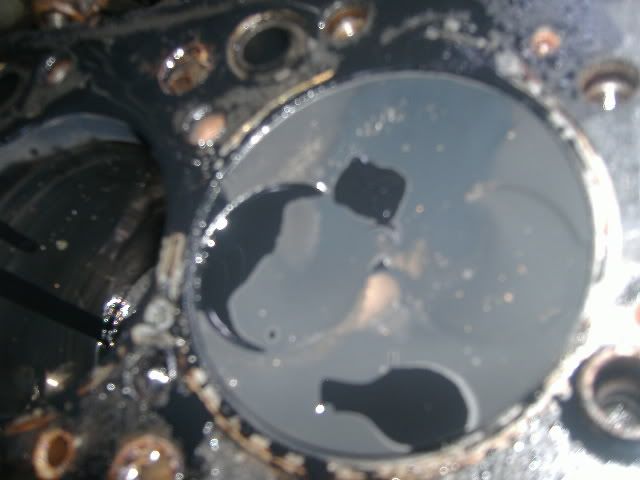
February 18th, 2011 11:52 AM #8The reason why you need to lift the head vertically not sideways....protruding headbolt hole in the rear....
and at the front
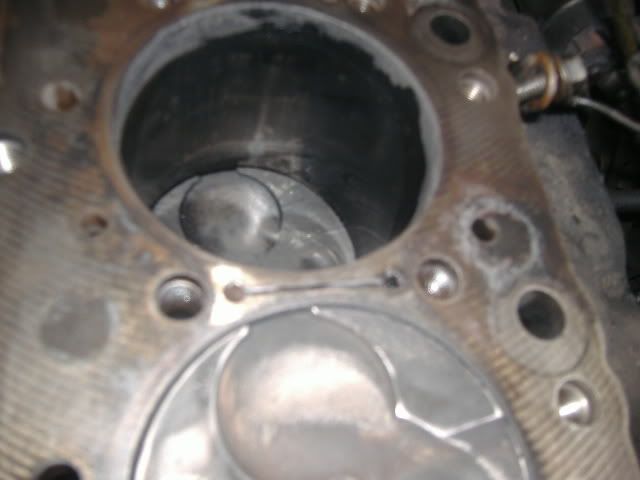
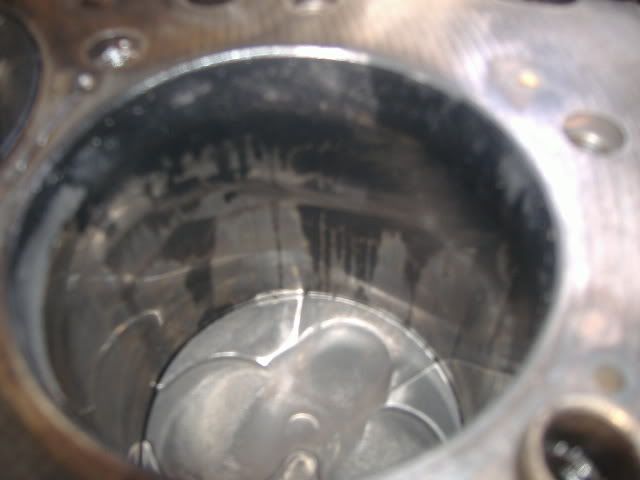
Dirty piston. See the piston surface pattern? pattern according to valve position. usually intake valves have larger "mushroom" diameter than exhaust valves for the primary reason of diluting any combustion gases left during the intake-exhaust overlapping of the valves
See the carbon on the top of the cylinder liner. this is where the top compression ring ends...These built-up carbon have the possibility of breaking the rings if excessive.
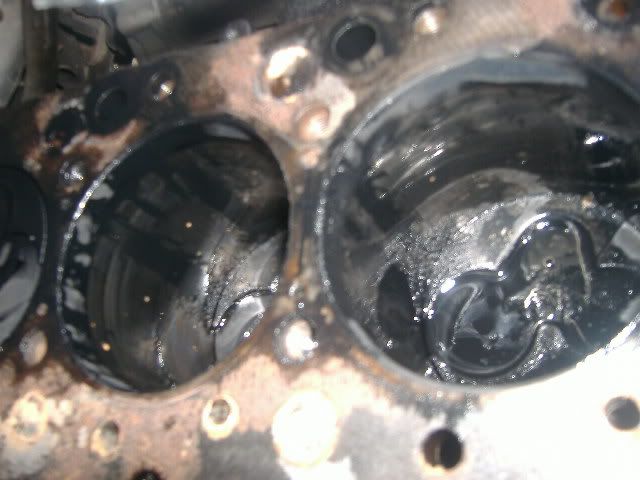
Block and pistons cleaned out of debris. TC and arrow marks on the piston indicates the timing belt side and a piston designed to higher pressures of supercharging.
-
Tsikoteer
- Join Date
- May 2009
- Posts
- 1,990
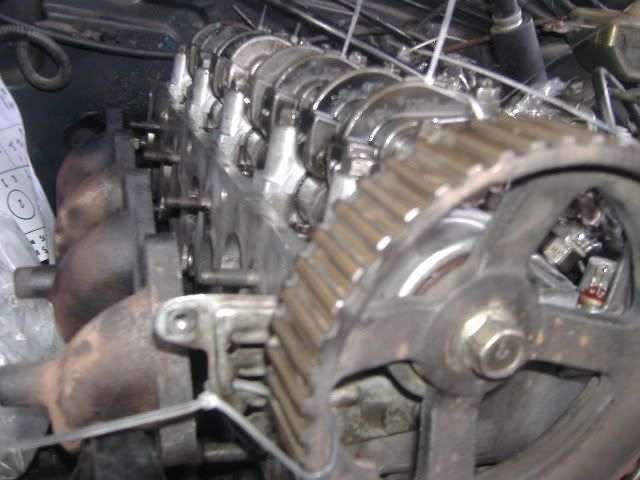
February 18th, 2011 12:13 PM #9Timing belt tied with tie wire to prevent rotation during the disassembly and cleaning.
My son got hold of the camera and took a down-to-earth shot.
Now Measure any presence of warp on the block. 0.05mm is the standard and 0.1mm is the limit. i got a measurement of in excess of the limit between the cyl# 3 and #4 on the manifold side...no refacing was done since the head gasket can fill the gap (with crossed fingers)...well, the engine is running fine for 3 months now.
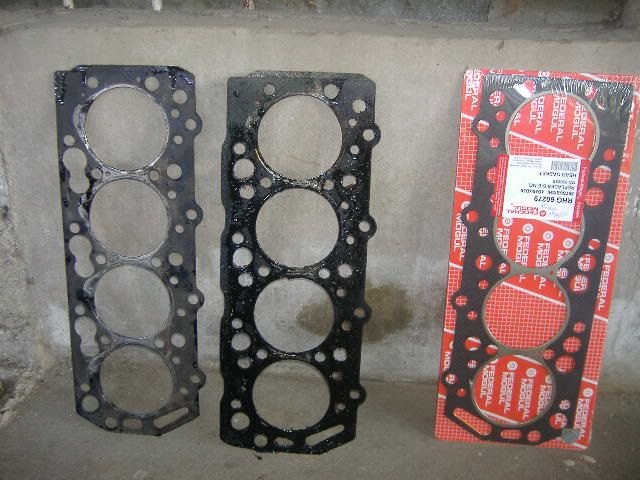
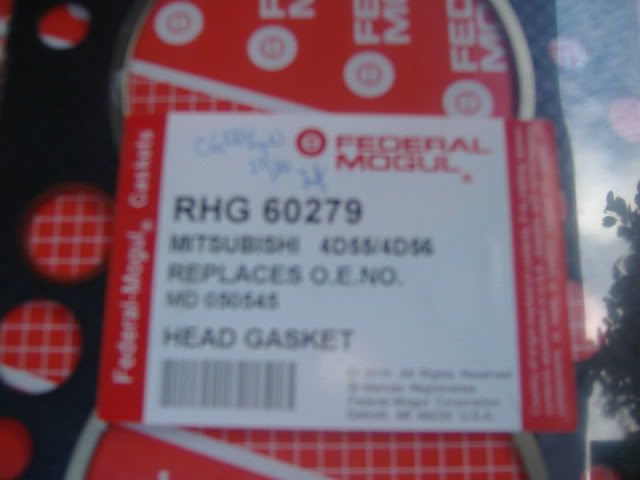
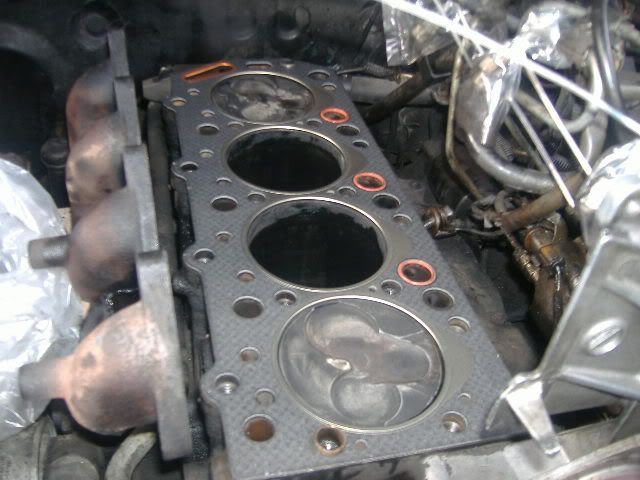
This is the head gasket (Federal mogul Part#60279 replaces MD050545) for 4D56 as well as 4D55...yes they have the same heads...if i'm not mistaken, 56s and 55s differ in the stroke length but with the same bore.
For the cleaning process, i used a hand pump with lots of numerous pumping for each hole. Take note: no Air compressor Used!
-
Tsikoteer
- Join Date
- Jan 2007
- Posts
- 409
-
Tsikoteer
- Join Date
- May 2009
- Posts
- 1,990
February 18th, 2011 12:30 PM #11PART 2:REASSEMBLY
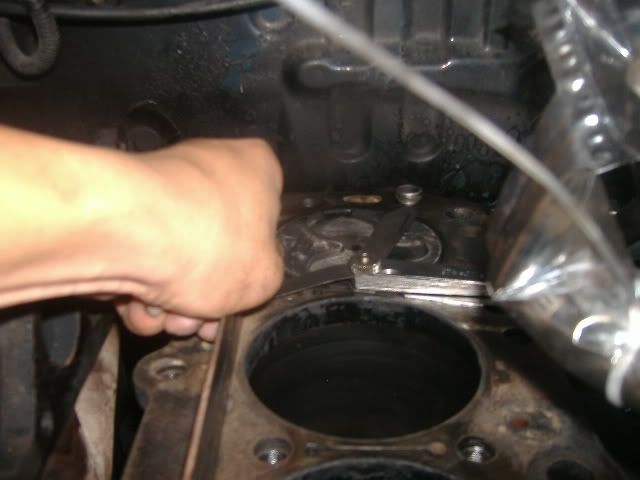
I cleaned out the bolt holes using the headbolts to bottom out any debris then pump air again many times and clean again and so on. cleaning the holes using a tap may widen the hole and the bolts can lose clamping force.
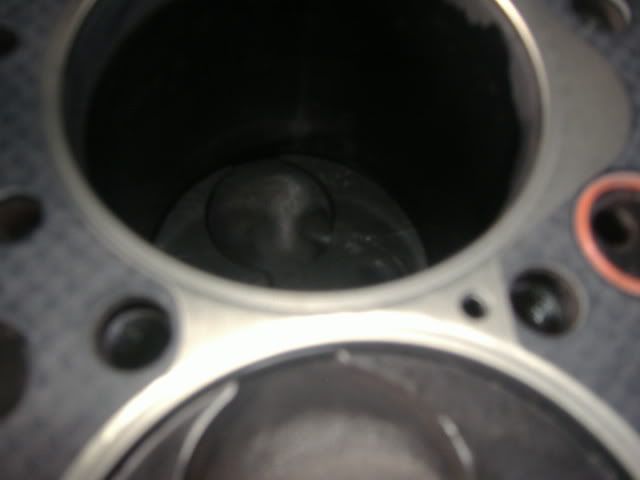
These are the water jackets in between cylinders. Now you have two holes. After Placing the gasket, now you have only one hole...all previous gaskets are also the same wrt the holes.
I decided to disconnect timing belt and check the oil ring. In just one revolution, some oil are left clingin on the liner walls. signs of oil ring wear.
Now install the head gasket and check the orientation of the holes... a quick guide is the long hole which should be located at the rear left when facing the engine....
-
Tsikoteer
- Join Date
- May 2009
- Posts
- 1,990
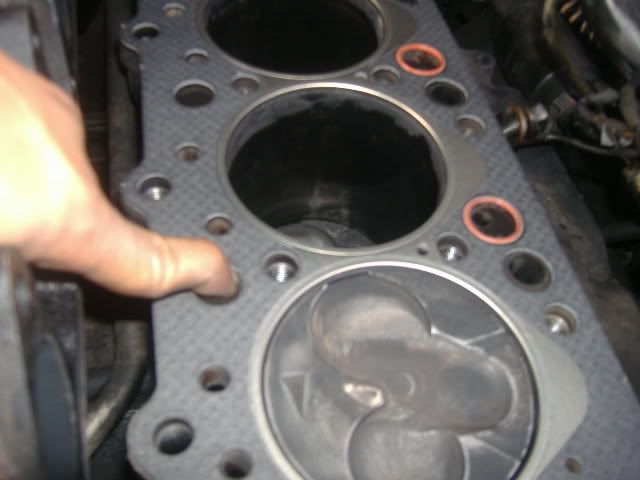
February 18th, 2011 12:40 PM #12Houston, we've got a problem!....no hole in block but gasket have one. i don't know why...is this a universal gasket?
Again, using the assy guide for the assembly process. Take note of the rough part of the headbolt washer. It must face the bottom of the head of the bolt to prevent it from turning loose
I dipped the threaded portion in SAE40 oil before install. the headbolt lengths were the same: 105mm (below the head down to the ends). Headbolt are waisted at the shank.
Finger tighten first
Then snug-tighten using a ratchet
-
Tsikoteer
- Join Date
- May 2009
- Posts
- 1,990
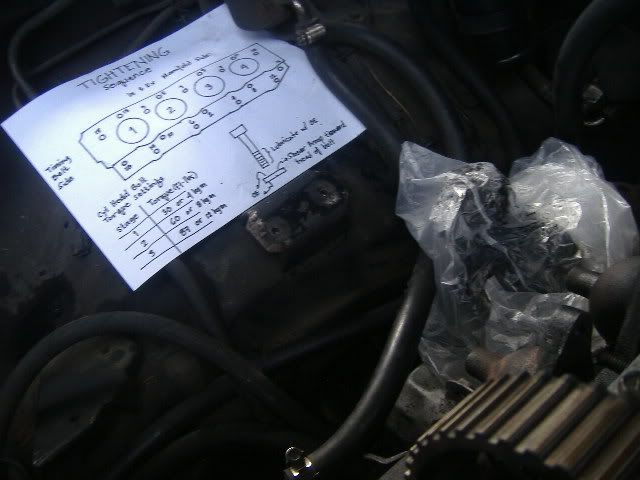
February 18th, 2011 12:53 PM #13This is the part where "Machete" would be of great help: Torquing the headbolts!
What I did (with special mention to fellow tsikoteer mechanics who provided me tips on torquing the bolts: jick and lexxus) was to divide the torquing to 3 stages. since the indicated torques are usually 80% of the yield strength of the bolts, the approx 87 lbsft torque was divided to 20 lbsft, then 40 and then 87. Actually I torqued to a little bit greater than 87. In between the 2nd and 3rd stages, I had a "yosi break" for about 10 minutes to settle the bolts and gaskets. I was hardup on 40, how much more on 87. Therefore i need a break. Also don't forget to apply new silicone sealant on the halfmoon on the rear of the head. It's a leak-prone area.
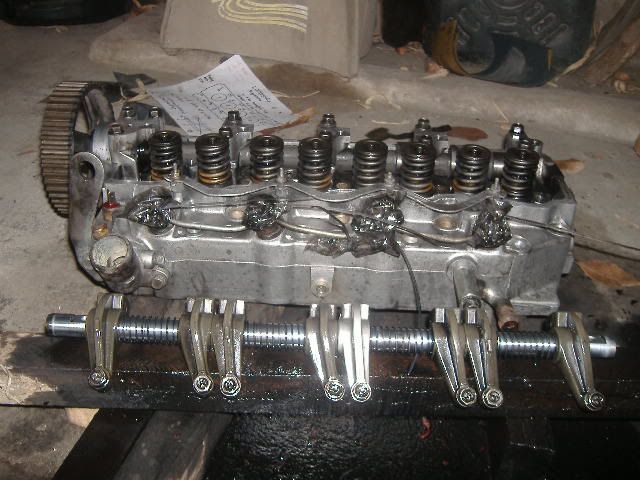
Now install rocker arm and shaft assy. finger-lickin tight and then ratchet-snug tight. Notice the fresh oil..it will help during the initial priming process before start-up of the engine. Take note also of the chamfer side of the washer. It must face down (the rocker shaft).
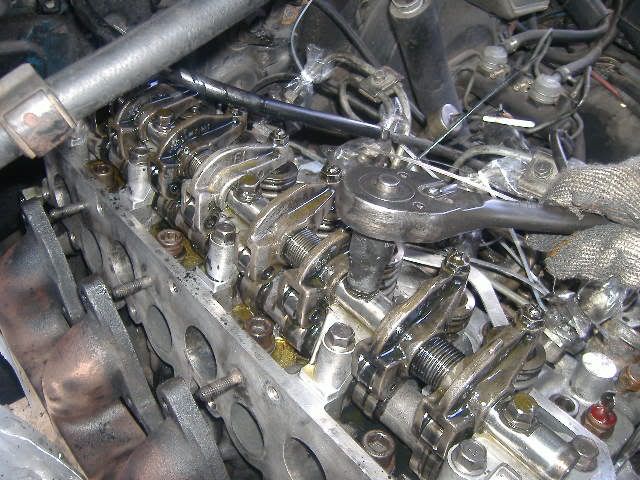
I used cable ties again to keep sprocket from moving...
-
Tsikoteer
- Join Date
- May 2009
- Posts
- 1,990
February 18th, 2011 01:03 PM #14I used again cable ties to keep the rocker arms from springing out of position.
Valve Clearance adjustment is recommended after the headbolt tightening...not before. 0.15mm on a cold mitsu 4d56. 0.25 when hot.
TIMING
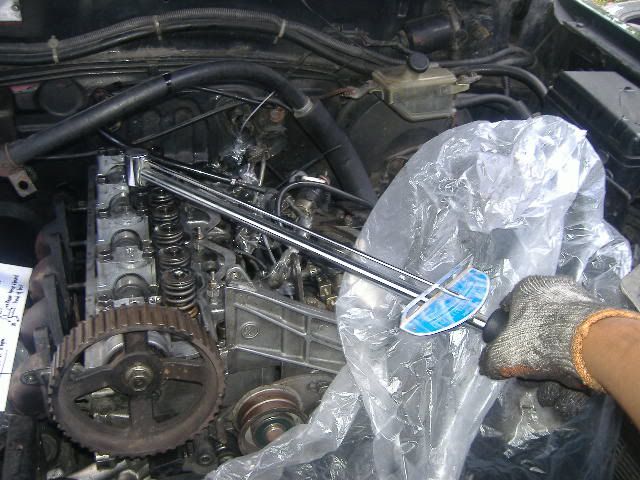
Install the belt "by-the-book"
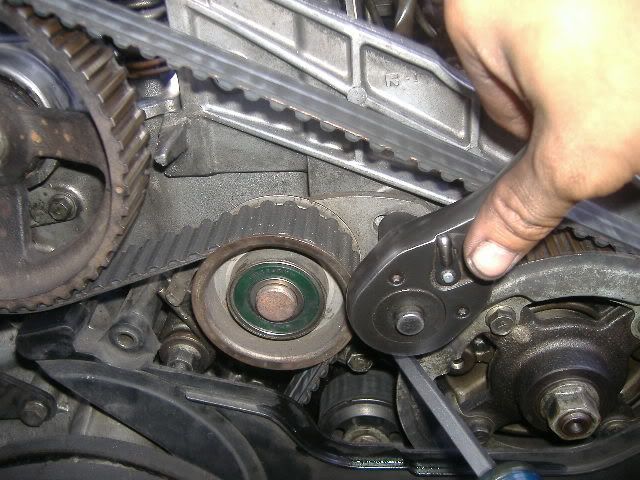
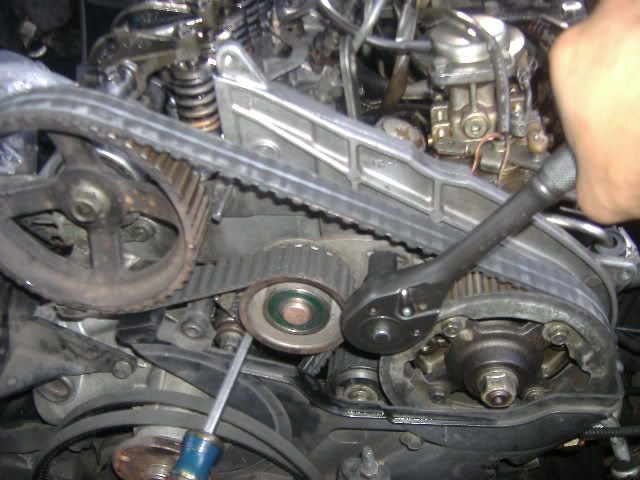
then check the timing. rotate by the crankshaft nut about 3 revolutions and check if timing marks align.
-
Tsikoteer
- Join Date
- May 2009
- Posts
- 1,990
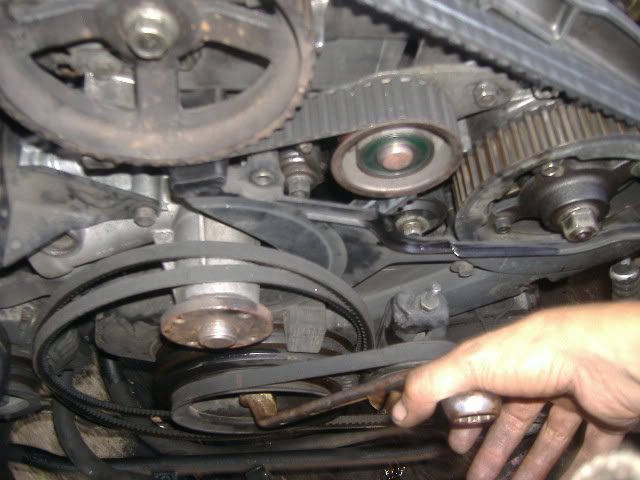
February 18th, 2011 01:14 PM #15Put back all engine ancillaries (manifolds, gaskets, PS pump, V-belts and so on)

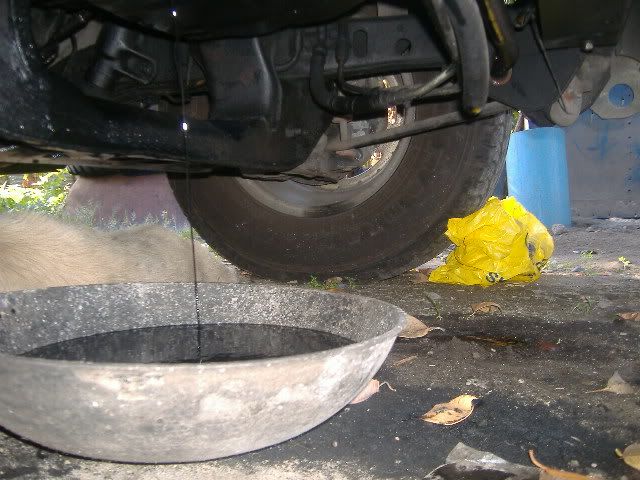
Refill water coolant
Change the oil
Prime the turbo with engine oil
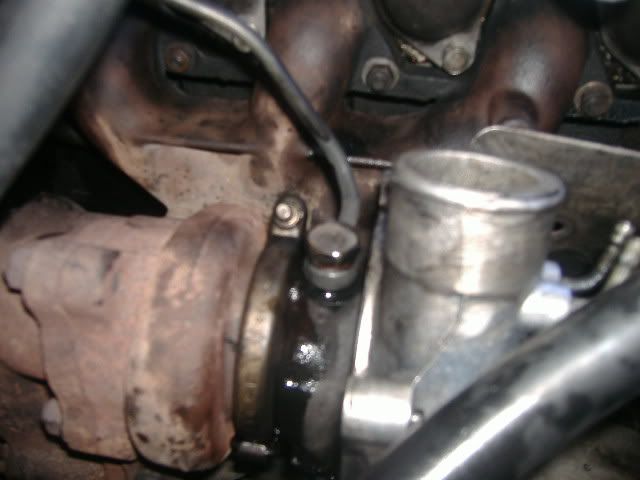
Also, don't forget to prime the injection pump down to the pipes before starting the engine.
Radiator had no bubbling after or any pressure build-up when still cold...
Whole job cost me 2 days...buti na lang mahabang weekend that time.
Gasket = PhP500
Engine oil = P670
Special hex socket tool = PhP 350
Torque wrench = borrowed
Experience = priceless
Pickup has been running fine for about 3 months now and already racking up 6,000 km after the Head Gasket replacement. I didn't even retightened and adjusted valve clearance up to now. Got no time for that yet.
Well, these are my methods. It can't be the perfect method since this was my first time to do this. I've been doing brake jobs, tune-ups, driveline and a little bit of suspension repairs for the past years. This was my first time to do engine minor surgery. anybody can also share theirs. It's a forum.
Hope this helps other tsikoteers on their future DIYs.
-
Verified Tsikot Member
- Join Date
- Jul 2009
- Posts
- 23
-
Tsikoteer
- Join Date
- Aug 2009
- Posts
- 349
-
Verified Tsikot Member
- Join Date
- Dec 2009
- Posts
- 242
-
Tsikoteer
- Join Date
- May 2009
- Posts
- 1,990
March 4th, 2011 04:28 PM #19sirs edtf, albert, red and samcoy: salamat
sir sam: you can do it also...this write-up will be your guiding light....amen.
-
 Tsikoteer
- Join Date
- Jul 2008
- Posts
- 351
March 4th, 2011 07:18 PM #20* miked... just in case you're near bulacan and in need of testers/tools (compression, transmission, cooling, leakdown, timing , pneumatic tools, impact driver, torque wrench (1/4 & 3/4dr) obd scanner, etc....) just let me know, im glad to lend it to you for your project. regards..

 Reply With Quote
