
Thank you ma'm madkatz for elaborating it to me...Originally Posted by madkatz
 *FasTrac: Haha this is going to be long but i'll see how far i can explain things and i'll explain the others after, i so need to go out right now to take my mind of things especially with what happened in my previous post.
Okay, lets start.
Basically there really are a lot of different kinds of pads.
Wool Pads no matter which kind, 4 ply wool, 2x twisted wool, No burn, and Foam wool are all used for serious paint correction. This is usually used with a Rotary polishe and with these kinds of pads its very easy to remove serious defects but its also easy to burn out or strike through the paint. But since its made for Rotary we won't get the much into this.
Then there's the Curved edge pads these are foam pads that have a curved edge very good for curvy cars and excellent for those with recessed curves. This pad is also mainly used for Rotary Polisher since only in using a Rotary would you be able to maximize its potential, if you use this on a DA then you would just end up like using its cheaper counter part the flat pads
Now under flat pads there's 3 kinds of pads that i know LC manufactures and these would be the one you would be looking for.
First there's the Flat pads, these pads are your standard generic pads and are the staple in most body shops. They are as it is described just a flat circular foam pad.
Second there the Flat pads with polish pockets, these pads are pretty much like the flat pads but have an inward curve in it, this helps in keeping the product you are using from slinging out when running at high speeds since its like enclosing the product in a foam cage. Using this pad could save you a little product but you have to prime it well to be able to use is properly.
Third is the CCS, these are a lot like the flat pads but its polish pockets are a lot smaller like the size of our 5 centavo coins distributed all throughout the pads they claim to save product but i have yet to notice if this really save products
Then there's also the kompressor pads, and kompressor pads also come in flat and curved edge shapes much like the ones i perviously describe the only difference is that with kompressor pads its like the pads are cut like very small rectangular cubes, the good thing about this is that in conforms to different surface and lessens heat build up, but the downside with the is that since its like cut into many many small rectangular cubes you actually end up using more products.
Okay, thats it for now, i'll continue my post regarding foam colors and regarding the compatibility with kp600 later, my BF is already downstairs and its time to enjoy the night. I'll try to continue late tonight.i want to know what kind of pad you are using right now on your detailing? and which color type provide the best results? And where can i buy them locally?
The Largest Car Forum in the Philippines
- Forums
- Discussions
- Events
- Community
Results 3,341 to 3,360 of 5910
-
 Verified Tsikot Member

- Join Date
- Feb 2010
- Posts
- 7
February 11th, 2010 11:52 AM #3341Thank you ma'm madkatz for elaborating it to me... Originally Posted by madkatz
i want to know what kind of pad you are using right now on your detailing? and which color type provide the best results? And where can i buy them locally?
-
Verified Tsikot Member
- Join Date
- Feb 2010
- Posts
- 7
February 11th, 2010 12:08 PM #3342Ganyan naman talaga mga yan...tayo pa dapat ang magpasensya at umintindi sa kanila tsk tsk.. Originally Posted by mau2485
 sabihin ng meron nga sila naitutulong sa komunidad pero kalimitan naman puro sakit ng ulo dala ng mga yan sa lansangan
-
Tsikoteer
- Join Date
- Aug 2009
- Posts
- 1,553
February 12th, 2010 12:20 AM #3343*mau and FasTrac: anyways i just hope karma gets them, and if its within the original context of karma i hope either they get it 3x worse in the life or the next life. Im gonna try to buff out the scratches VIA rotary polisher and hopefully make them a lot less visible while waiting for the insurance paper works to finish.
-
Tsikoteer
- Join Date
- Aug 2009
- Posts
- 1,553
February 12th, 2010 01:15 AM #3344*FasTrac: Continuation...
Lake Country Manufactures 8 different colored pads and 9 if you will count in the hybrid purple foam wool pad.
While Wool pads are mainly used for heavy oxidation, moderate scratch removal and wet sanding marks, Foam pads are significantly lighter in terms of cut.
Pads in order of aggressiveness.
Yellow Pad - this is used for removing buffer swirls caused by the wool pad, this can also be used for moderate to light compounding which basically also tackles heavy swirl marks, moderate oxidation, and etchings. This is the most aggressive among the 8 foam pads. This is also called a cutting pad since it can level paint surfaces easily once used with compounds and heavy polishes.
Orange Pad - this is the light cutting pad, this pad can remove moderate to light swirls very easily, it can also remove minor oxidation and light scratches. this is a very popular product among the 8 pads because it can tackle serious paint defects just by repeating the procedure over and over again, and since it does not have enough cut into it, you can polish out paints with a lot less to worry about
Green Pad - this is a cross between the Orange and the White pad, this product is very versatile in the sense that it is like a softer version of the orange pad so it can tackle some problems that the orange pad can at the same time you can already use this pad with medium to light polishes. This would be great for tackling light swirls, very light oxidation and micro marring.
White Pad - this is the polishing pad, this is great for adding some gloss to the paint, removing light swirls and very light scratches, its also good for micro marring. With this pad it is advisable to use only medium to light polishes, this pad has very little cut, but in the wrong hands can still strike through or burn out paint especially those on the edges so be careful with all the pads listed above especially on corners. The White pad is a staple in the polishing step before LC introduced the 3 new pads, the white pad can really improve a paints finish and to some people the finish you get would already be enough to pass their standards. This pad once used properly will leave you a swirl free finish. This pad is also great for removing very light hazes and is great in getting that last few touches to dulled paint.
Black Pad - this pad is originally made to applying waxes and sealants, this pad, once used to apply waxes and sealants has no cut so it is safe for paint, but once used with light polishes it could still give that little extra cut. This pad is generally used for applying waxes and sealants but i also use this pad and achieve great results when applying light and fine polishes, this pad when used with fine polishes adds that added gloss that the white pad cannot, its like refining the polishing stage even more, this can be used to remove very very light scratches, mirco marring and fine hazing the ones that can only be seen with the help of good lighting. You can also use this to apply glazes since it has nearly zero cut, glazes can be used to fill in and hide those minute microscopic paint defects.
Blue and Red pads - this to me are the same actually, this is ideal for jeweling or burnishing the paint to the most gloss it can achieve. You use this pad much like the black pad with fine polishes but with the red and blue you use use ultra fine polishes so you end up with the most perfect paint you can get, its like the last 5% to that perfect shine. This is best used for getting that extra one more notch of gloss and shine that would set you apart even from show car standards.
Gold pads - this is their softest pad and is only used for applying waxes and sealants.
-
Tsikoteer
- Join Date
- Aug 2009
- Posts
- 1,553
February 12th, 2010 01:48 AM #3345*FasTrac: Continuation...
Meguiars also produces foam pads but so far i have only tried 5 of them...
Cut N Shine wool pad - this is basically Megs standard for serious to moderate paint removal, once done properly you could actually end up with very few and very light compounding scratches with this wool pad, i'm very happy with their wool pad since it can really good fast but it doesn't leave that much defects to remove after which is like a dream when compared to using 3m and LC
LC counterpart - all wool pads
Soft Buff Burgundy pad - this is their cutting pad and this is good for using heavy to medium polishes, this works great on finishing up your paint after using the wool pad, it removes moderate swirl marks and light scratches. This can also be used for moderate oxidation and in short all other moderate defects on the paint. This pad usually leaves you a very nice finish already.
LC counterpart - yellow and orange cutting pad
Soft Buff Yellow pad - this pad is ideal for using light and fine polishes to further improve the gloss of the paint. this pad can remove very fine swirls and scratches as well as hazing and very fine micro marring.
LC counterpart - White pad
Soft Buff V2.0 Black pad - this pad is quite a versatile pad, its basically pretty much like the beige pad but is better than the beige pad in terms of jeweling and burnishing the paint to a high gloss
LC Counterpart - Black pad
Soft Buff beige pad - this is their finishing pad, this can be used for ultra fine finishing polishes in jeweling and burnishing the paint as well as applying sealants and waxes, this in some cases can also be used to remove LSP's
LC counterpart - Red and Blue padLast edited by madkatz; February 12th, 2010 at 01:50 AM.
-
Tsikoteer
- Join Date
- Aug 2009
- Posts
- 1,553
February 12th, 2010 02:19 AM #3346*FasTrac: Firstly i would have to warn you regarding handling a rotary polisher, this is not like a DA or a ROP polisher that is pretty much noob friendly since its does not induce swirls and it would take a long time to burn or strike through paint. The rotary polisher is a totally different animal, at first i though that after seeing video's of how to do it how can it be that hard? So i grabbed some paint panels from some body shops in banawe for a few hundred to about 1k pesos and practiced on them, and they are not joking when they say that it is very easy to strike through, so after practicing on some panels and learning the steep learning curve i was still not producing great results so i ended up taking the Megs and Mothers Seminar before i could start to get great results. A rotary polisher can be safe once you follow the guidelines and when you use light foam pads with light polishes but its a different story when using wool and cutting pads and compounds
Its a good thing that you have that polisher since thats also my first polisher, but in my case when i bought mine i already bought it as a package with an included 7" backing plate for 8 inch pads and an extra wool pad so that makes it 2. Outside this package sells for 4.5k to 5k but since we personally know the seller we got it for a little less but the thing is i don't know if he's selling the backing plate separately. If you want his number send me a PM and i'll give you his contact.
The wp1300 is actually a good buffer since it has the power to do serious paint correction but one thing to take note of, is that you cannot put too much pressure on the polisher since it tends to bog down unlike its Makita counterpart. Another thing that i noticed is that when it bogs down you have to release the trigger and start slow again so it definitely takes time to learn how to make it rotate well under different circumstances. Its also a bit heavy so i ended up buying a Makita since its definitely lighter and with the Makita i don't have to put on earphones.
Im saying those things just to give you some heads up without any intention to deter you.
Now with that said these are the things that you would need:
1. Backing plate - you can't attach any pads without this one. The sad thing about this is that this machine does not accept the standard backing pads available in the market so you either have to have one machined for you or find an adapter.
2. Lighting - you need proper lighting to be able to see whether the correction has been done, halogen and fluorescent lights are good for the average joe but if want to take it further, mercury and sodium bulbs are also great in showing up scratches and swirls.
3. Pads - the pads you will be needing would depend on the severity of the defects that you want to correct. It is always nice to start with the least aggressive pads as i've mentioned earlier its nice to get soft pads to for LC it would be white and black for starters and with Megs that would be Yellow and Beige. Once you are capable of getting good results and you might want to venture into more aggressive pads and polishes
4. Polishes and compounds - these are equally important as the pads, and these would also depend on your goals, Megs and Mothers have great polishes that are available locally. Megs 84 for compounding and heavy oxidation, Megs 83 for medium polishing and removing moderate scratches and swirls, sadly this is their lightest polish and this is even considered a medium polish and the Megs light, fine and ultra fine polishes are not available locally. As for Mothers they have a HD compound thats good for compounding, this is actually heavy duty and is considered very aggressive. Then there's Mother Power polish, this is a very versatile product but is very pad dependent, it could be a medium polish with a cutting pad, a light polish with a light cutting pad and a fine polish when used with a finishing pad.
5. Quick Detail Spray - you use this for priming the pad and for removing compound and polish residue's
6. Lots of MF towels - you need to remove polishes every after correction you do or after every polishing you do so alot around 3 for one vehicle this is for one step only.
7. Toothbrush - this is used to clean foam pads
8. Pad Spur - this is used to clean wool pads, if you're not going with wool you don't have to buy this
9. Spray bottle with high concentration of shampoo - you use this to treat those parts of you foam pad that are dirty while working the toothbrush
10. Spray bottle with water - used to rinse off the soap solution.
11. Masking tape - to tape of those non painted parts of the car, getting polishes stuck on non paint surfaces can really be a real pain to remove.
-
Tsikoteer
- Join Date
- Aug 2009
- Posts
- 1,553
February 12th, 2010 02:58 AM #3347*FasTrac: As for which pads i use. I actually have a lot of pads which i use where most of them are not available locally like the LC kompressor and CCS pads, LC red blue and gold, Megs black, and all of Edge and Cobra pads.
But when it comes to detailing our daily drives and our friends cars where i don't want to use my premium pads. LC Yellow, Orange, Green, White, Black are good pads and they are available locally not all models though. Megs also has the Wool, Burgundy, Yellow and Beige available locally. And thats the reason why i never bothered explaining about the others since they i got them imported, but if you are considering importing them especially if you know someone coming over from the US and even if you are ordering it online you could still consider if to be a bit cheaper as compared to getting them locally. ( anyone knows someone coming over? im in need of some detailing materials from AG hehehe )
Also with these 5 LC pads or 4 Megs pads, you can already tackle a wide variety of defects and even tackle some of the serious ones
3m also produces great quality foam pads but when i got mine the distributor sells it per pack which is in sets of 2's. Their foam pads are pretty much straight to the point since they only have 3 so far i know available locally, compounding, polishing and finishing pads ( this one is special order from 3m Phil.)
If your goal is to just enhance the gloss of the paint a little and remove some very minor and light swirl marks you could stick with
Megs Yellow and Beige + Megs 83 Dual action cleaner polish
or
LC White and Black + Mother Power polish
or
3m finishing pad ( too bad its special order basis i had to find enough people to share 1 box ) + 3m Perfect It Ultra Fine Polish
If you are planning on tackling moderate to light swirls you have to go as far as
Megs Burgundy + Megs 83 Dual Action Cleaner Polish
or
LC Orange or Green pads + Power polish
or
3m Polishing pad + 3m Perfect It Machine Polish
If you are planning on tackling heavy swirls and heavy oxidation and blemishes then you have to go as far as
Megs Cut n Shine + Megs 84 Compound power cleaner
or
LC Wool or Yellow pad + Mothers Rubbing compound
or
3m Compounding pad + 3m Perfect It Rubbing Compound
although you could alternate the polishes and pads by using Megs pad and Moms polish and vice versa it is best to stick with one brand
If you are just starting i would recommend you go with Megs only because they have 32 ounce size polishes ranging from 800 to 1100 pesos whereas with mothers you have to buy their rubbing compound by the gallon, although the power polish is sold at 16 ounce bottles for 700+. The 3m pads are actually the cheapest in terms of value too bad you buy it in 2's but their polish is the most expensive among the 3 at around 1.4k per quart, but i guess that because these are the polishes used by Toyota, Honda, and the majority of the car dealers, they are also a main staple in most body shops.
You can Reach
Mothers and Lake Country Distributor
Somewhere near Santolan along ortigas, very near greenhills
02-744-5875
Megs
Kamias around 1 to 2k km from edsa
02-436-8360
02-436-8361
3m Phil
Somewhere in Makati
[SIZE=-1]02-813-3781 to 95
With this one you have to ask for your nearest distributor or ask for the local Sales Representative since they don't do direct selling they only refer you to a distributor.
If you are planning on sticking to one product, i might be able to help you lower the cost a little, just send me a pm
Hope this helps
[/SIZE]
-
Tsikoteer
- Join Date
- Aug 2009
- Posts
- 1,553
February 12th, 2010 06:50 AM #3348*FasTrac:
here are some links that have helped me in getting information regarding rotary polishing when i was just starting, just so you if really want to try rotary polishing and haven't gone through training these links might help you avoid the most common mistakes
Different Polish Aggressiveness
http://www.auto-geek.net/charts/wax-...art-master.htm
http://meguiarsonline.com/forums/showthread.php?t=28407
(thanks to Jonjon_u for the link above)
LC Pads aggressiveness and purpose
http://www.auto-geek.net/charts/buff...d-chart-lc.htm
http://www.lakecountrymfg.com/applicationguide/
you could just download the application guide
although i don't agree with gold for jeweling since its too soft and takes a long time to break down.
Different kinds of pads available although most have to be imported
[ame="http://www.youtube.com/watch?v=3by1elw5AXE&feature=player_embedded"]YouTube- Buffing Pads, Backing Plates and Accessories[/ame]
Very helpful video's that show proper handling and rotary polishing and more from Meguiars Mike Pennington, very funny guy
5 video's all in all
[ame="http://www.youtube.com/watch?v=6f8EQNVxxbw&feature=related"]YouTube- Wetsanding part 1 of 5[/ame]
[ame="http://www.youtube.com/watch?v=38L3UQxXuQA&feature=related"]YouTube- Wetsanding part 2 of 5[/ame]
[ame="http://www.youtube.com/watch?v=zwEyZw-qLPk&feature=related"]YouTube- Wetsanding part 3 of 5[/ame]
[ame="http://www.youtube.com/watch?v=hJPIwCgJwPw&feature=related"]YouTube- Wetsanding part 4 of 5[/ame]
[ame="http://www.youtube.com/watch?v=IfVhG-j3CGQ&feature=related"]YouTube- Wetsanding part 5 of 5[/ame]
3 part video from Meguiars also featuring Rod kraft
[ame="http://www.youtube.com/watch?v=K9jR_PEmD9E"]YouTube- Meguiar's Detailing Tips - Part 1[/ame]
[ame="http://www.youtube.com/watch?v=H6sT7fyKASA"]YouTube- Meguiar's Detailing Tips - Part 2[/ame]
[ame="http://www.youtube.com/watch?v=GPIfR-0gdz0&feature=PlayList&p=0BF8C2A55A9AE916&playnext =1&playnext_from=PL&index=28"]YouTube- Meguiar's Detailing Tips - Part 3[/ame]
Other video's
[ame="http://www.youtube.com/watch?v=j47nsVb_sXI"]YouTube- Paint Correction with a Rotary Buffer Part 1 of 2[/ame]
[ame="http://www.youtube.com/watch?v=ODsgX-9vwCA&feature=channel"]YouTube- Paint Correction with a Rotary Buffer Part 2 of 2[/ame]
But like what Mike Pennington said, in no way that after you see the video or use a rotary for the first time does it make you learn how to do it, I would highly recommend you try using the polisher on old paint panels, you could these from body shops and once you get results then maybe you could try it on an old car, thats what i did i had my friends old cars brought over and used that when i was getting better results, But don't get me wrong im not discouraging you, getting the initiative to learn is nice and once you learn it thoroughly you would start getting fantastic results
Hope this helps everyone thats interested in learning how to polish via Rotary polisherLast edited by madkatz; February 12th, 2010 at 06:53 AM.
-
Tsikoteer
- Join Date
- Aug 2009
- Posts
- 1,553
February 12th, 2010 07:44 AM #3349So i wasn't able to sleep well since my uncle from Australia is arriving and my car looks horrible, im here stuck in our Caloocan office/home then while i was writing up about rotary polishing i started to think about detailing my car and hopefully get to at least lessen the visual horror that happened to my car but then all my good and special waxes and polishes are in our QC home and my Makita Detailing kit with both the Moms and Megs wax and polish kits are also there since we just had a major detail session in our QC home at the end of january, when i just remembered that i actually have my first ever BnD wp1300 Detailing kit here! I brought it out and to my delight i still have ketchup bottles full of different polishes but mostly Megs. So off i went to the revo and tried to do the best i can, with some really worn out foam pads.
While i was at it i also did some 50/50 shots of swirl corrections i did on the undamaged paint panels.


End result with camera focused on the paint texture

this one focused on the light

Last edited by madkatz; February 12th, 2010 at 07:47 AM.
-
Tsikoteer
- Join Date
- Aug 2009
- Posts
- 1,553
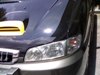
February 12th, 2010 08:01 AM #3350Here are pictures of the scratched and damaged parts that i tried to polish and hopefully lessen the eyesore


Im just sooo happy that i had that car painted with PPG Ceramiclear, i requested it to have a thicker clear coat though, that it was tough enough to lessen the damage to the car, i was actually surprised to see that i was able to buff off most of the scratches, well not really buff them off but minimize their appearance. Its my first time to work on a ceramiclear clear coat and i will say that they really are tough, not that im trying to advertise ok? i guess the good side would be that they are tough against scratches and these things but the downside is that its toughness also makes it hard to buff off paint imperfections, i even had to use Megs 85 Diamond Cut on the deeper damaged parts for the first pass and then follow it up with Megs 84.
-
Tsikoteer
- Join Date
- Aug 2009
- Posts
- 1,553
February 12th, 2010 08:16 AM #3351The results after buffing the damaged parts was


Not too bad considering that its no longer that much noticeable and from afar you can barely see it
Too bad i can't do anything for the bottom fiberglass part since the scratch is already too deep, that part got scratched with the tricycles reinforcement bar the same one that actually punctured my fiberglass in the earlier pictures i posted.
Procedures i did was
1. Wash the car with BB shampoo
2. Remove asphalt using kerosene
3. Re-wash the car with BB shampo
4. Clay the car using soft99 dark clay
5. Re-wash the car using NXT shampoo
6. Rinse the car
7. Dry the car using Microtex Elite
8. Tape the non painted parts
Step 1 - LC yellow pad, misted with Megs Last Touch for priming, and Megs 85 Diamond Cut
Step 2 - LC yellow pad, misted with Megs Last Touch for priming, and Megs 84 Compound Power Cleaner
Step 3 - SM Arnolds Cool It Green polishing pad, misted with Moms Showtime, and Megs 83
Step 4 - SM Arnolds Cool It Black finishing pad, primed with Megs 80 Speed glaze spread thinly all over the pad, and Megs 80 Speed glaze
Picture of pads, my LC yellow curved is already worn down this is nearing its end and would have to be replaced really soon, on the picture also is SM Arnolds Cool It Green Polishing Pad, its a very nice cheap alternative if you don't want to spend as much for Megs and LC 8 inch pads

And this is the wp1300 with the included velcro backing plate

Sorry for the really crappy grammar and spelling, i know i've made a lot of typographical errors, im so tired after detaling my car, i've been detailing since 1am and stopped at around 5am and im already sleepy i just want to finish all these posts since i'll be busy being my uncle and auntie's chaperone for the next 2 weeks
Ok thats it for now, im going to hit the hay stackLast edited by madkatz; February 12th, 2010 at 08:31 AM.
-
 Verified Tsikot Member
- Join Date
- Nov 2007
- Posts
- 176
February 12th, 2010 06:07 PM #3352I just got to read what happened to madkatz. Grabe talaga ang ibang mga motorista dito sa atin.
I hope no one got hurt.
At any rate, it seems she did a good turnaround insofar as the paint defects are concerned.
-
 Chicken at Itlog
- Join Date
- Nov 2008
- Posts
- 4,642
February 12th, 2010 10:01 PM #3353I knew it, you can get rid of those scratches without breaking a sweat. GREAT JOB!
Reminds me of the scratches on our vios . Can it be removed or have its appearance reduced by repeatedly applying SwirlX? Ayaw ko na kasi bumili ng separate pa na ScratchX 2.0 kasi ang mahal. Medyo nag-iingat na ako ngayon sa mga pinagbibibili ko dahil gusto ko magtipid hehe.
BTW, I haven't taken a picture of the dent on the door. I'll try to post tomorrow since I'm really tired now. There has been an event in our college and I was like standing the whole day.
Question: Dent ba talaga tawag doon? Basta na- "kutusan" yung body kaya lumubog ng onti and kitang kita na hindi na pantay (as in straight line) yung that part ng body.
-
Tsikoteer
- Join Date
- Aug 2009
- Posts
- 1,553
February 13th, 2010 06:09 AM #3354*Jon: no one got hurt thankfully, i have a questions BTW if you don't mind
1. If im planning on detailing my car with Klasse twins + Collinite 915, and i want to incorporate a filling glaze like, M09/M80/PB Blackhole/ 3m IHG/ Moms Step2, when do i apply that? in between the Klasse Twins? or before the AIO?
2. If i apply the glazes before AIO and have successfully concealed the swirls won't AIO reveal the swirls again after?
3. One last, of all the glazes that you've used which one is best in terms of filling and concealing swirls? I'm a little scared of polishing the innova due to its very thin paint.
Thanks in advance.Last edited by madkatz; February 13th, 2010 at 06:13 AM.
-
Tsikoteer
- Join Date
- Aug 2009
- Posts
- 1,553
February 13th, 2010 06:12 AM #3355*chickselog: i was able to remove some of them but, the pictures of the defects and deep scratches on my second set of images are still on the paint, but you have to look up close to be able to notice them.
Yes using SwirlX would remove scratches but it would be a long and painstaking process probably 2 or more applications if the defect is deep enough.
Were you busy with the product fair in UST?
-
Verified Tsikot Member
- Join Date
- Nov 2007
- Posts
- 176
February 13th, 2010 09:07 AM #3356Ask away. Originally Posted by madkatz

I'd say in between the Klasse Twins. But let's take note of some points. Originally Posted by madkatz
1) The Klasse twins are formulated to be used together, so it could reasonably be said that no product should be applied in between the two sealants.
2) If, however, you want to incorporate a glaze in between the twins, then then M09, M80, 3M IHG, and perhaps the Moms Step 2, would be out as they are oil-based glazes. I think they would interfere with the bonding and consequent durability of the KSG on the paint.
You would then be left with the PB Black Hole. While the PB Black Hole is not an oil-based glaze, the only thing I would be concerned about is that sometimes different brands just don't go along that well. In other words, its chemical make up might be incompatible with the Klasse twins. Do tell us your observations on this point.
The KAIO has strong cleaners, so I'd have to say that there is a possibility that the glaze could be removed. The filling done by the glaze could thus be undone. Originally Posted by madkatz
PB Black Hole for me. Aside from its filling properties, it's also easy to apply and remove. Originally Posted by madkatz
One question though, the thin paint of the Innova was caused by what? Over polishing?
You're welcome. Originally Posted by madkatz
-
Chicken at Itlog
- Join Date
- Nov 2008
- Posts
- 4,642
February 13th, 2010 01:39 PM #3357I see.. I don't mind naman applying it more than 2 times, as long as it does its job Originally Posted by madkatz
.. I hope that when I remove it, it won't remove too much clearcoat though..
Actually it's just in our building (educ/cthm building beside eng'g.). There has been a cooking competition of 24 schools held by a sponsor in our building (UST was the host that day) and I was one of the ushers.
Last edited by Chikselog; February 13th, 2010 at 01:58 PM.
-
Chicken at Itlog
- Join Date
- Nov 2008
- Posts
- 4,642
February 13th, 2010 02:12 PM #3358More detailed pics of the damage mula sa bumagsak na sampayan..
Pictures of the dent on the left passenger door


Scratches on the upper part near the roof of the same door

-
Verified Tsikot Member
- Join Date
- Jan 2010
- Posts
- 5
February 16th, 2010 12:49 AM #3359sir madkatz,
how much does it usually cost to order from auto geek or ads and ship it here in manila?
i want to buy some optimum products specially ONR and optimum car wax.
also where do you buy the soft99 clay bar? been looking for it for a long time.
do you have any cheap clay bar alternatives that is locally available?
too bad there is no clay bar replacement kit (pack of 3) in SIMEX kamias
-
Verified Tsikot Member
- Join Date
- Feb 2009
- Posts
- 171
February 16th, 2010 02:19 AM #3360Madkatz is a girl...
Soft99 is available in concorde stores in SM look for the decent looking package because most of them are old stocks. If 750-1200 will be your budget for a clay bar then you can go for BB clay or mothers w/qd and mf

 .
.