
Im currently using elevo brand. I do have the more thicker type of cover.
Pros:
Smooth inside cover
Has a reflector at the front, sides and rear
Cons:
Water passes in the stitch marks.
The Largest Car Forum in the Philippines
- Forums
- Discussions
- Events
- Community
Results 41 to 60 of 151
-
 Verified Tsikot Member

- Join Date
- Feb 2009
- Posts
- 171
November 9th, 2009 01:46 AM #41
-
 Chicken at Itlog
- Join Date
- Nov 2008
- Posts
- 4,642
November 9th, 2009 12:42 PM #42Alam ko may thread na napag-usapan ang car cover eh, di ko na maalala kung saan..napag-usapan doon yung DUB car cover..ewan ko kung sa detailing thread nga ba yun..

-
Tsikoteer
- Join Date
- Aug 2009
- Posts
- 1,553
November 10th, 2009 01:39 AM #43*Mau and Chickselog: thanks for the information, i'll try to check out blade for a car cover and also check the threads for car covers and see whats the best to get for me car.
-
Verified Tsikot Member
- Join Date
- Feb 2009
- Posts
- 171
November 10th, 2009 01:56 PM #44Just want to share this.
Kaninang umaga nakita ko yung car ng kaibigan ko. Napansin ko yung gasgas sa likod ng car na parang ginamitan ng rubbing compound. Napansin ko yung sides ng scratch nadamay and parang nasira yung clearcoat and nawala yung pagiging smooth ng paint. So sinubukan ko gamitan ng step1 ng mothers at ang galing effective medyo nakarami din ako ng buff and application. Tapos nilagyan ko ng IHG and wax then after bumalik yung dating color ng paint ang galing!
Hindi nya alam na ginawa ko yun sa car nya hehe
So ang conclusion ko sa Step1 Mothers:
Works very well on damaged clearcoats.
-
Chicken at Itlog
- Join Date
- Nov 2008
- Posts
- 4,642
November 10th, 2009 02:27 PM #45sir mau ano itsura nung paint? baka similar siya sa civic namin na pansin kong wala ng kintab parang ang nipis na ng clearcoat..may pics po ba kayo nung car? Originally Posted by mau2485

BTW eto yung sa EK namin..


-
Tsikoteer
- Join Date
- Aug 2009
- Posts
- 1,553
November 10th, 2009 05:33 PM #46*Mau: Hehe Step 1 really helps improve paint condition, its very good at cleaning and it can also smooth out the paint very well without being too abrasive. its like it has some fillers of some sort that brings dull color back to life, really great product, until now it never fails to impress me especially for its cheap price. Hows your car BTW?
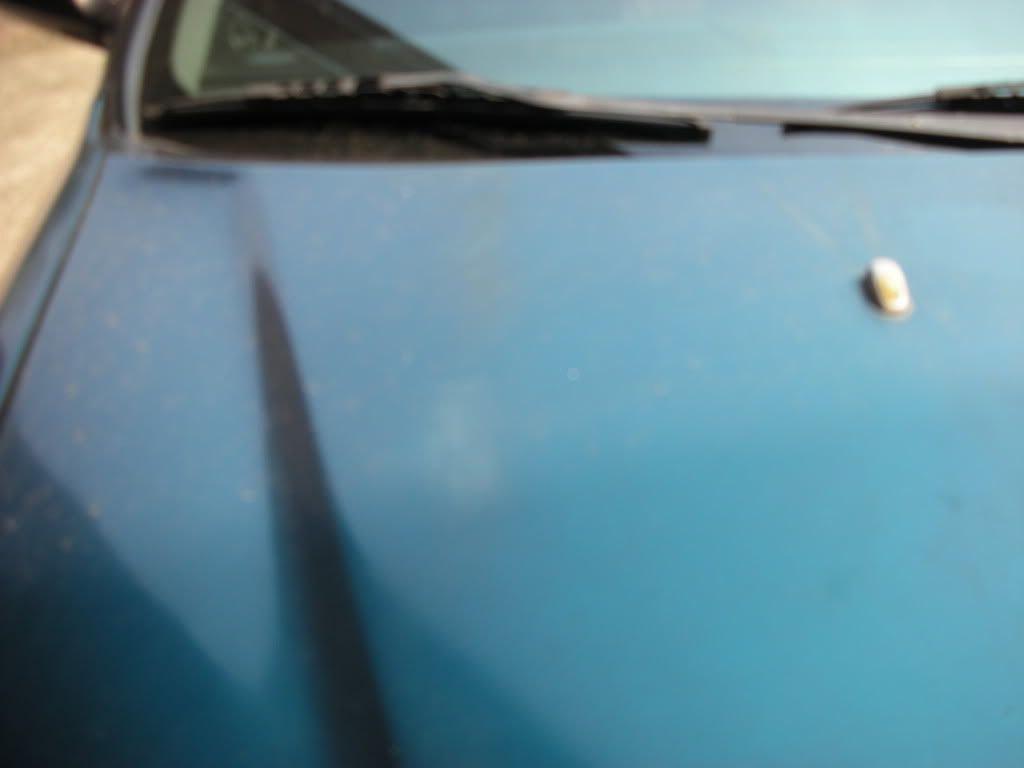
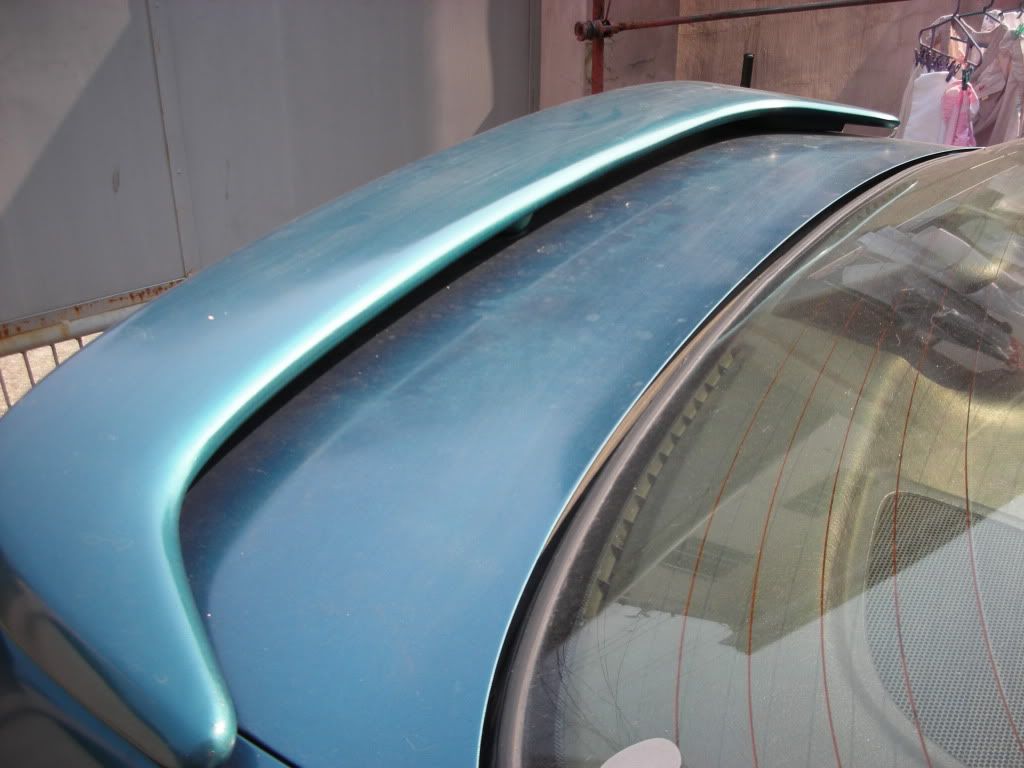
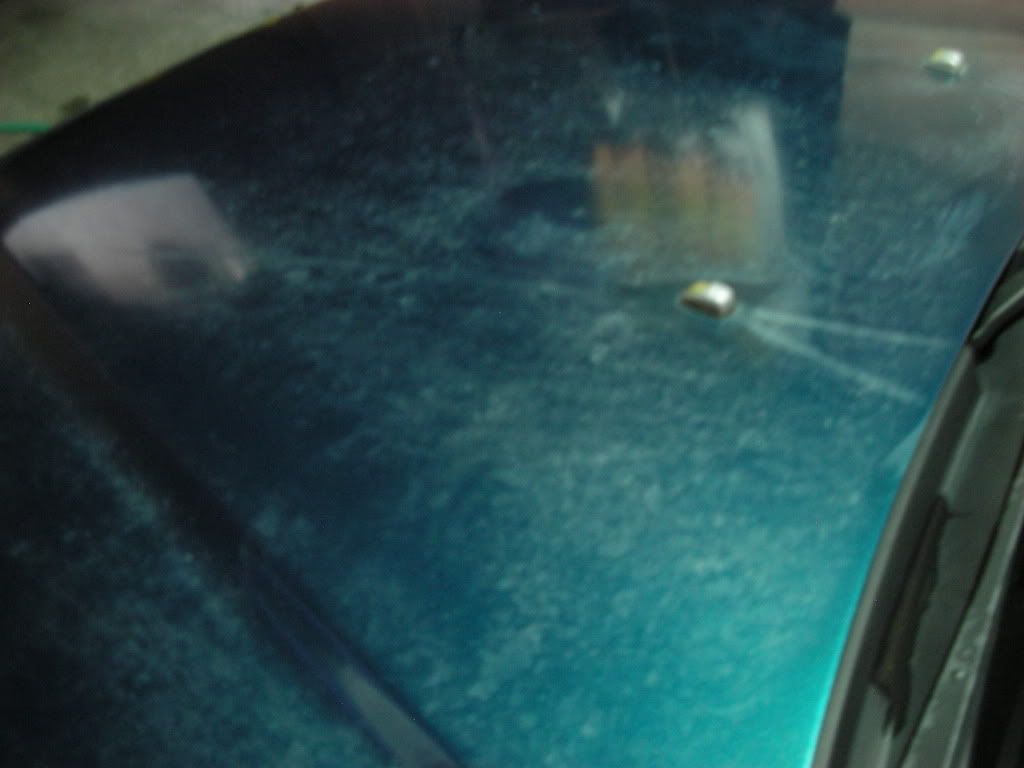
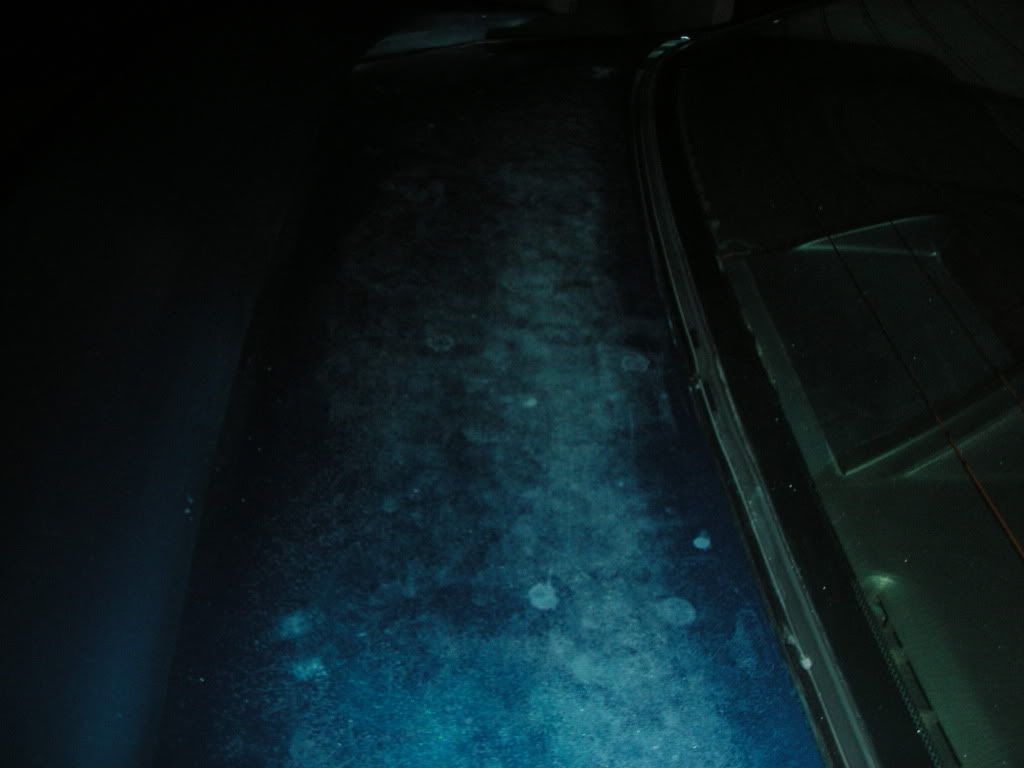
*chickselog: as for the first picture i think Moms step 1 and 2 can probably improve/fix that. for the 2nd and 5th picture Moms step 1 could probably improve its color and add gloss to it, im not sure about the stains and scratches though, as for the 3rd picture, same comment as above but those windshield washer residues are nasty its like it bleached the paint through, Moms step 1 could probably lessen the white stains and improve its color but im not sure if it can take out everything, also i would suggest you add more water or use a less stronger windshield washer fluid, thats what happened to my other car and i had to apply an abrasive polish just to remove it, as for the 4th picture thats paint cracking and chipping already, the best Step 1 could do it reduce the dull paint and help thin out the crack lines, it would help in hiding it from afar but if you look closer you could still see the lines of the crack although after step 1 it should be cleaner and thiner.
-
Verified Tsikot Member
- Join Date
- Feb 2009
- Posts
- 171
November 10th, 2009 06:29 PM #47*chicksilog
Same sya sa picture 1
*madkatz
Balak ko ulitin yung step1. Baka kasi hindi enough yung nilagay ko na step1 and kulang sa pressure. Sa palagay mo ok lang kaya yun? As of now plan ko magpatint sa saturday.
ikaw po ba ito? http://img4.imageshack.us/img4/8952/img5158sk.jpg
Dami mong tools ah hehe pwede ba magpadetail sayo?
Ganda mo din ah! Facebook naman dyan! apir!
Any suggestions for a good color of tint.
Gusto ko sana hindi visible sa side and rear. Ok lang kahit visible sa front
Color green or near blue green yung car.
-
Chicken at Itlog
- Join Date
- Nov 2008
- Posts
- 4,642
November 10th, 2009 09:03 PM #48*madkatz
It only got worse after step 1, mas nagpakita yung mga marks natuyo na ng husto yung mga marks siguro dahil araw araw nakabilad eh..
after pics.. Hood & Trunk
-
Verified Tsikot Member
- Join Date
- Feb 2009
- Posts
- 171
November 10th, 2009 09:29 PM #49Awww. Siguro kaya lalo naging visible kasi na-enhance yung color dun sa part na wala pang damage
-
Chicken at Itlog
- Join Date
- Nov 2008
- Posts
- 4,642
November 10th, 2009 09:40 PM #50Oo nga eh..Nung sinubukan kong apply-an ng pressure medyo kinakain na yung paint..Does this mean almost wala na yung clearcoat? Originally Posted by mau2485
-
Tsikoteer
- Join Date
- Aug 2009
- Posts
- 1,553
November 10th, 2009 10:36 PM #51*chickselog: Awww im terribly sorry it turned out that way, and yeah it did enhance the unaffected/undamaged parts making it more noticeable, the paint has significantly gone darker if you ask me, it did its job of cleaning the paint and making it pop out more but the light and oxidized spots were not affected, if this would be the case then your clear coat is really really thin close to none, its thin enough that the oxidation has already penetrated though the paint, and i noticed that you trunk has lots of drop/water oxidation marks, hmm this would be a candidate for a washover already, do you wax this car? if you want to prevent further damage to the paint, even if its that neglected i would suggest you still wax it so that your paint has a sacrificial layer before hitting the paint itself, at this stage the damage has already gone the color coat, one of the signs for this would be that when you applied step 1 it already affects the color coat.
-
Tsikoteer
- Join Date
- Aug 2009
- Posts
- 1,553
November 10th, 2009 11:01 PM #52*Mau: better not detail your car yet if you plan on having your car tinted, as far as i know if you're getting a tint set up it would take about 3 days before you can wet your windows, well thats what toyota told me when i bought my innova, hmmm as for re-applying step 1, i won't suggest you do that too often, i guess it would be ok as long as you do it per panel and apply a very thin coat but definitely do not apply heavy pressure, thats one safe way of doing it again, Also test on an inconspicuous area fist, as for tints i don't know that much with regards to tints, and yeah thats me thanks for the compliment, and that box behind me is just one box, i have 2 more not in the picture and one more arriving this december hahaha so yeah i really got addicted to trying detailing materials
-
Chicken at Itlog
- Join Date
- Nov 2008
- Posts
- 4,642
November 11th, 2009 12:00 AM #53mahirap rin kasi alagaan yun kasi wala sya bubong pag nakapark kaya kawawa talaga..maaraw pa sa lugar namin tapos kapag nauulanan na rin..
yung previous owner din daw wala bubong pag nakapark sa trabaho kaya nabugbog talaga yung kotse at medyo na neglect na rin yata..kawawa nga eh ang dami ng sakit..
nung una naming kinuha yun di gumagana power windows at sira ang alarm..nung binuksan yung power windows, sunog at sobrang kalawang na pala nung pinaka mechanism niya..nahihiya naman ako sa dad ko sabihin ipagawa lahat lahat ng sakit nung kotse..gusto ko na nga sana ipa-restore eh pati mga sira sa tranny gusto ko rin pagawa..
-
Tsikoteer
- Join Date
- Aug 2009
- Posts
- 1,553
November 11th, 2009 12:40 AM #54*chickselog: ohh, i see, hmmm then i guess for now it would be best to wax it even in its condition just so it does not get worse, at least there could be a layer to prevent further damage to the paint, its better that way, because if you leave it out in the rain and sun longer there could be no telling when the damage could go through the primer, once this happens and rust develops that would be a bigger problem and a more expensive one to tackle since washover sometimes doesn't cover rust problems, most shops charge extra when it comes to dealing with rusts.
-
Verified Tsikot Member
- Join Date
- Feb 2009
- Posts
- 171
November 11th, 2009 12:43 AM #55Why not try to sell some of your detailing tools? Or might as well make it as a business. Pabili nga ng step 2 and 3! Originally Posted by madkatz
Discount po ah
-
Tsikoteer
- Join Date
- Aug 2009
- Posts
- 1,553
November 11th, 2009 01:26 AM #56*Mau: As for now, im still actually trying to test more products and add things to my collection so i don't think selling some items would make sense but who knows, as for the business part im actually thinking about it since there have been some people/friends asking if they could buy some items from me but sadly its all part of my collection so my answer was no, but my BF told me since i could source them cheaper than outside why don't i just sell stuffs? the thing is i don't know if people are indeed interested in buying items and if there is a demand for items already available and items that should be imported. I just might actually sell some of my collinite products once they get shipped here, but im still not sure how much to sell them and this way if nobody buys them good for me, more durable waxes on hand. Also i know someone that sells mothers products cheaper than SRP but you have to purchase more than 4k worth and thats how i get my monthly step 1 2 and 3 as well the reflections cheaper as compared to blade but thats the catch i have to order at least 4k, the discount i get for this would be 5 to 10% depending on the product, i get a 5% discount on step 1 2 and 3 and 10% off on reflections and claykit hehehe, it just so happens a friend of mine also owns a hardware chain in the southern region that he allowed me this privilege.
-
Chicken at Itlog
- Join Date
- Nov 2008
- Posts
- 4,642
November 11th, 2009 01:33 AM #57I hope pagawan ng bubong dito sa lugar namin or something..Even a car cover can't help that much dahil maya't maya gagamitin rin and tirik talaga ang araw sa kanya..I'll just wax it muna with turtle wax, di tatagal ang step 3 ng mother's IMO, bugbog talaga eh..
-
Verified Tsikot Member
- Join Date
- Feb 2009
- Posts
- 171
November 11th, 2009 01:39 AM #58*madkatz
Detailing tools are ain't cheap here in the Philippines specially when getting them in the mall's hardware store. Good for you that you know where to get your stuff in a much cheaper price though it is still pricey and having the resources that will support your hobby. Ebay and tsikot will be a great help if you will opt for selling some stuffs in a cheaper price compared in the hardware stores.
[SIZE=3] [/SIZE]
-
Tsikoteer
- Join Date
- Aug 2009
- Posts
- 1,553
November 11th, 2009 01:53 AM #59*Chickselog: What turtle wax would you be using? Could i recommend you do a 2x coat? apply 1 coat as you would then leave it for a few hours and apply another coat, its gonna greatly improve the durability of the wax.
*Mau: Haha alright, i'll see what items i could get sent here, as for the items arriving for me this december that would be purely for collection purposes, maybe i'll do a study on what are the best products that i have and find those that are not available here, then maybe and hopefully around february or march i could have some items sent here, i'm contemplating on getting Klasse AIO and SG, Optimum spray wax and QD, Porter Cable, and probably Pinnacle and some P21S it all depends on how they perform once my december box arrives and yeah i can looking forword to pursuing importing items here not just for the small profit i could get since my job could probably earn me more but more on being able to test more products and improve the availability of products here since i myself had a really hard time importing them
-
Verified Tsikot Member
- Join Date
- Feb 2009
- Posts
- 171
November 11th, 2009 02:05 AM #60^^ Why not having a detailing business? The idea will be a girl doing a detailing jobs for the big boys!
 I think that will be a hit! You might be discovered and be featured on TV!
About the car cover, might as well check on this
http://www.autoanything.com/car-covers/60A1009A0A0.aspx

 Reply With Quote