
*Z50R: sir pa PM contact number mo. thanks.
The Largest Car Forum in the Philippines
- Forums
- Discussions
- Events
- Community
Results 1,621 to 1,640 of 2085
-
 Tsikoteer

- Join Date
- Feb 2009
- Posts
- 858
-
 Tsikoteer
- Join Date
- Mar 2008
- Posts
- 575
February 18th, 2011 05:47 PM #1622Dear yowza: Originally Posted by yowza01

Thanks.
BTW I vote for EB also - end of month?
-
Verified Tsikot Member
- Join Date
- Feb 2007
- Posts
- 14
February 20th, 2011 04:55 AM #1623mga igan musta po kayo....I am a proud owner of B2500, but hindi ko masyadong nagagamit kasi nasa ibang bansa ako and time na para magbakasyun kaya lang dami palang problem ng b2500 ko, i wish to have some advice at your end;
magkanu po ba nag gulong ngayun? 235/70/R16?
kailangan na rin daw palitang ng clutch, plate bearing disk..- magkano po ba kaya to?
anyway dami pa problema please advice po kung sang shop ko po ipa total check ang b2500 ko..di ko na rin kc nasubaybayan ang history ng repair..
maayus pa naman daw ang makina nasa 220K na po ang kilometrahe na at balak po kc namin pumunta ng bagiuo at abra gusto ko lang po maka sigurado na top health ang tsikot ko.
yung top cover po meron ba kaung alam mapag bilhan?
salamat po in advance
-
Tsikoteer
- Join Date
- Mar 2008
- Posts
- 575
February 20th, 2011 11:43 PM #1624Dear khelvin:
Welcome to our humble thread!
I also have a B2500 and my original tires are 215/70R-14's, not 235/70-16's ... it seems you have changed the wheels and tire sizes.
My 215/70R-14's are Wanli from China, they cost me around Php 2700 each... you will have to ask around as I have not bought new tires lately.
Try calling suppliers in Banawe for quotations for the clutch disk, pressure plate and release bearing.
When you say top cover do you mean something like a Campershell?
Best Regards,
Dusky Lim
-
 Verified Tsikot Member
- Join Date
- Jun 2010
- Posts
- 29
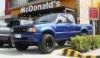
February 21st, 2011 05:26 PM #1625late model b2200 na nakikita ko samin. idol
 ganda talaga ng stance nito.

-
Tsikoteer
- Join Date
- Feb 2009
- Posts
- 858
February 21st, 2011 07:07 PM #1626welcome sir khelvin! Originally Posted by khelvin
new tires? depende sa brand and size yan sir. 16s ba syo? nsa P5500 to P8000 each po yata yan. depende din sa preferred mong brand like yokohama geolandar, nitto, federal, maxxis, bridgestone, dunlop, simex, at madami pang iba. depende din po kung all-terrain or mud terrain [A/T or M/T] ang gusto mo. better kung magppost ka na mga photos dito sir.
bago tires, makina muna at performance ng heart ng truck mo ang dapat nasa A1 condition {sir dusky, take it away!}
clutch assembly: pressure plate, clutch disc, release bearing, pilot bearing; and flywheel [either ipa-reface mo or bago na].
top cover? you mean valve cover? meron nyan sa banawe qc sir.
wag mo kalimutan ang mga preno sir. kelangan mainspect / clean / adjust / replace ang mga worn out parts nito.
happy trucking!!
-
Tsikoteer
- Join Date
- Feb 2009
- Posts
- 858
February 21st, 2011 07:12 PM #1627nice! invite mo sir pra sama na din sa EB. Originally Posted by Z50R
-
Tsikoteer
- Join Date
- Mar 2008
- Posts
- 575
February 22nd, 2011 10:09 PM #1628Dear Guys:
Mahabang kwento to, so bear with me, if nakaka-bore I apologize in advance.
My right-front headlight bulb finally burned out (low-beam lang, buhay pa yung high-beam) so I considered it a good a time as any to install my new (he, he, he, - that was more than 6 months ago!!!) set of made-in-Taiwan HID Lamps.
For the full background here goes (nuong unang panahon...)
Several years ago, during a promo in ACE hardware at SM-Fairview, I bought an original set of Bosch 'blue' halogen bulbs (including the 2 small park lights - na buhay pa!) for Php 999.00 - sale kasi.
What got me to buy was Bosch's claim that their 'blue' bulbs used no more power than standard 55W/65W bulbs but gave out as much useful light as 100W/110W.
To be frank there seem to be a small (not spectacular) improvement in the lighting but overall, pwede na.
For those of you who are familiar with the Mazda system, it uses H4 type of headlights - that is, there is a dual-element, replaceable bulb, mounted onto a locator plate with 3 tangs on it.
The bulb has 3 prongs on it, for high-beam, low-beam and ground.
One of the sneaky, older tricks to boost you light output was to run a dedicated ground line to the connection on the bulb and connect it to the battery (-) terminal.
That has the effect of boosting the actual amount of current to the bulbs (making them burn brighter) as they don't have to use the higher-resistance body ground.
Surrounding the bulb is a tight-fitting, rubber boot or skirt - to weather-proof it against mud and rain.
Frequently when you install very high-voltage halogen bulbs, the lamp and bulb heat up so much that the rubber boot gets cooked, hardens, dries out and cracks - leading to leaks and shortened bulb/lamp life - so watch it when installing those hi-power bulbs.
Well those old Bosch bulbs have now finally burned out.
Because I am getting old and my eyesight isn't what it used to be, I decided to splurge and go for some new headlamps with a lot more lighting power - hence the HID set.
The dealer in 168 mall told me that these were 'yellow' HID bulbs (I originally wanted blue) but they were just as bright daw as the white or blue models - only cheaper.
What's more wala na daw siyang stock ng blue or white and if I made a down-payment and was willing to wait 1 month (!) he would get me a set of 'blue' bulbs.
I decided just to use the yellow ones that were in stock.
We tested them, (they checked out) I paid him - Php 4000 and that was that.
Due to my extreme katamaran, it took until now for me to actually install them - more than 6 months later!
I had been taking the whole kit out (it comes in a little aluminum suitcase) and examining the parts and how they fit together.
I also looked at the connectors and terminals and studied the wiring diagram - all 1.5 x 2 inches of it - on a sticker attached to the back of the main relay.
I laid the set out (not the bulbs - very delicate!) in the Mazda's engine compartment and tried to see how to go about the wiring.
The kit has 5 main parts:
1) the main power relay, with most of the connecting winding attached, including -
a) +12 volt main connection to the battery
b) a male socket that attaches to one of the female sockets that used to connect to the light bulb - so that existing switching works
c) 2 thick power supply cords with (+) and (-) lines each to power the solid-state ballasts
d) 2 thin control cords with (+) and (-) lines for controlling the the HID lamps
2 and 3) 2 solid-state ballasts (which come with clip-on brackets), that have the following connection -
a) power supply from the main relay
b) dedicated ground line
c) pair of bayonet-type, high-voltage connectors for the HID lamps
4 and 5) 2 HID Lamp assemblies
To install, I found I had to take down the air-cleaner assembly (I have 2) and the battery.
Although rated for 105 deg C, I wanted to place the electronic components in places that don't get hot.
For the left-hand ballast, the best place was the firewall behind the headlamp just below the main air cleaner box.
For the right-hand ballast, the ONLY place was attached to the chassis grounding screw of the battery.
I had tried other places but the wires were too short to reach.
I had to run the power and ground line from the main relay to the left-hand ballast and lamp across the front of the A/C condenser and through the access holes.
Finally I got the relay and the ballasts mounted and connected up to my satisfaction - it was time for the HID lamp installation.
Now the worthless instruction manual, tells you to cut a hole in the rubber boot in order for the HID lamp assembly to fit - that's preposterous!
That would destroy the seal, and lead to leaks and shortened bulb life.
The REAL problem is, the HID lamp has the conventional H4 3-tab, locating plate, but instead of a narrow base like the bulb where the boot fits snugly, it has a very large high-voltage connector at it's back - which is probably the reason they tell you to cut a hole in the boot.
I noticed however that there is a narrow neck the exact same size as the H4 bulb, with a silicone rubber o-ring to seal it.
A little fiddling with the bulb assembly (BE VERY CAREFUL)and low and behold the damn thing unscrews and separates along it's parting line!
Then you can separate the forward portion of the lamp - which includes the metal reflector body and the locator tabs and clip them in just like you old H4 bulb - no blood, sweat and tears.
Over this you can now return the original rubber boot (I washed mine twice) and the mounting and seal is PERFECT!
Lastly you very, very carefully insert the HID bulb and connector assembly (power cord down) into the front portion and very delicately feel for the locating lugs - then push in and twist until the alignment markings line-up - YOU'RE DONE!
There were absolutely no instructions regarding this in the manual - I had to figure it out myself.
After keeping all the tools and washing up - start and wait, wait, wait for the engine to heat up - then LIGHTS ON!
Great News! Sindi agad! - All lights working both low and high beam - lakas talaga!!!
Now for the fly in the ointment - well the 168 guy told me dilaw (yellow) yung binenta sa akin na ilaw - Not True - the lights turn out to be white lamps!
Hmmmphfff! Bolero talaga - palibhasa di nya ata alam yung binebenta niya!
Grabe it took me all of 4 hours to get it done and installed!
This calls for a drink!!! gurgle, gurgle gurgle,....
Best Regards,
Dusky LimLast edited by duskylim; February 22nd, 2011 at 10:16 PM.
-
Tsikoteer
- Join Date
- Feb 2009
- Posts
- 858
-
Verified Tsikot Member
- Join Date
- Apr 2008
- Posts
- 50
February 23rd, 2011 01:59 PM #1630*kelvin... welcome to our thread sir... hopefully u'll be able to get the info's u need..
*sir dusky... congrats to the installation...
*everyone... hopefully EB soon...
-
Tsikoteer
- Join Date
- Feb 2009
- Posts
- 858
-
Tsikoteer
- Join Date
- Mar 2008
- Posts
- 575
February 26th, 2011 10:28 AM #1632Dear Ronn:
It looks like sa susunod na buwan na ang next EB natin.
I for one am sick with a bad cold and also sprained my left hand.
I can't drive and have a hard time even blowing my nose!
You can imagine how I have to type this e-mail with one hand, (or horrors!) - use the tiolet!
Best Regards,
Dusky Lim
-
Tsikoteer
- Join Date
- Feb 2009
- Posts
- 858
-
Tsikoteer
- Join Date
- Mar 2008
- Posts
- 575
March 1st, 2011 02:22 PM #1634Dear Guys:
Feeling a lot better now - thanks to a lot of bed rest and anti-biotics!
For me, whether it's March 20 or 27 OK lahat yan!
Best Regards,
Dusky Lim
P.S - While sick in bed I couldn't help wonder if my recovery would be faster if I had a pretty nurse to take care of me.... !!!
!!!
-
Verified Tsikot Member
- Join Date
- Oct 2010
- Posts
- 49
March 1st, 2011 10:18 PM #1635me too mar 20 or 27 is ok for our next EB
regards & ingaaat!
pickupbike
-
 Verified Tsikot Member
- Join Date
- Mar 2008
- Posts
- 67
-
 Verified Tsikot Member
- Join Date
- Jan 2010
- Posts
- 72
March 3rd, 2011 11:29 AM #1637hi guys musta na kayung lahat pate mga trucks nyo its been a long time na din bago ko nag log in uli ang hirap na pumasok a hahaha. ge eb sama din ako may ibang mga nagawa na din ako sa trucks ko. regards to all of you guys
-
Verified Tsikot Member
- Join Date
- Jun 2010
- Posts
- 29
March 3rd, 2011 02:37 PM #1638hi guys, selling my pair of stepboards.

http://sulit.com.ph/3202856
Thank you.
-
Tsikoteer
- Join Date
- Mar 2008
- Posts
- 575
March 5th, 2011 09:35 AM #1639Dear Guys:
Decided to post a few updates as to what's happening in my corner of the woods - Fairview.
The road expansion along Commonwealth is still on-going, grabe talaga ang traffic!
The reason is they are digging up the road to install large concrete drainage pipes - mga 5-6 ft in diameter and they use 2-3 backhoes at one time - leaving only 1 lane to get through and sometimes they even use that.
Follow-up on my upgrade to HID's - when you do install them, try to insure the following get done:
1) wash thoroughly the rubber sealing boots that cover the back of the lens and bulbs - they don't get much maintenance and every little bit helps.
2) after washing, spray a little silicone lubricant all over the inside and outside - that will keep the rubber soft and pliant and stop it from drying out and cracking - until you have to replace the bulbs.
3) Very important - make sure each electronic ballast assembly is securely mounted and that the ground to the battery is 100% good - if not your HID bulb won't light properly - learned that the hard way.
4) Oh yeah - double check all the connections and use a lot of contact cleaner (mahirap hanapin) if you can't find this, try connecting and disconnecting the leads a few times to create a good contact.
On the injection pump front - am about through reading the Bosch VE type injection pump manual, makes for interesting reading - kung mahilig ka.
I learned several things -
1) flooring the gas pedal to aid in starting is UN-NECESSARY - because the pump actually has a starting lever and spring to do this for you.
If everything else checks out and you still have a hard-starting issue, try this trick - the 'double pre-heat'.
A) Switch the ignition key to ON, then wait until the glow lamp goes out, then
B) Switch the key back 1 step to ACC (accessory) and immediately back to ON, glowing for a 2nd time,
C) When the glow lamp goes out for the 2nd time, try starting - if the glow system is OK and the fuel system is fine, it should start without any problems and immediately begin to idle smoothly.
This procedure is frequently needed if you use the higher-voltage glow plugs (like me) - 12 volts instead of 11.0 or 11.5 volts, they tend to need more time to heat up.
2) Exciting news on the additive and turbo front - mahaba na naman na kwento to, pre - wait for part 2 of this post.
Best Regards,
Dusky Lim
-
Tsikoteer
- Join Date
- Feb 2009
- Posts
- 858

 Reply With Quote