


Fortunately, my measurements were not that far off and the yellow paper framed the artwork decently. I wish I used a thicker paper type, but i couldn’t find any with that size in the art store.
I taped the artwork onto the border and replaced the cardboard backing and peeled off the protective sheet covering the acrylic.
Nat-Geo-like eh?
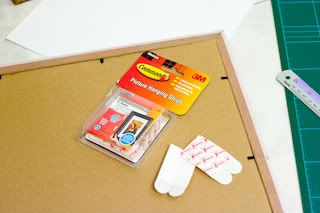
I had to find a way to mount this, and I tried 3M’s new Command Picture Hanging Strips. These things are quite amazing and I’m really surprised that 3M has continuously creates products from things that people have used in ages without realizing. These mounting strips work like Velcro strips. You basically mount a piece onto the wall via the supplied mounting tape, and stick another one onto the item you want to stick to the wall.
The result? A way to peel and re-attach your frame as often as you wish. You can now change the mounted frame to another one, just like you would if you have a nail on the wall!
3M Picture Hanging Strips
I’m surprised it has taken this long to find this commercially as I’ve always used Velcro stuck to an item to secure it into a car’s trunk compartment, floor mats, etc.
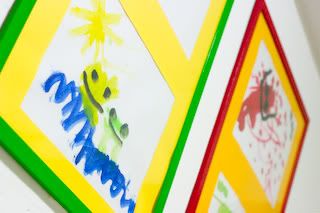
Anyway… Here’s the end result.
Not bad at all for a relatively low cost and easy mounting. I plan to put another one (blue frame) to mount his blue artwork like his Thomas the Train paintings.
Green and Red
I’ve bought a Canon iP4500 Photo Printer a couple of weeks ago to print my photos, so for sure I’ll be getting more black frames for our photos. The joy of seeing our humble home plastered with framed items created by our own hands is hard to explain with words.
I’m so proud of his fun and cheery artwork. I need a mansion to fit all of them as he grows older, though.
The Largest Car Forum in the Philippines
- Forums
- Discussions
- Events
- Community
Results 1 to 4 of 4
Threaded View
-

 David Tong

- Join Date
- Oct 2002
- Posts
- 13,415
December 10th, 2007 08:58 PM #2


 Reply With Quote