


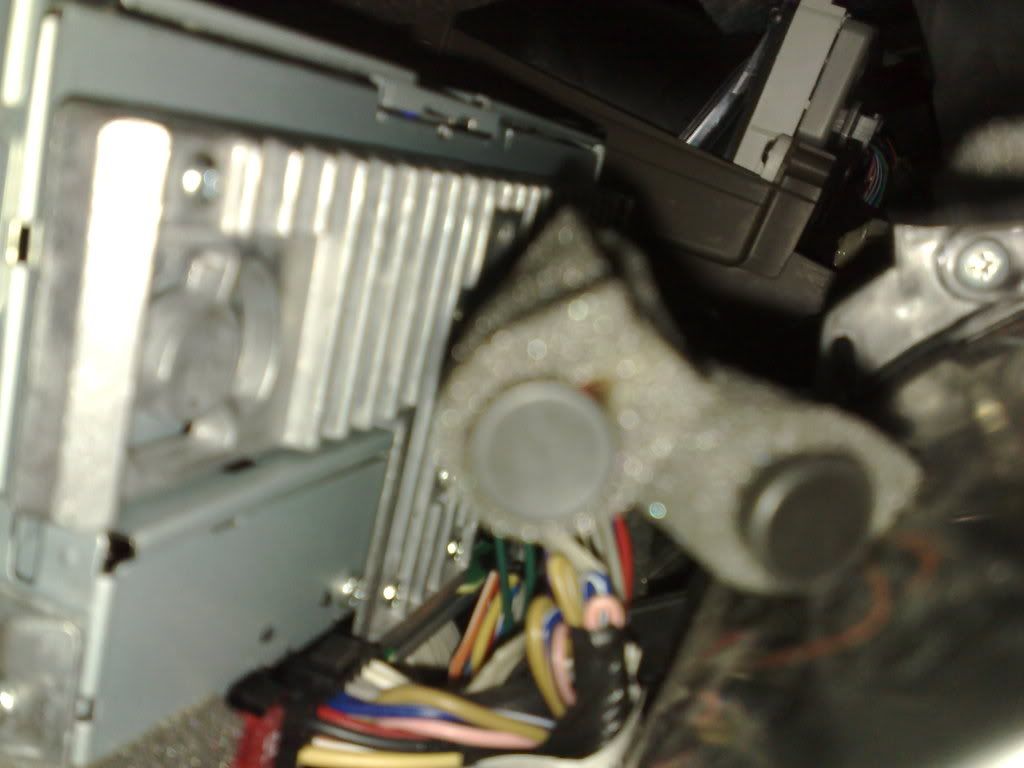
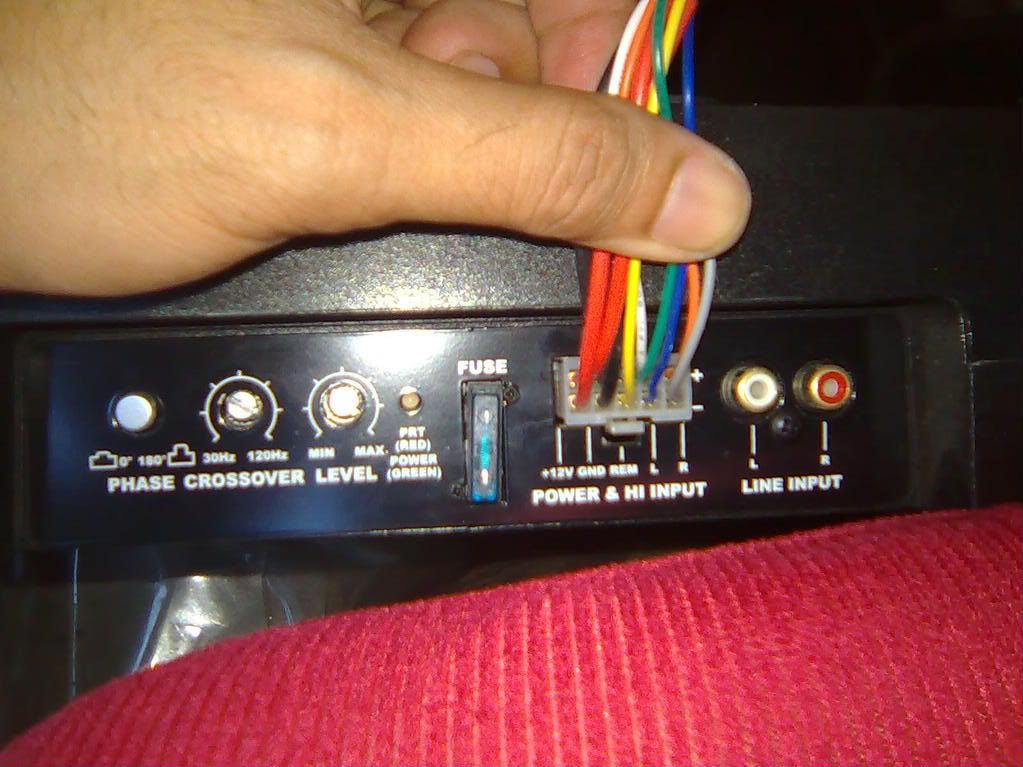
This is how the back of your 1.5G Head Unit looks like at the back (Mouse's Eyeview)
...and this is how the LINE-IN looks like when you want to connect your RCA Jack at the back of the HU.
The Largest Car Forum in the Philippines
- Forums
- Discussions
- Events
- Community
Results 1 to 20 of 63
Hybrid View
-

 Tsikot Member Rank 2

- Join Date
- Aug 2007
- Posts
- 623
June 4th, 2008 09:05 AM #1
-
Tsikot Member Rank 2
- Join Date
- Aug 2007
- Posts
- 623
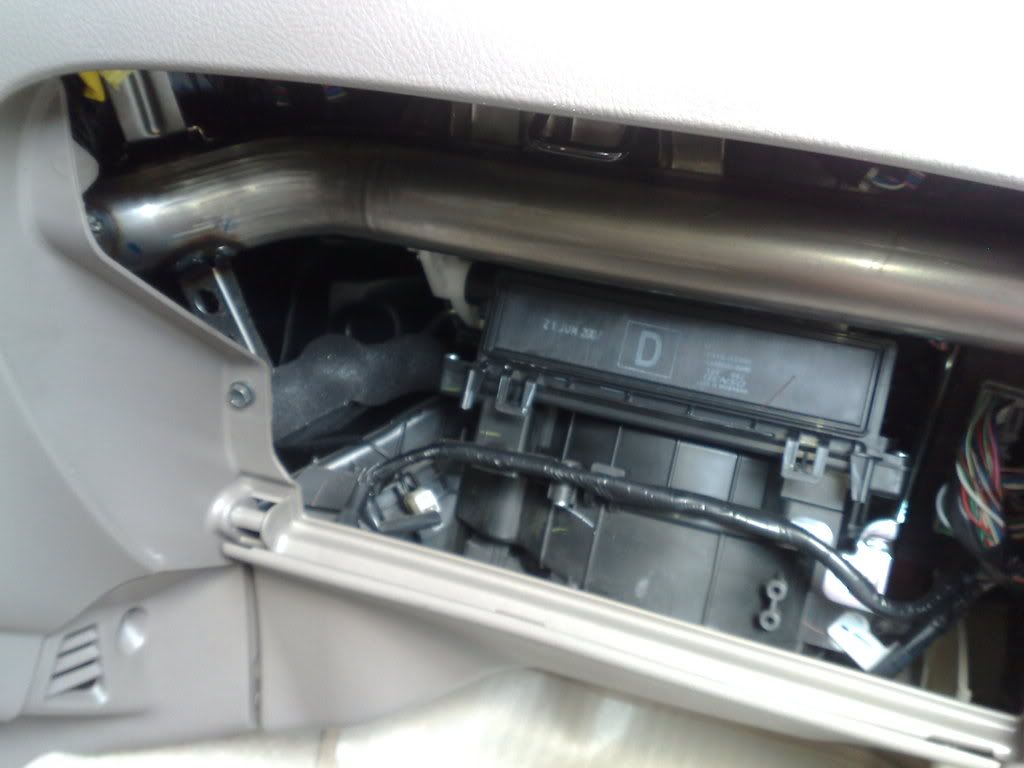
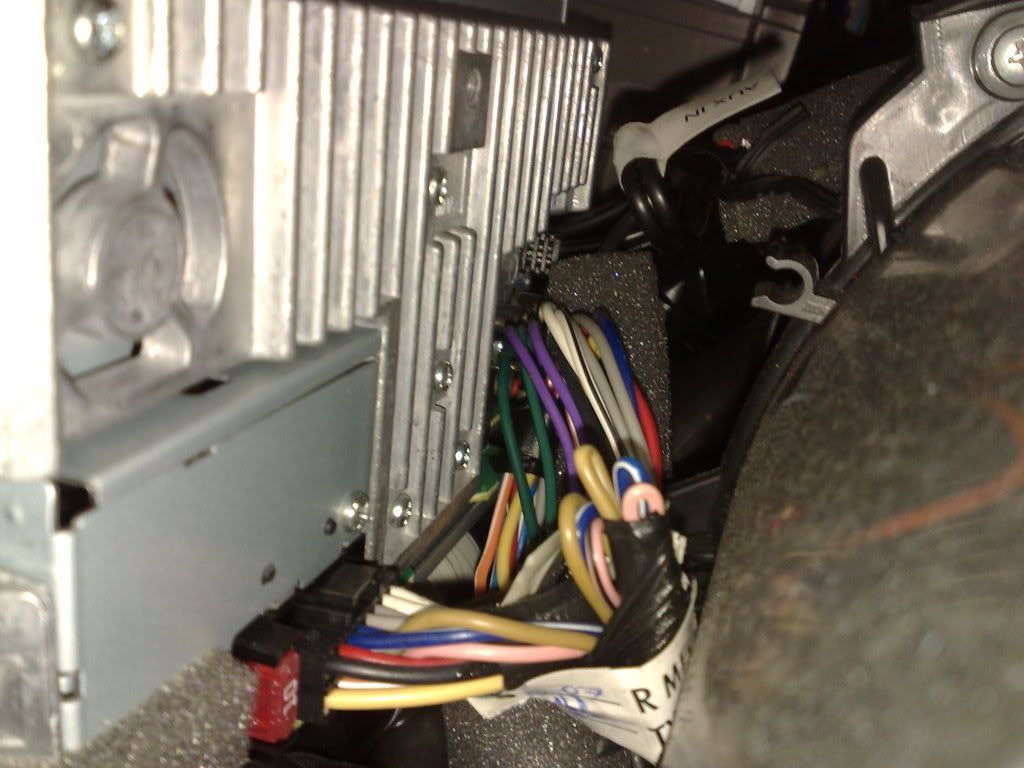
June 4th, 2008 09:18 AM #2STEP 1 - Remove the Glove Compartment Unit by sliding it up-right.
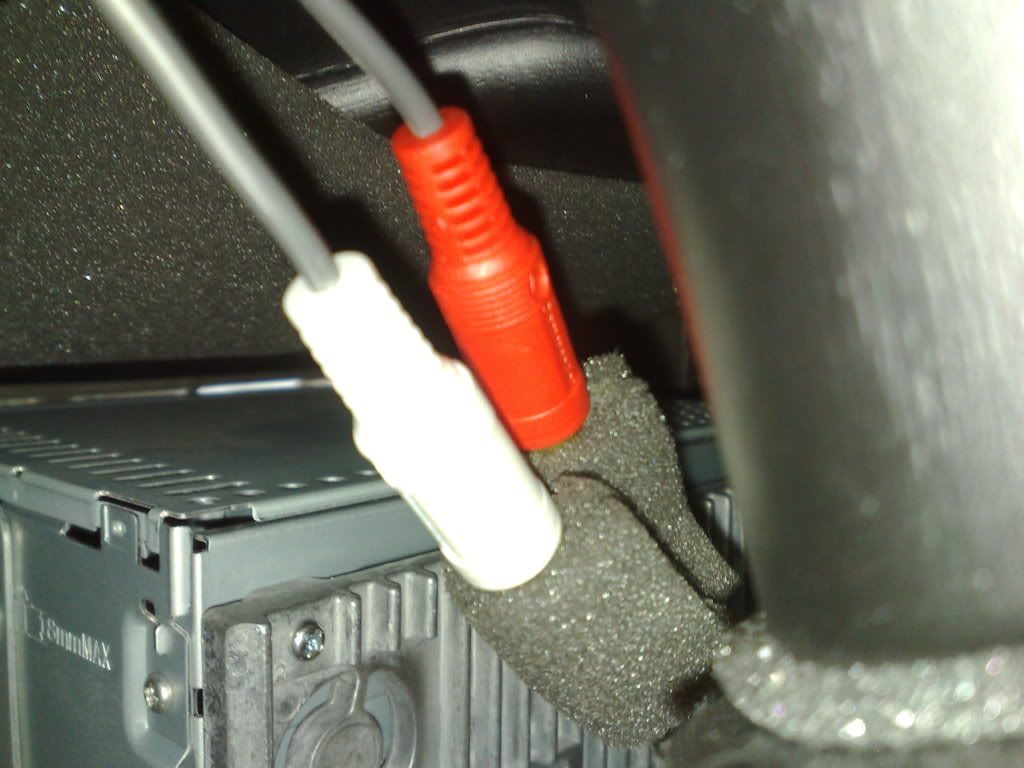
STEP 2 - Plug the RCA Jack (YELLOW CABLE) at the SUB-OUT connector by reaching it with your right arm.
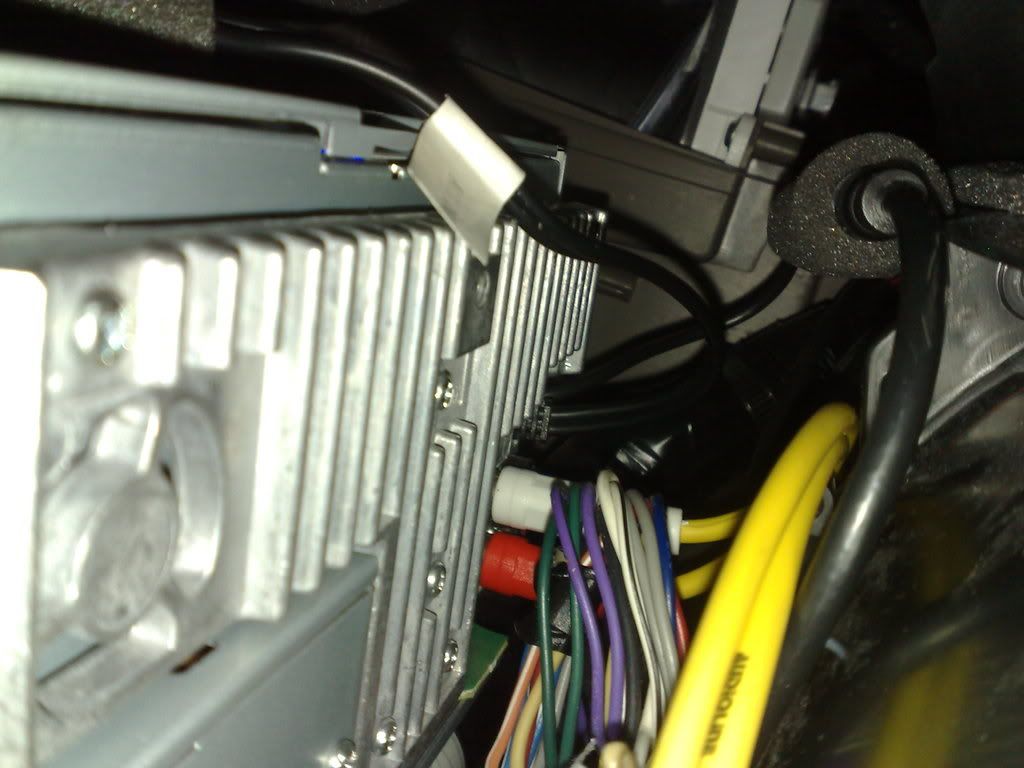
STEP 3 - Now connect the RCA Jack (Red and White) for the LINE-IN Connector.
STEP 4 - Run it under the center console to hide the cable...of course by removing your center console box
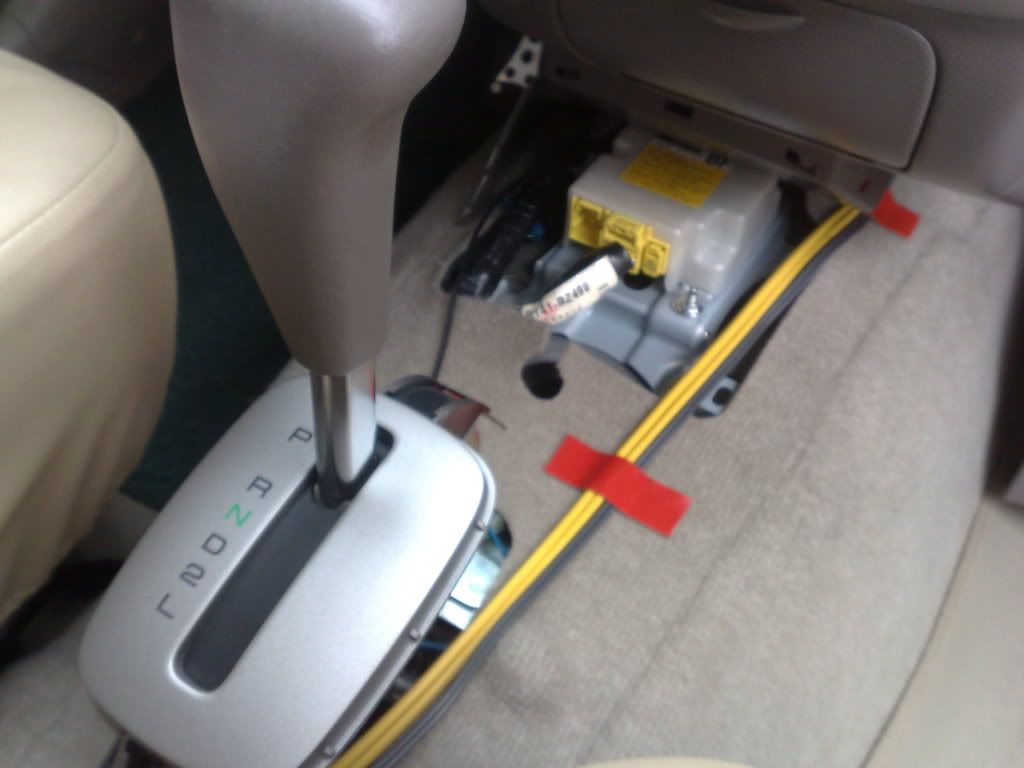
...and you're finished, you are now ready to connect any input (MP3) and output (SUBs) to your head unit.
-
Tsikot Member Rank 2
- Join Date
- Aug 2007
- Posts
- 623
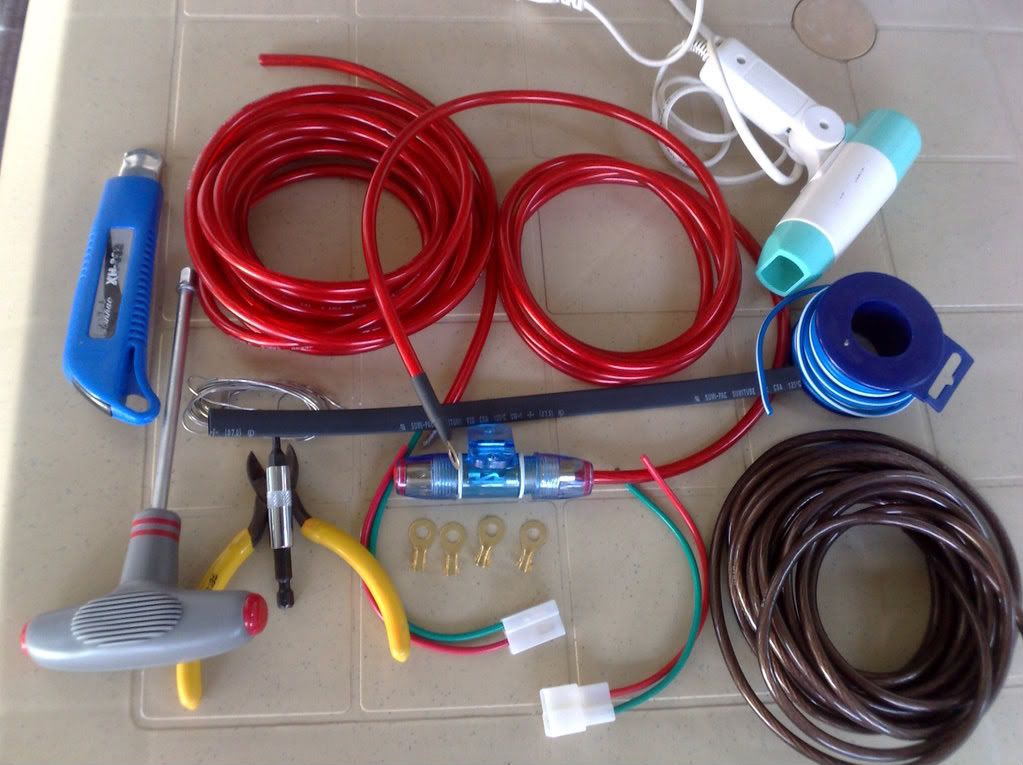
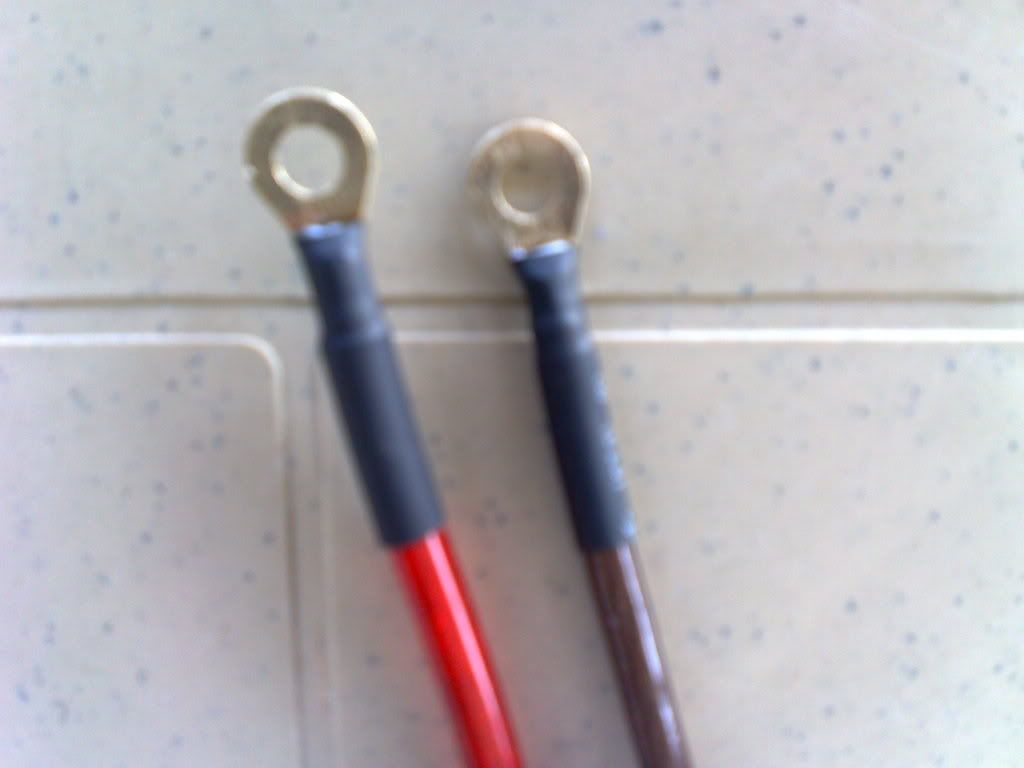
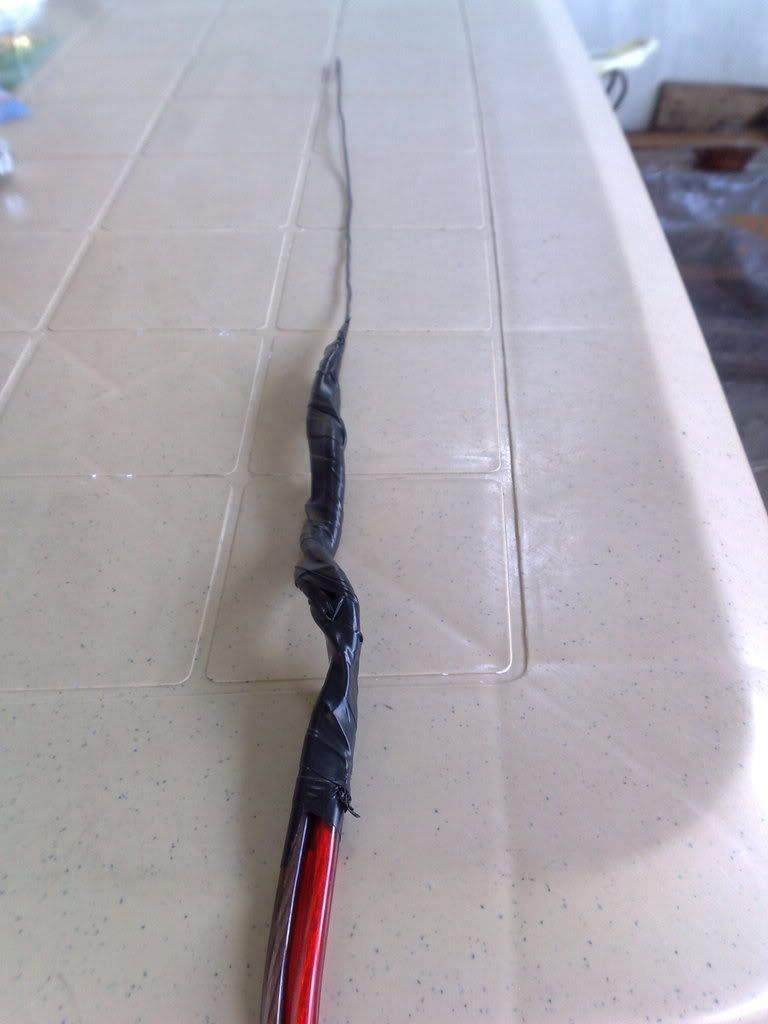
June 4th, 2008 09:34 AM #3Preparing the 12V TAP
STEP 1 - Prepare your things (materials)
STEP 2 - Solder the Circular Eyelet (Round Terminal Lug) on both ends of your 12V power line cables (RED and BROWN)
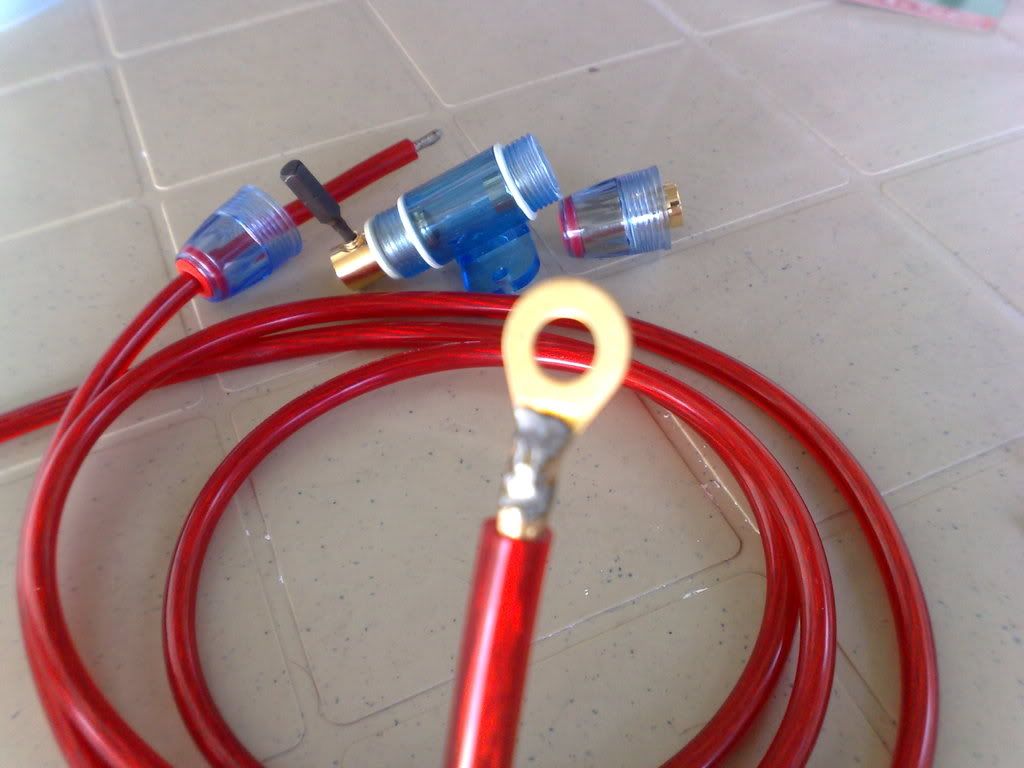
STEP 3 - Heat the shrinkable tube with a hair dryer to cover and secure the solder points on your terminal lug (this will prevent wear and tear)
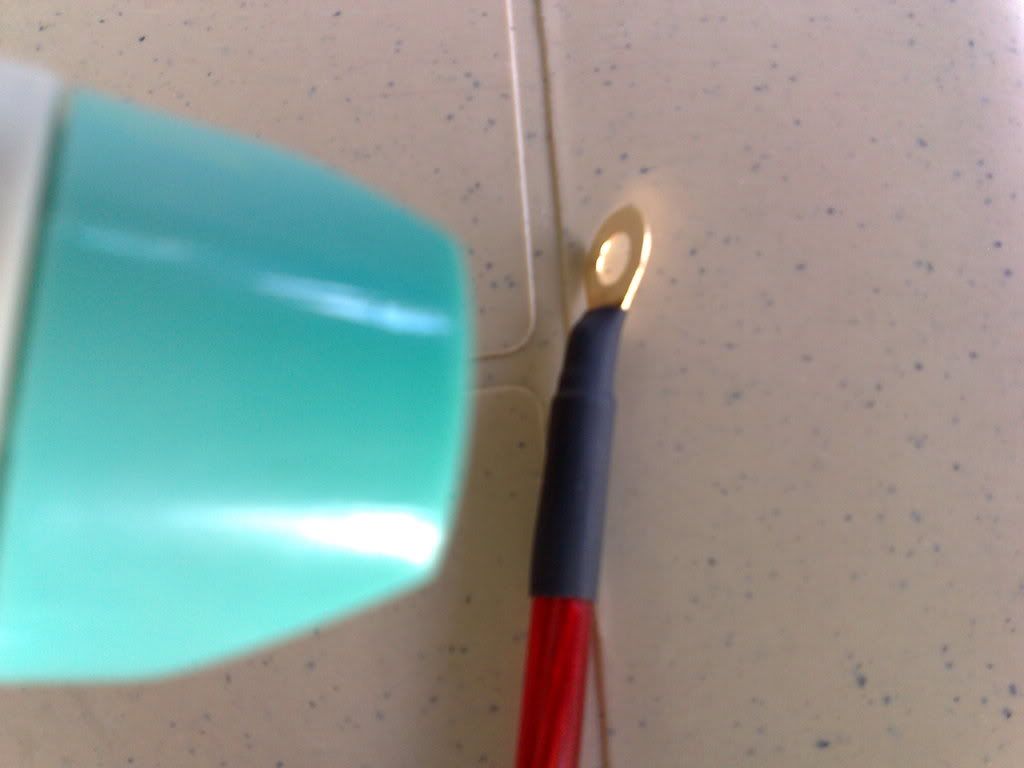
STEP 4 - This is how your 12V TAP will look like after your preparation, now your ready to hook it up.
-
Tsikot Member Rank 2
- Join Date
- Aug 2007
- Posts
- 623
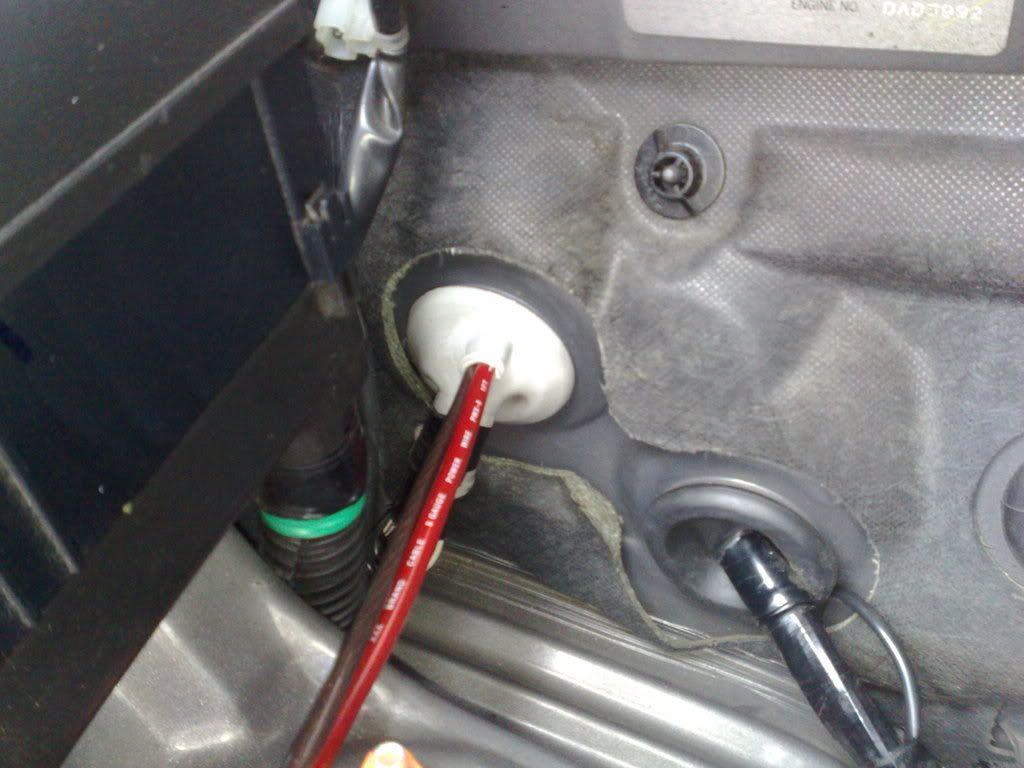
June 4th, 2008 10:17 AM #4Installing the 12V TAP
STEP 1 - Install a guy wire on end of the 12V cables (RED and BROWN) and temporary secure it with electrical tape.
STEP 2 - Our AVANZA already provided an extra poke-in hole for additional power requirement in case we need to tap directly from the battery terminal, all you need is a cutter to cut the rubber opening where we can install the cable. Slowly insert the guy wire into the provided rubber opening (WHITE RUBBER CAP) and slowly slip tour 12V cables inside going to your dashboard.
STEP 3 - Tap the 12V cables into the battery terminal lug, RED wire --> (+)RED and BROWN wire --> (-)GND, then secure the 12V TAP by using a cable tie and attached it together with the existing wiring harness
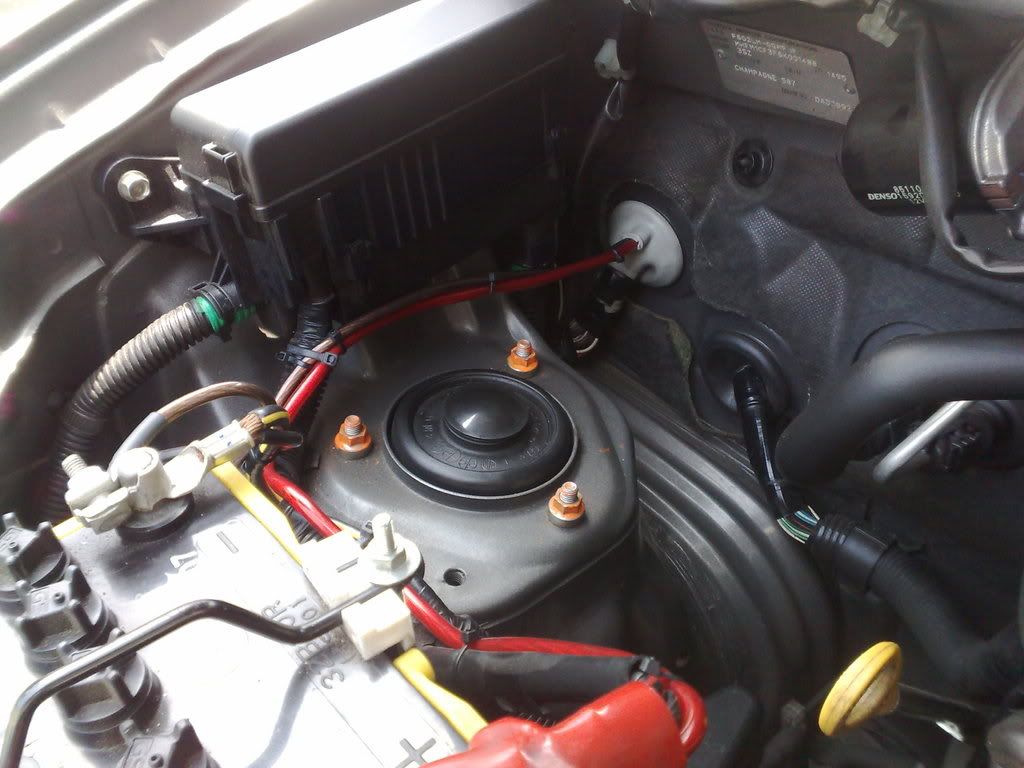
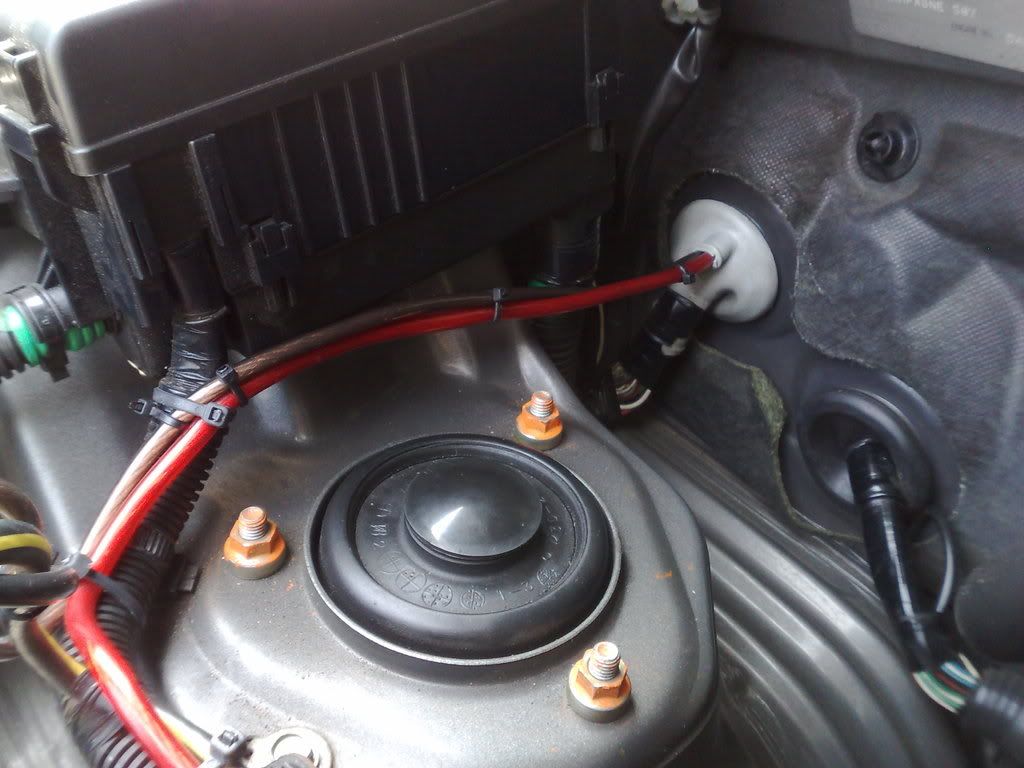
STEP 4 - Run your 12V TAP cables through your dashboard and install the in-line fuse (BLUE casing) in the 12V line for added electrical protection,
-
Tsikot Member Rank 2
- Join Date
- Aug 2007
- Posts
- 623
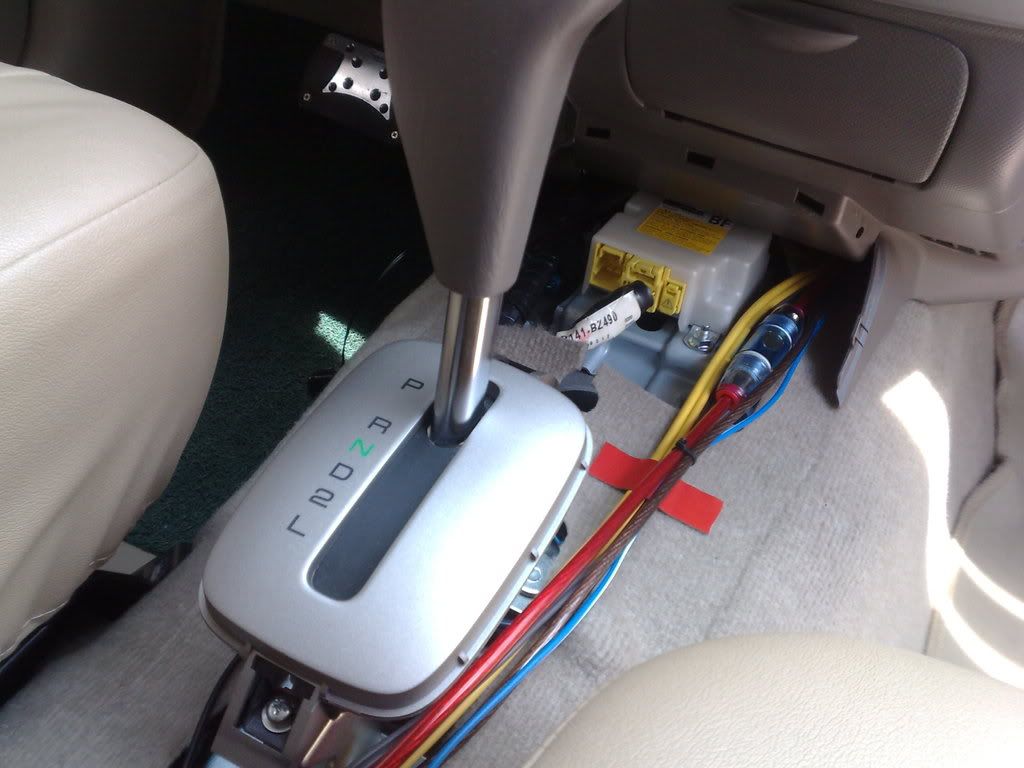
June 4th, 2008 10:19 AM #5STEP 5 - Tap and splice an extension cable to the POWER CONTROL cable (BLUE and WHITE wire) of the Head Unit for your subwoofer's power control.
STEP 6 -then run all the cables again beneath your center console and arrange the wires not to touch any mechanical parts to avoid physical damage on the wires.
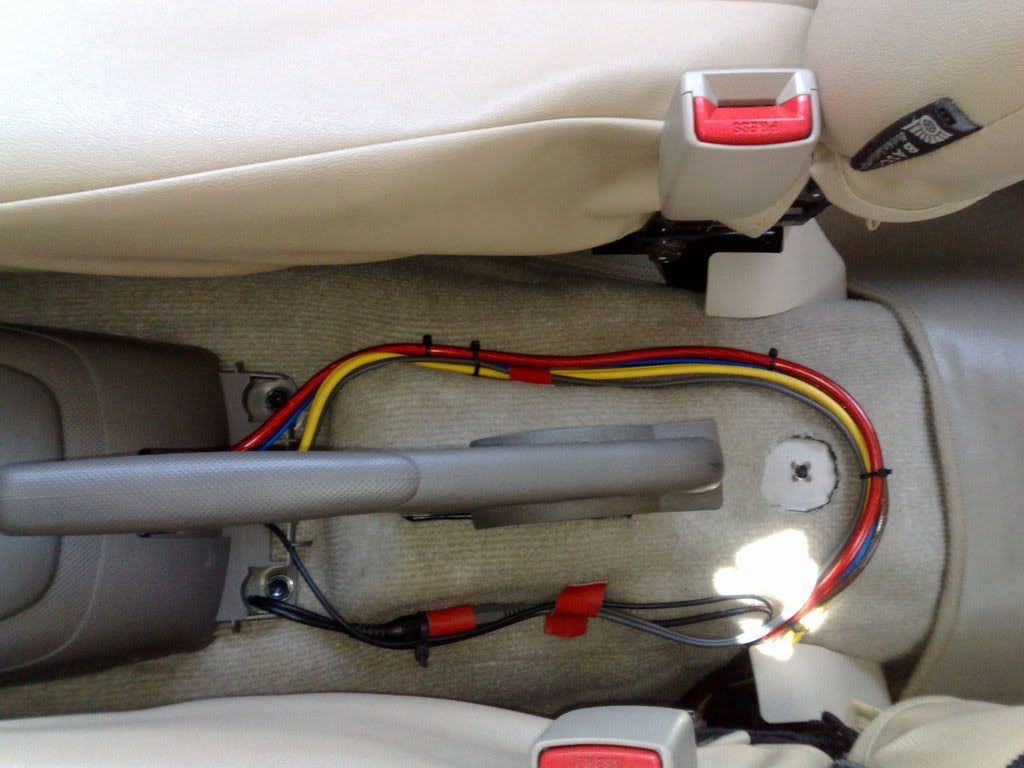
...and now you're set and ready to install your subwoofer.
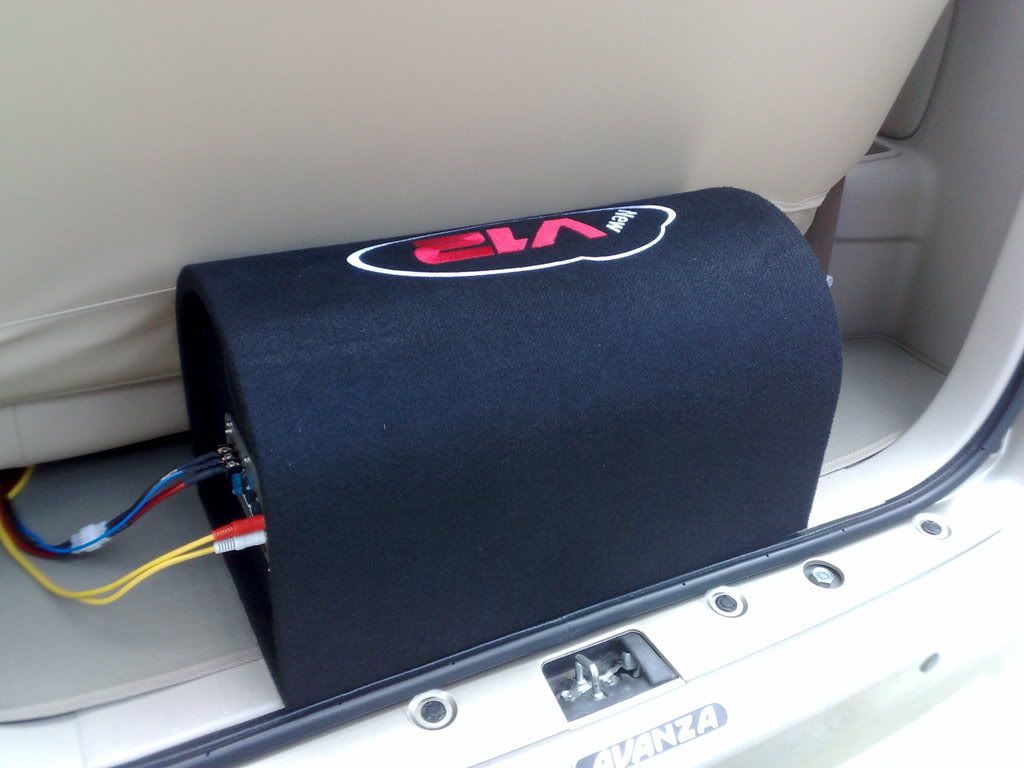
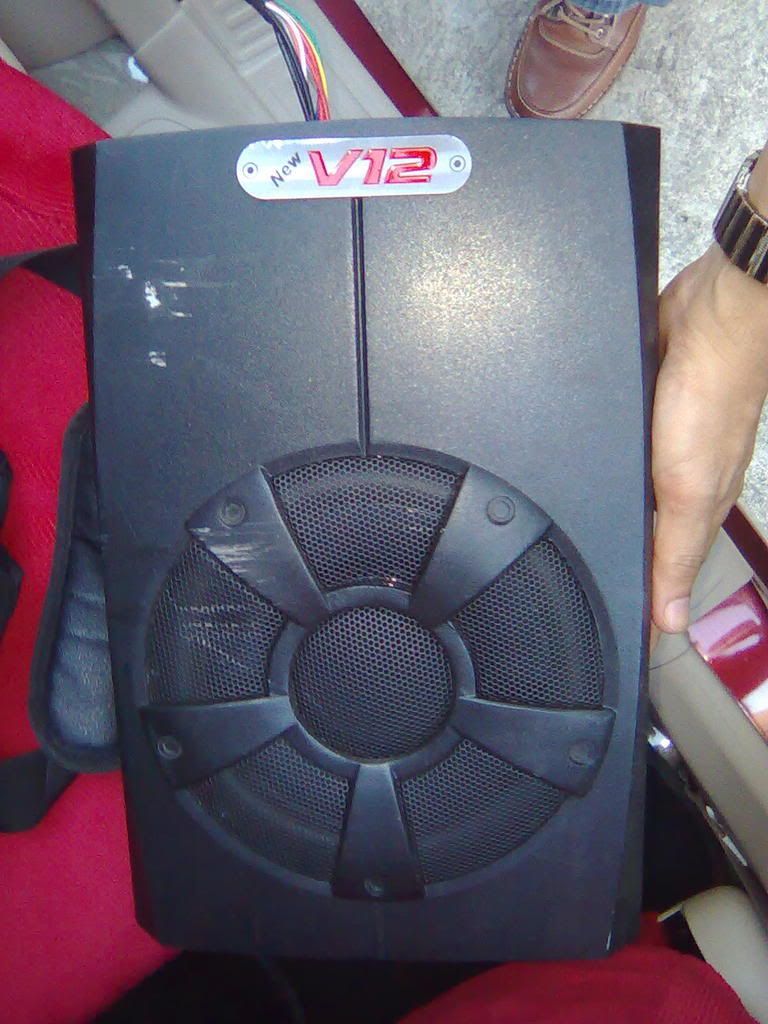
STEP 7 - Install your subwoofer, in this case the V12 10" sub will just fit exactly at the back of your avanza. ENJOY!
LOOKS PRETTY SIMPLE, ISN'T IT?
If I can do it, Yes you can also do it by yourselves!
-
Verified Tsikot Member
- Join Date
- Sep 2007
- Posts
- 207
-
 ACP Member
- Join Date
- Nov 2007
- Posts
- 715
June 5th, 2008 01:08 PM #7 Originally Posted by Islaw*Palitaw

Sir Islaw magkano ganyan? saan mo binili?
Ok ba yung bass sound nya?
Hindi ba tumatama sa back door?
Madami ba questions ko
Thanks
-
 Verified Tsikot Member
- Join Date
- Jun 2007
- Posts
- 240
September 20th, 2008 05:45 AM #8Sir Islaw ok lang ba ang bass effect ng ganitong subwoofer, kc ganyan din ang subwoofer ko sa Lancer ok naman sya ibang brand lang sya BEAC. Originally Posted by Islaw*Palitaw
-
 Tsikoteer
- Join Date
- Dec 2007
- Posts
- 3,938
February 21st, 2009 10:15 PM #9Oh, yes, I believe I can, too! Originally Posted by Islaw*Palitaw
Heto ang balak kong ikabit (galing ito sa pickup ni Tatang -- pickup na ibinebenta na namin):
13.5" x 8.9" x 2.9" ang dimensions niya:
Heto ang mga connections, etc. niya:

-
 Tsikot Member Rank 4
- Join Date
- Oct 2002
- Posts
- 2,919
June 7th, 2008 11:29 AM #10galing naman Bro kelan kaya akomagkaroon ng lakas ng loob sa ganyang project?........yun ngang ceiling insulator di ko maumpisahan....takot ako. Originally Posted by Islaw*Palitaw
-
Tsikot Member Rank 2
- Join Date
- Aug 2007
- Posts
- 623
June 9th, 2008 12:32 AM #11Yun siguro ang isusunod ko, pero unahin ko muna sa harap,pag-iisipan ko pa kung kakayanin kong maglagay sa likod...hehehehe Originally Posted by jaspi11
-
Tsikoteer
- Join Date
- Feb 2008
- Posts
- 903
February 26th, 2009 09:49 AM #12What is the Head Unit of the Avanza, pareho lang ba ng Innova? 2 din fujitsu ten? may rca out na ba yung HU unit ng avanza or kaylangan pang lagyan ng converter? Originally Posted by Islaw*Palitaw
-
Tsikoteer
- Join Date
- Dec 2007
- Posts
- 3,938
February 26th, 2009 10:10 AM #13Sa Avanza G, Kenwood DPX-MP2090 ang HU, sir. Originally Posted by attyallanlatras

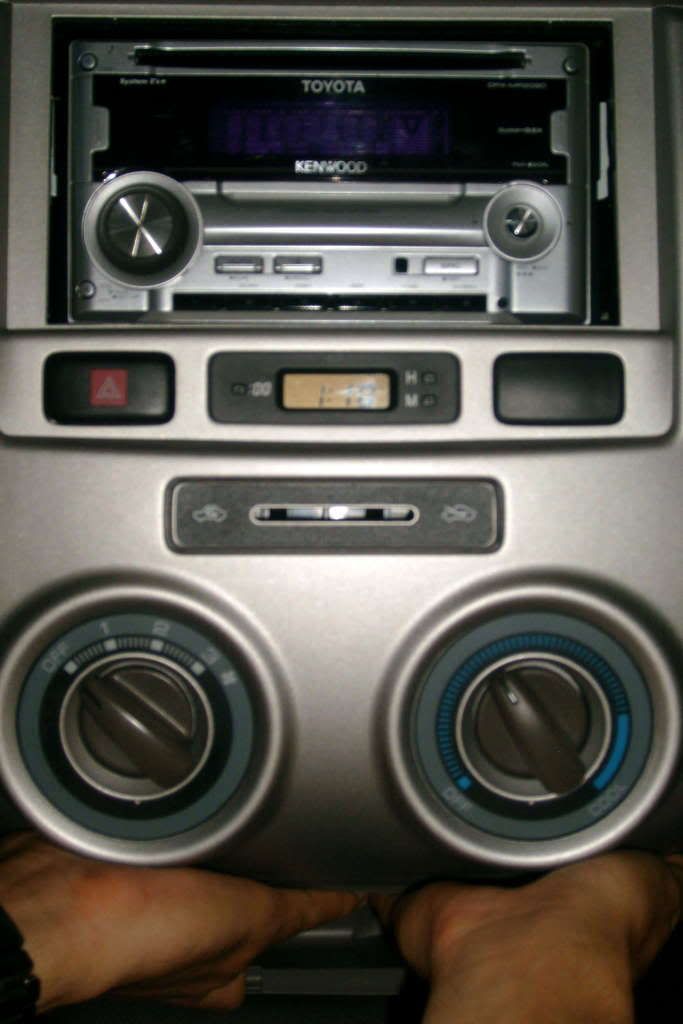
If you look at this pic from my prior post, you'll see the sub/rear line out where I inserted the blue RCA cable pair:

HTH.Last edited by woohoo; February 26th, 2009 at 10:38 AM.
-
 Verified Tsikot Member
- Join Date
- Mar 2010
- Posts
- 21
March 10th, 2010 12:44 AM #14mga kuya, ano po ba magandang separates at coaxial para sa avanza? pti anong size ng mga speakers? newbie lang po ako and bata pa ko bka lokohin lang ako..
 pti ok na ba ung head unit ng avanza j pag mag lalagay ng subs? thank you po mga sir.

 Reply With Quote