
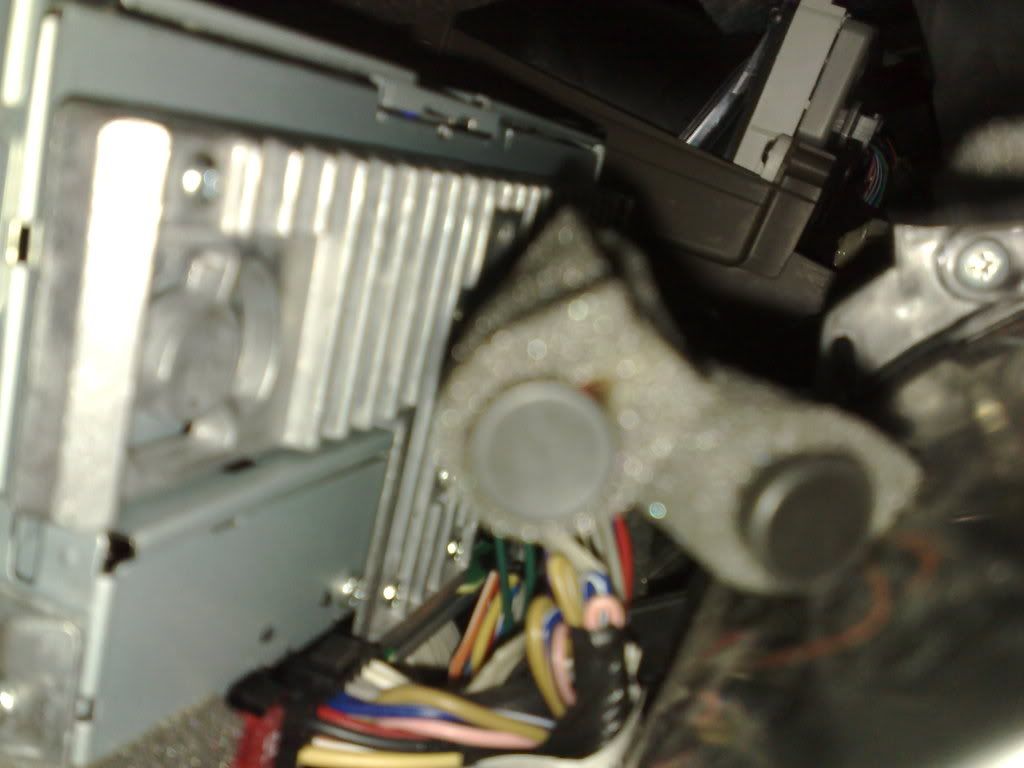
This is how the back of your 1.5G Head Unit looks like at the back (Mouse's Eyeview)
...and this is how the LINE-IN looks like when you want to connect your RCA Jack at the back of the HU.
The Largest Car Forum in the Philippines
- Forums
- Discussions
- Events
- Community
Results 1 to 20 of 63
-

 Tsikot Member Rank 2

- Join Date
- Aug 2007
- Posts
- 623
June 4th, 2008 09:05 AM #1
-
Tsikot Member Rank 2
- Join Date
- Aug 2007
- Posts
- 623
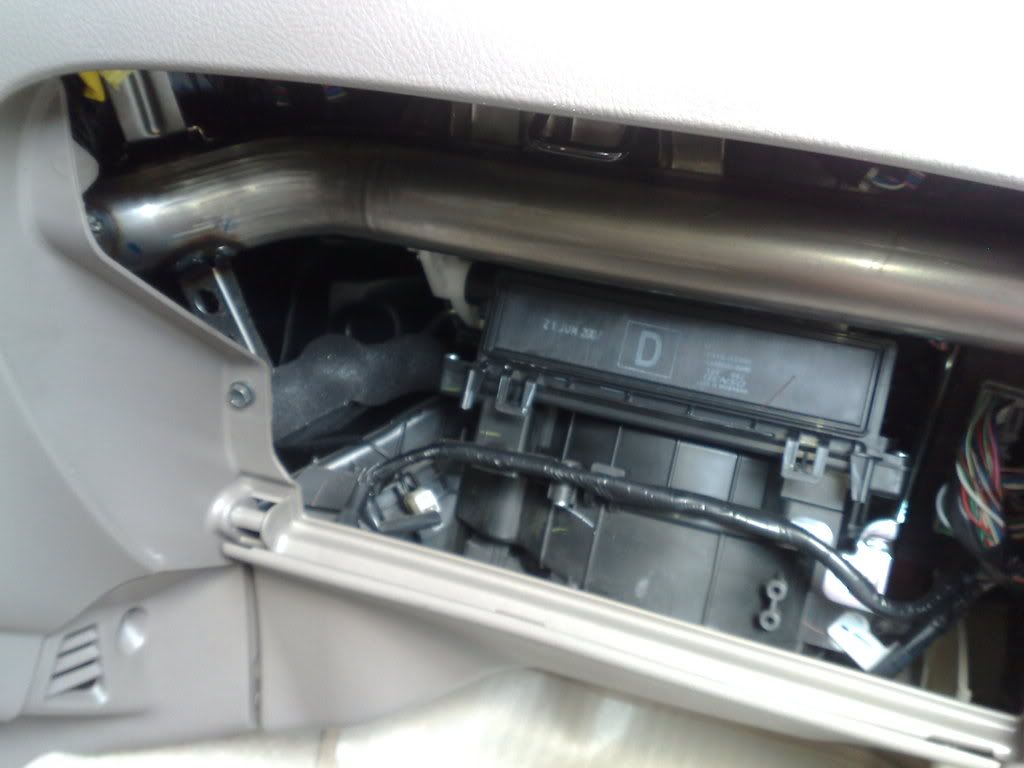
June 4th, 2008 09:18 AM #2STEP 1 - Remove the Glove Compartment Unit by sliding it up-right.
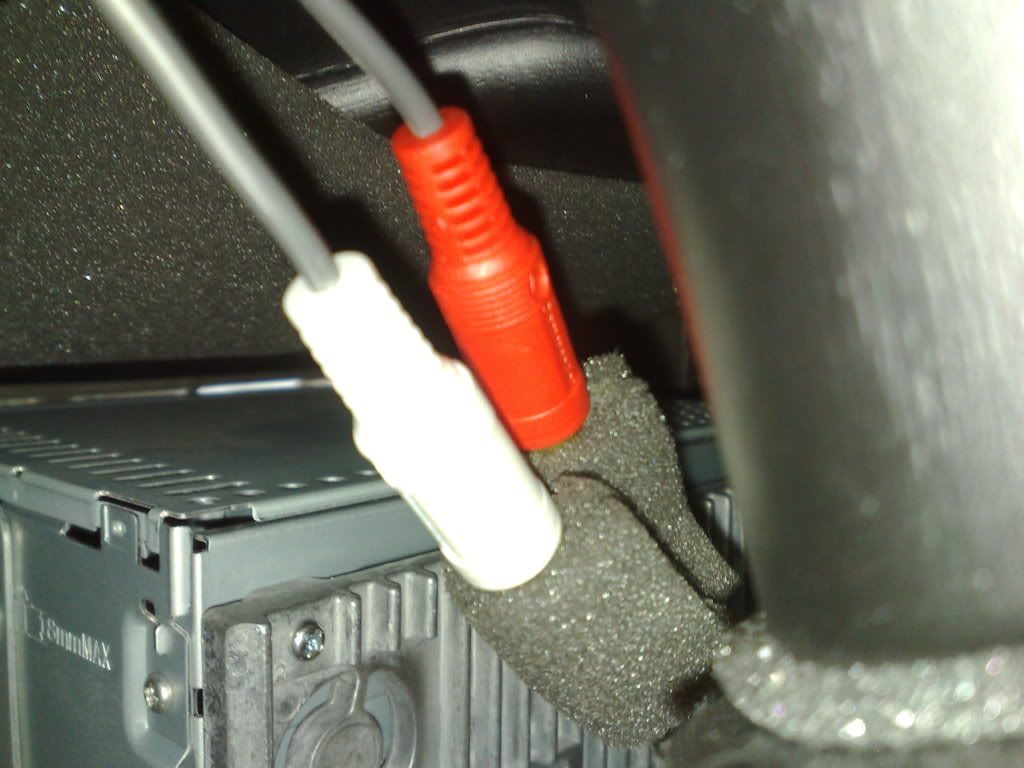
STEP 2 - Plug the RCA Jack (YELLOW CABLE) at the SUB-OUT connector by reaching it with your right arm.
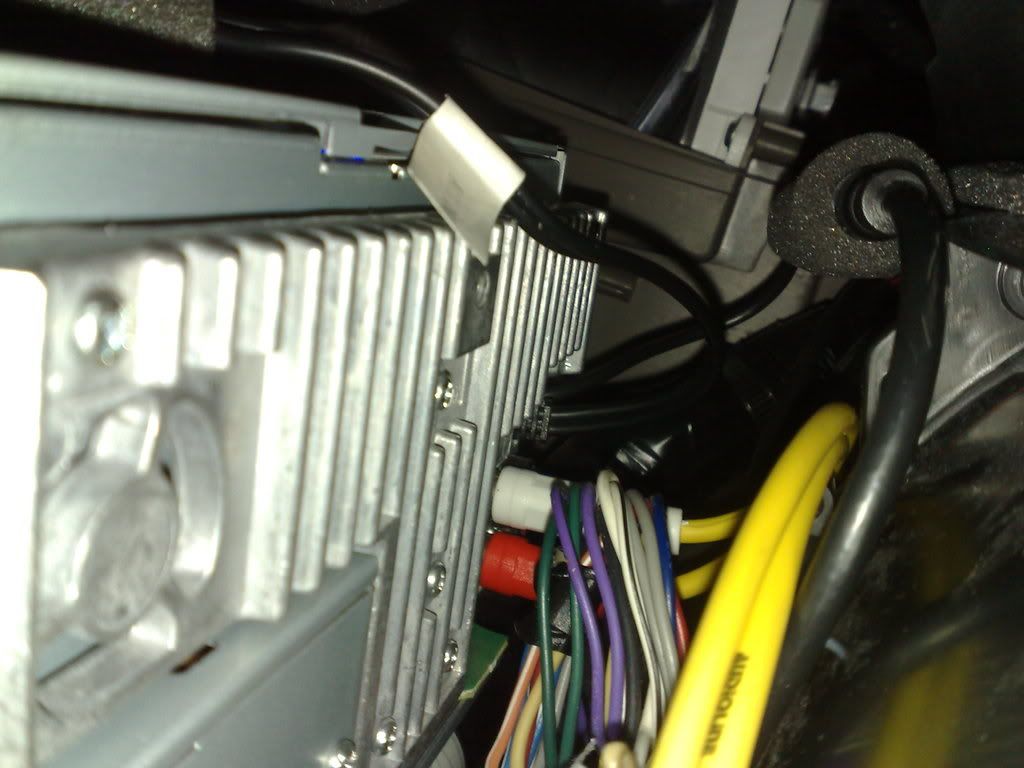
STEP 3 - Now connect the RCA Jack (Red and White) for the LINE-IN Connector.
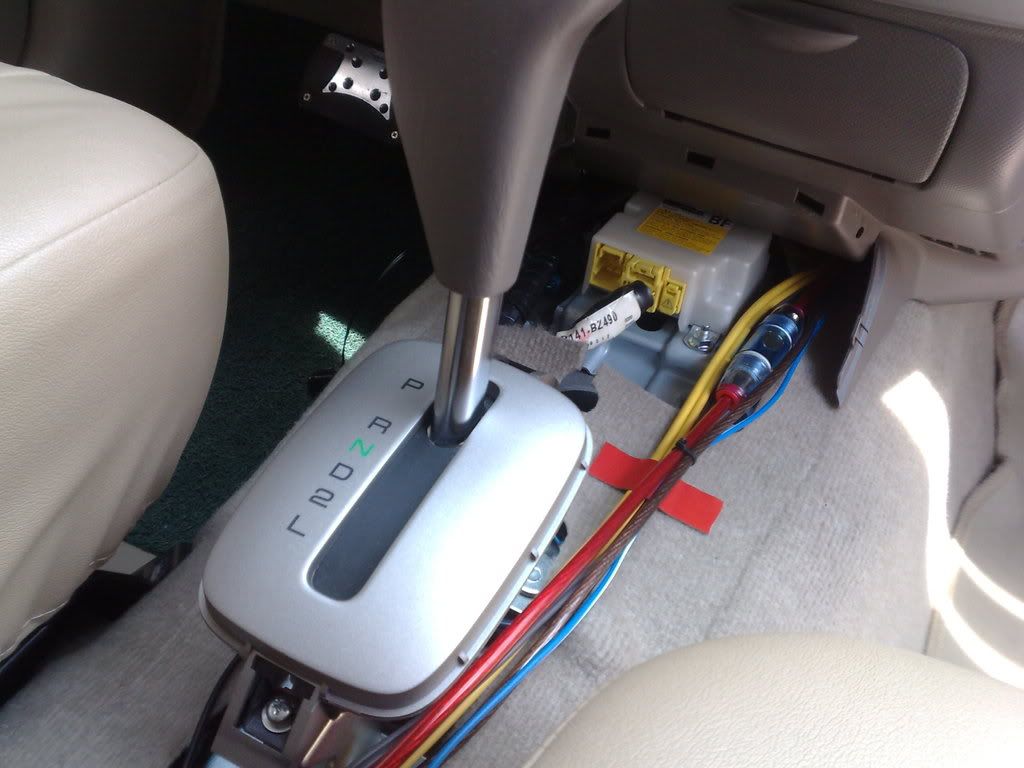
STEP 4 - Run it under the center console to hide the cable...of course by removing your center console box
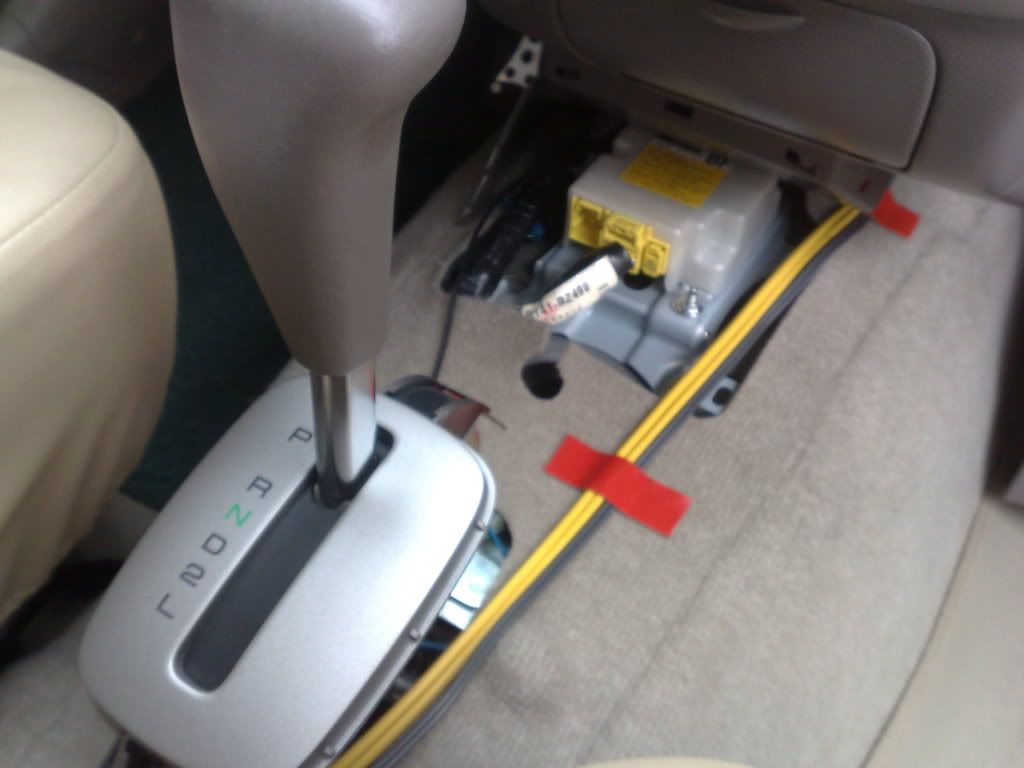
...and you're finished, you are now ready to connect any input (MP3) and output (SUBs) to your head unit.
-
Tsikot Member Rank 2
- Join Date
- Aug 2007
- Posts
- 623
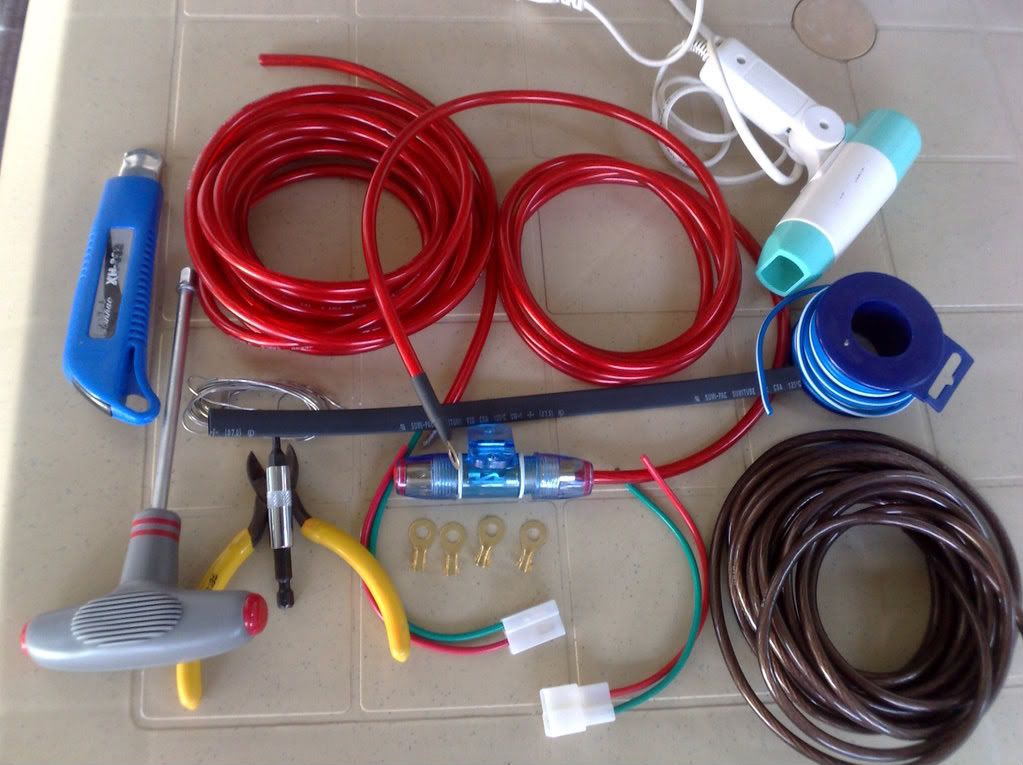
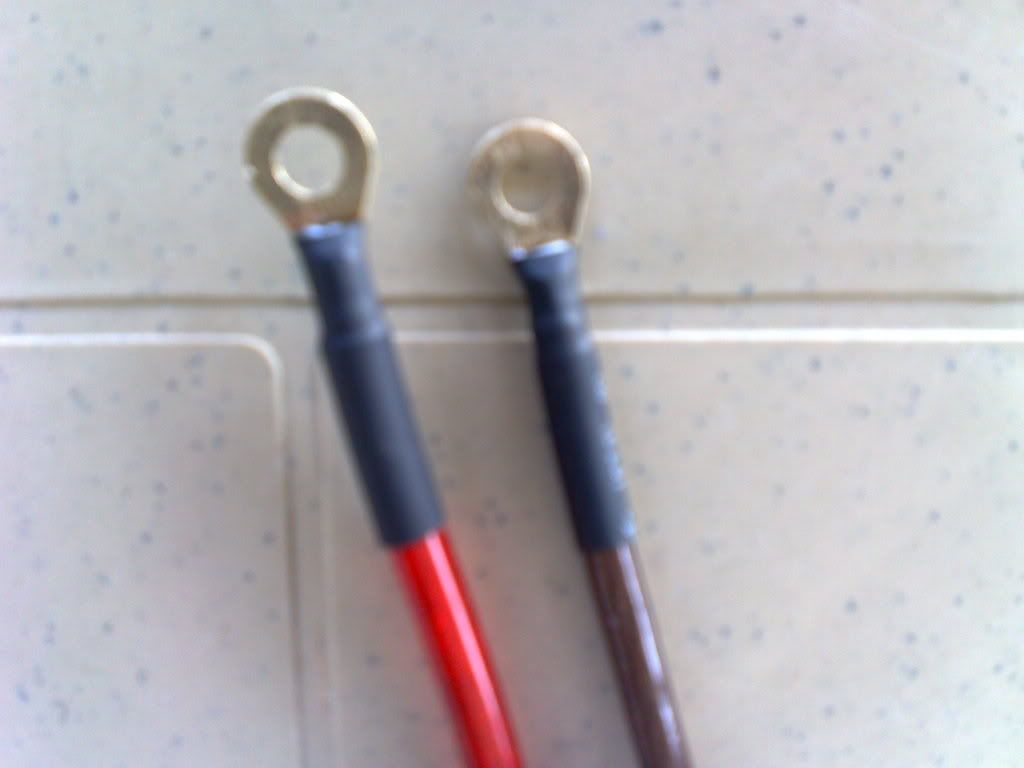
June 4th, 2008 09:34 AM #3Preparing the 12V TAP
STEP 1 - Prepare your things (materials)
STEP 2 - Solder the Circular Eyelet (Round Terminal Lug) on both ends of your 12V power line cables (RED and BROWN)
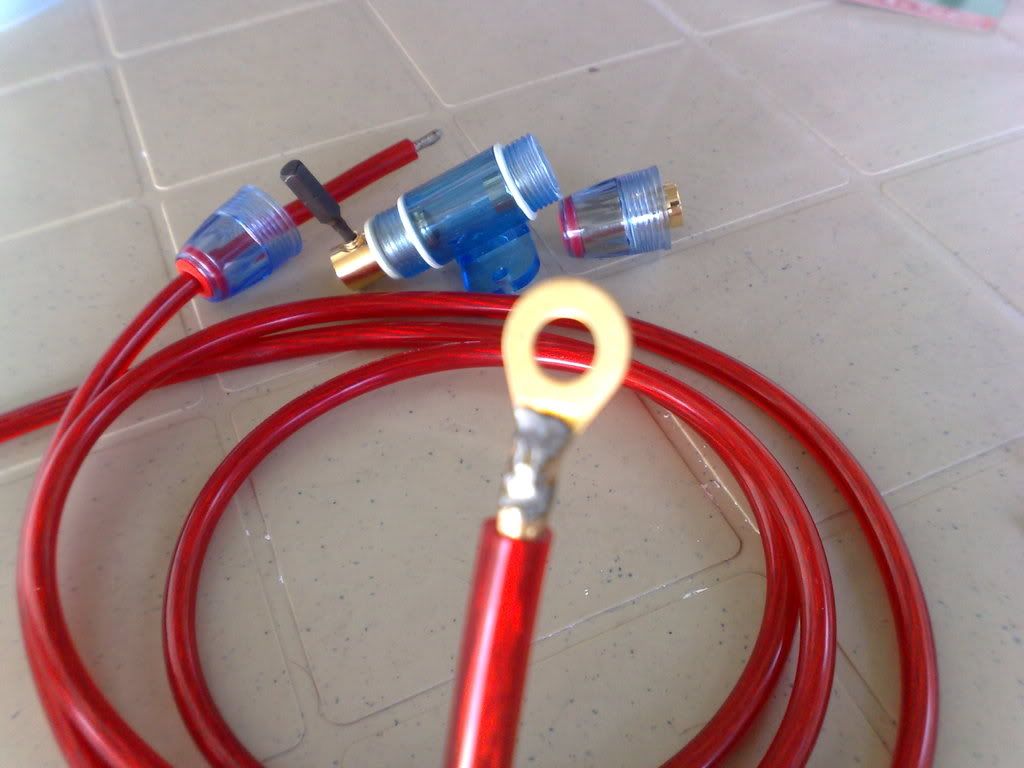
STEP 3 - Heat the shrinkable tube with a hair dryer to cover and secure the solder points on your terminal lug (this will prevent wear and tear)
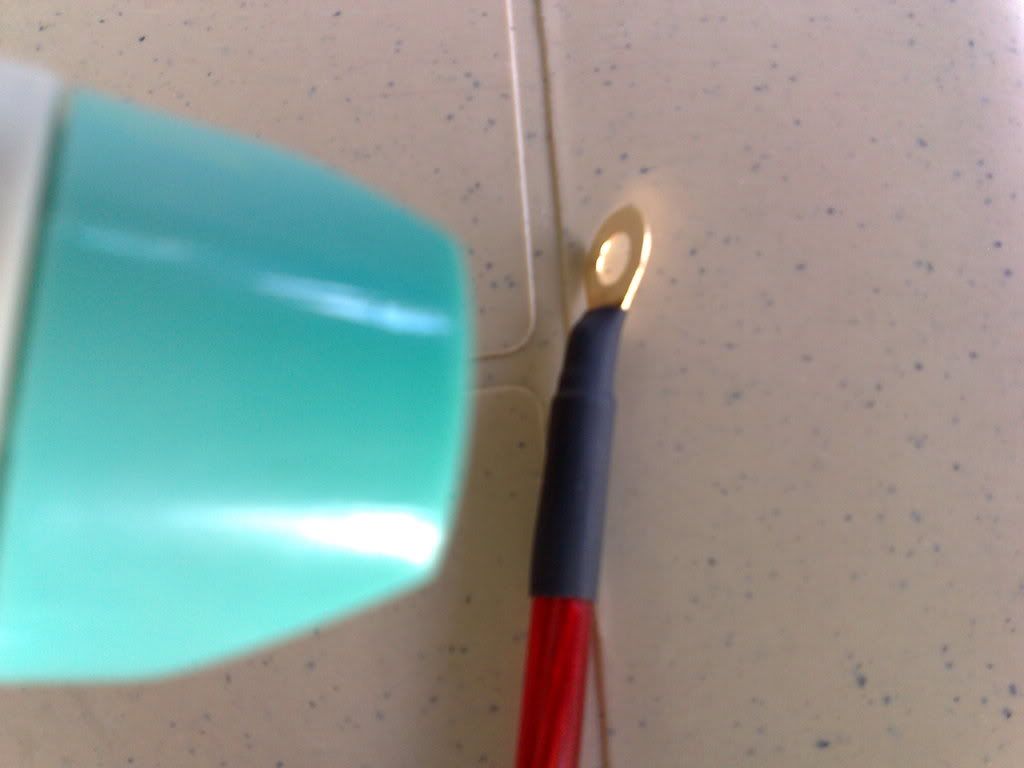
STEP 4 - This is how your 12V TAP will look like after your preparation, now your ready to hook it up.
-
Tsikot Member Rank 2
- Join Date
- Aug 2007
- Posts
- 623
June 4th, 2008 10:17 AM #4Installing the 12V TAP
STEP 1 - Install a guy wire on end of the 12V cables (RED and BROWN) and temporary secure it with electrical tape.
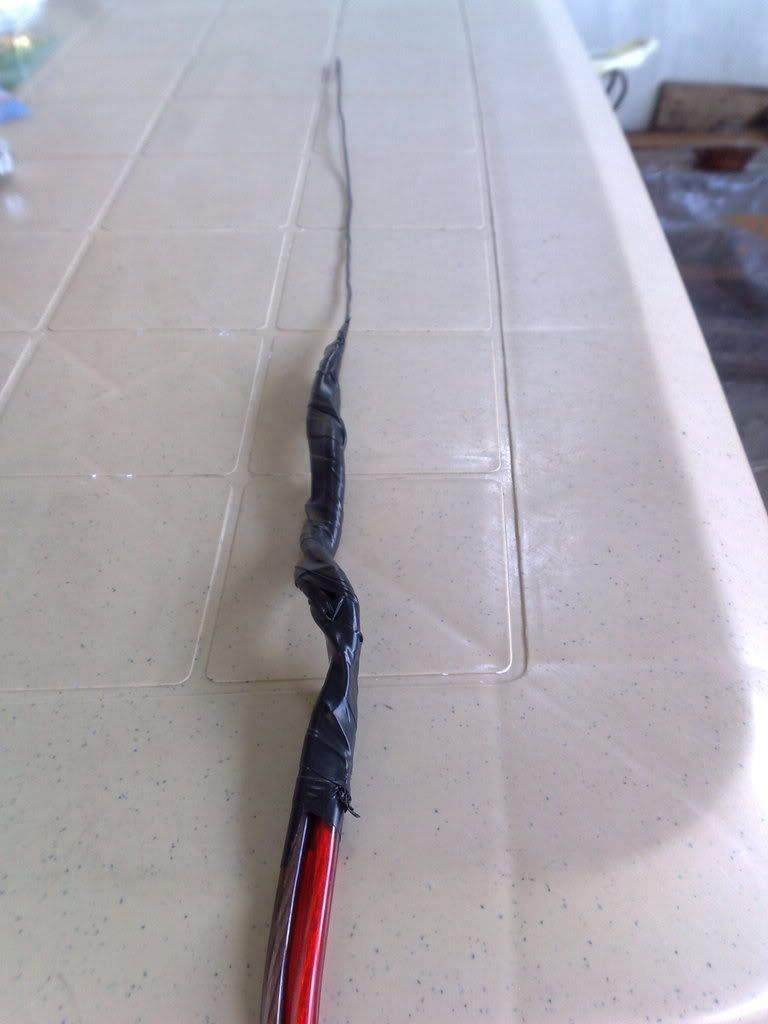
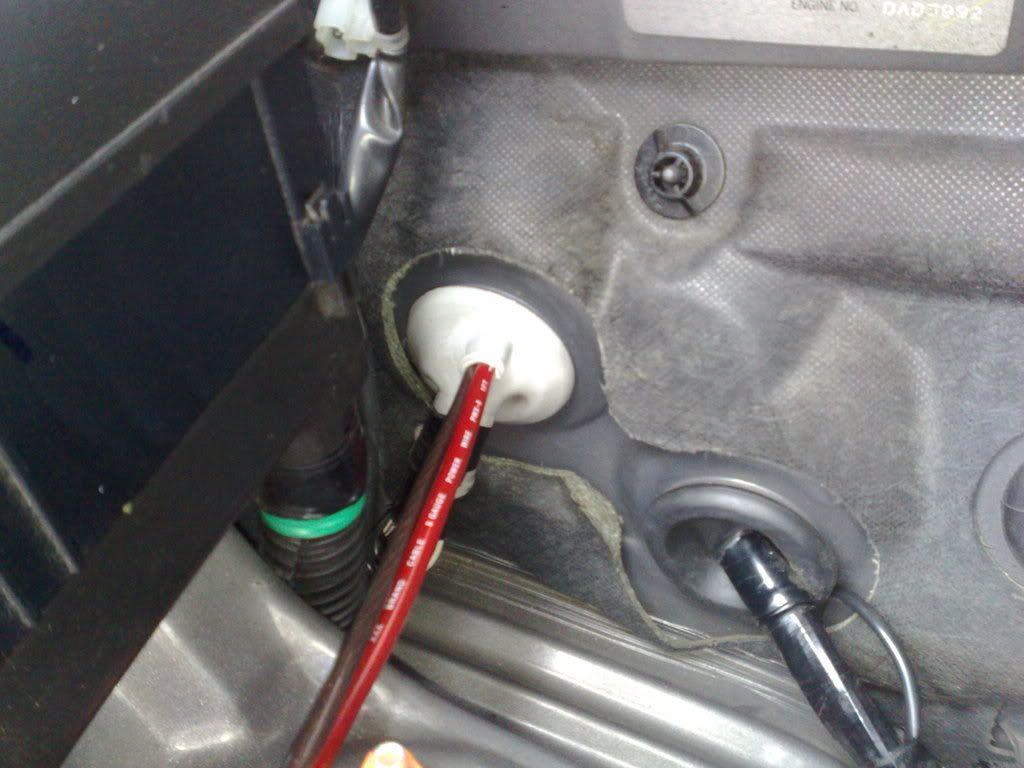
STEP 2 - Our AVANZA already provided an extra poke-in hole for additional power requirement in case we need to tap directly from the battery terminal, all you need is a cutter to cut the rubber opening where we can install the cable. Slowly insert the guy wire into the provided rubber opening (WHITE RUBBER CAP) and slowly slip tour 12V cables inside going to your dashboard.
STEP 3 - Tap the 12V cables into the battery terminal lug, RED wire --> (+)RED and BROWN wire --> (-)GND, then secure the 12V TAP by using a cable tie and attached it together with the existing wiring harness
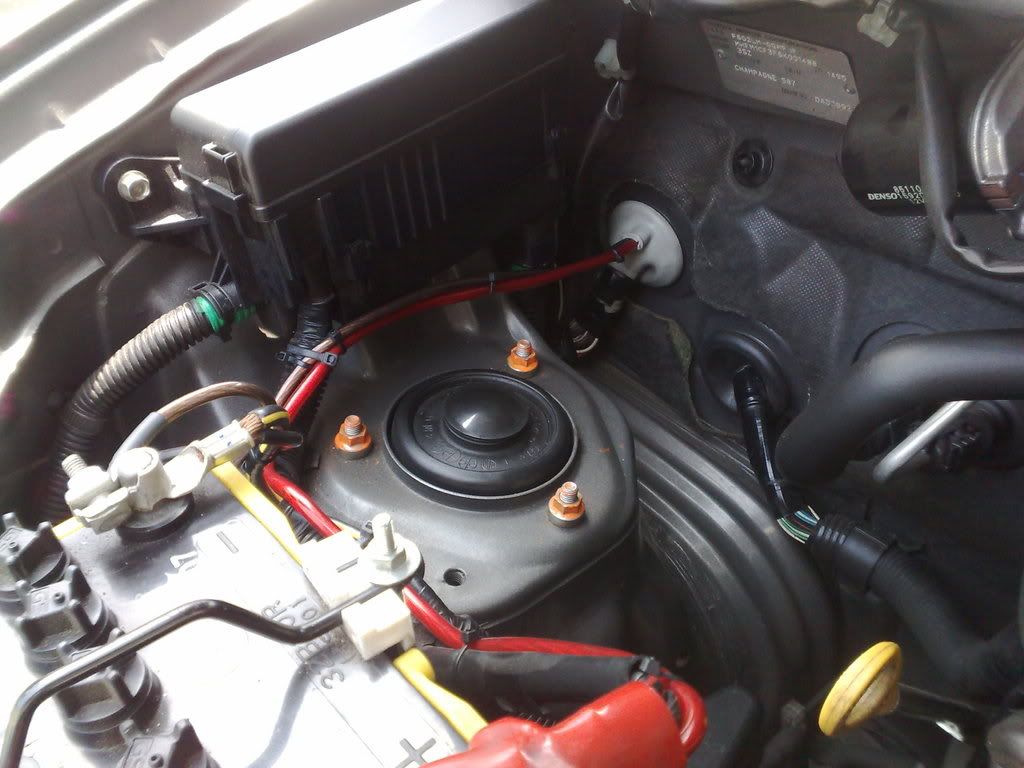
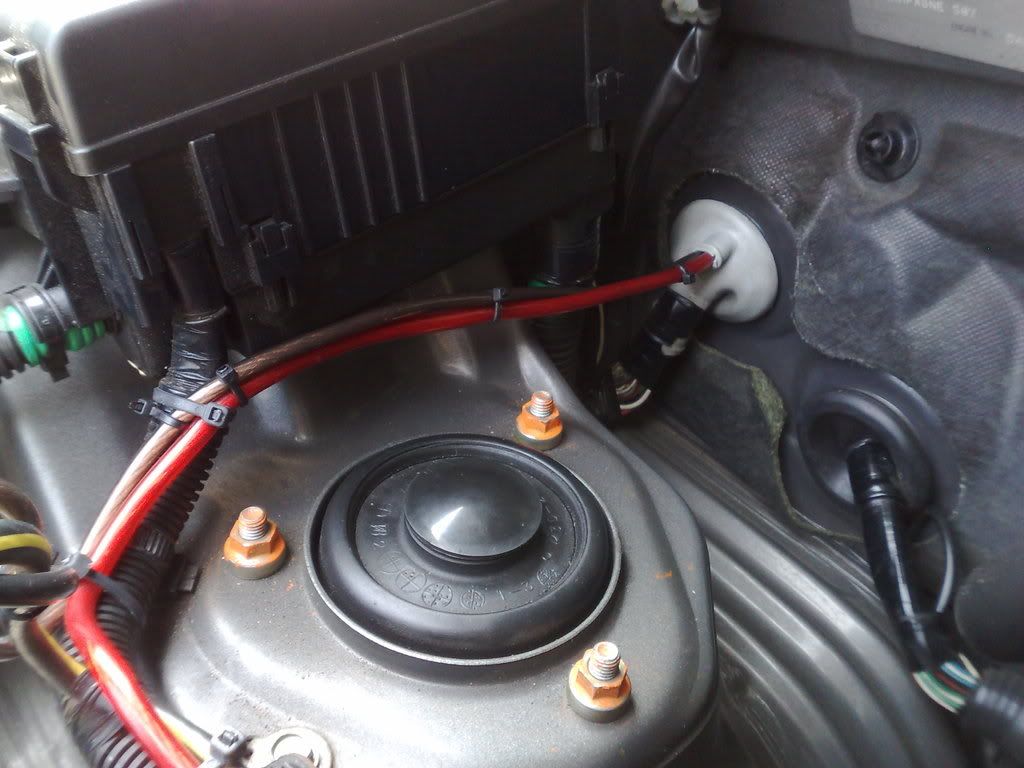
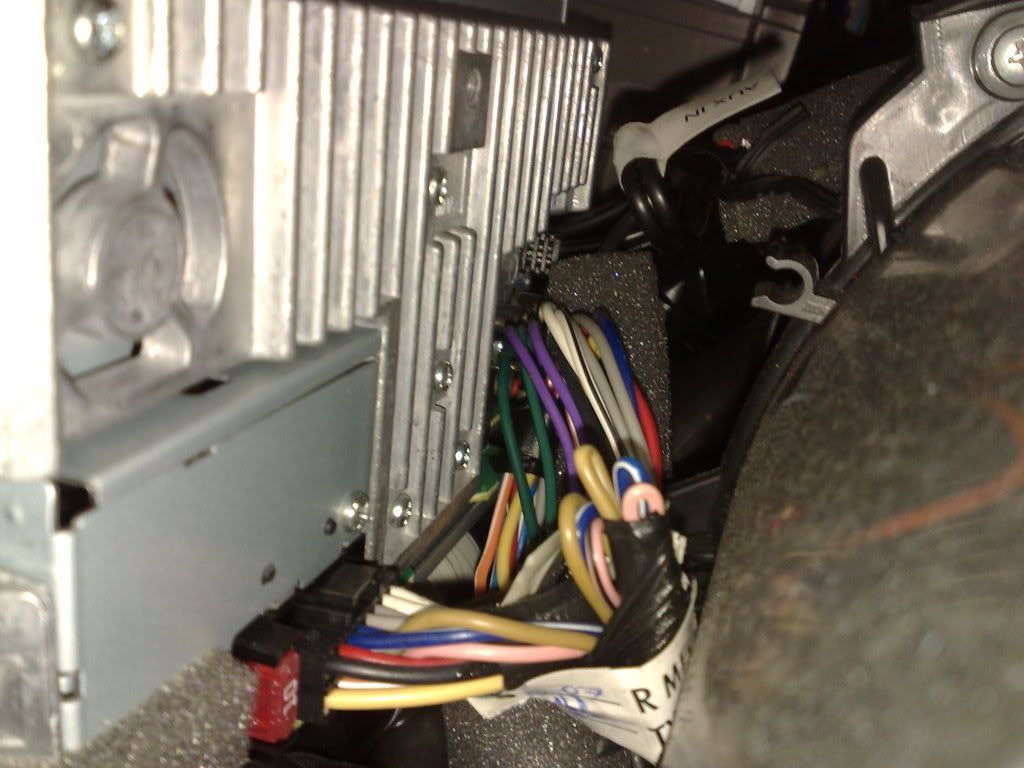
STEP 4 - Run your 12V TAP cables through your dashboard and install the in-line fuse (BLUE casing) in the 12V line for added electrical protection,
-
Tsikot Member Rank 2
- Join Date
- Aug 2007
- Posts
- 623
June 4th, 2008 10:19 AM #5STEP 5 - Tap and splice an extension cable to the POWER CONTROL cable (BLUE and WHITE wire) of the Head Unit for your subwoofer's power control.
STEP 6 -then run all the cables again beneath your center console and arrange the wires not to touch any mechanical parts to avoid physical damage on the wires.
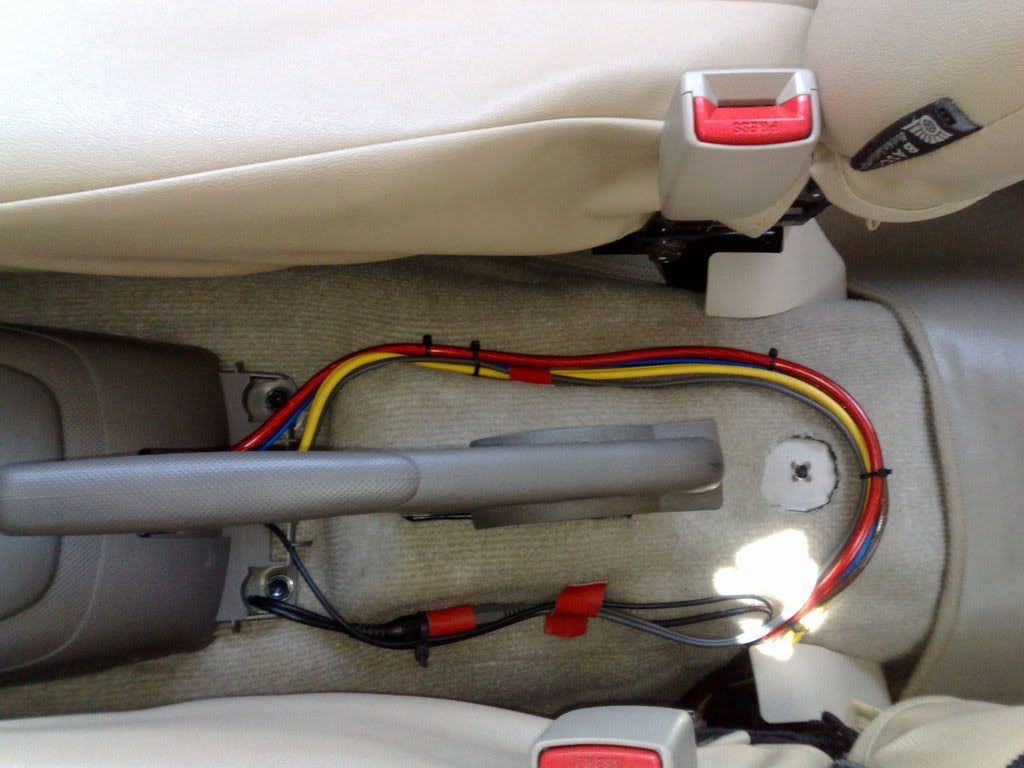
...and now you're set and ready to install your subwoofer.
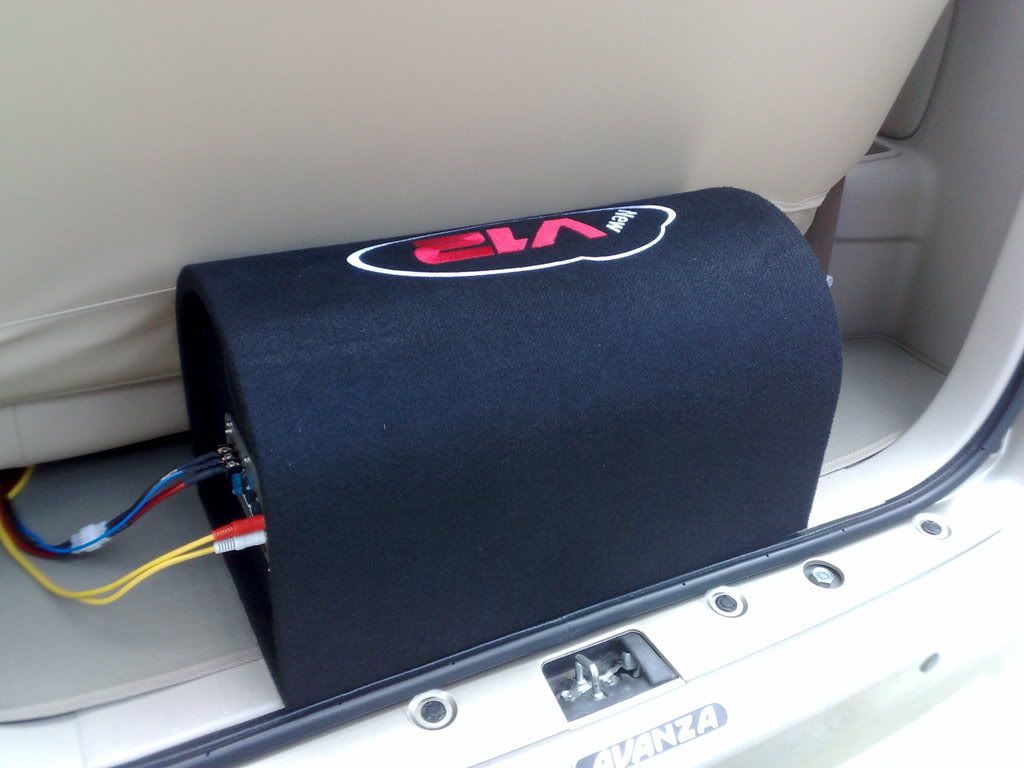
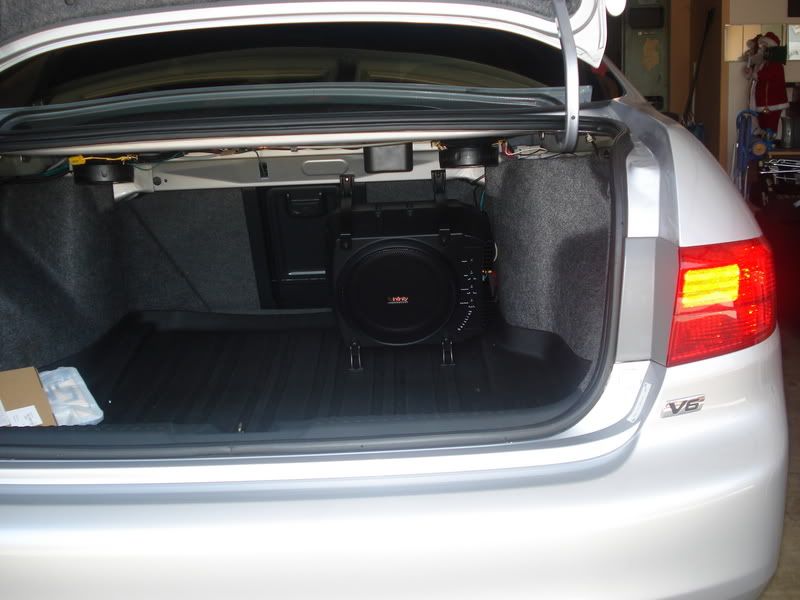
STEP 7 - Install your subwoofer, in this case the V12 10" sub will just fit exactly at the back of your avanza. ENJOY!
LOOKS PRETTY SIMPLE, ISN'T IT?
If I can do it, Yes you can also do it by yourselves!
-
Verified Tsikot Member
- Join Date
- Sep 2007
- Posts
- 207
-
 Tsikot Member Rank 5
- Join Date
- Aug 2005
- Posts
- 7,186
-
 Verified Tsikot Member
- Join Date
- Feb 2008
- Posts
- 95
June 4th, 2008 10:55 AM #8Very nice DIY Sir, with step by step procedure, very clear and neatly done

-
 Verified Tsikot Member
- Join Date
- May 2007
- Posts
- 243
June 4th, 2008 11:03 AM #9tamang tama mge, diba may isesetup ka rin na avanza? Originally Posted by mge

-
 one shot
- Join Date
- May 2007
- Posts
- 2,328
June 4th, 2008 11:39 AM #10Very nice indeed.
I was looking all the picture of your wiring set up and it was pretty good and clean but I have to correct some of your wiring procedure only if you may. I myself was a can install car stereo from basic to advance for private only.
1. Power cable fuse- I believe you put under the ashtray. Your In line fuse must be near to the battery is a must approximately 16 inches. Yours I believe thats more 3ft. from the batt.
2. Power cable- You must isolate that cable (RED) away from other wiring it can radiated others as a result of noise from the electrical system. The best spot to run that cable is beneath the door sills all the way to trunk.
3. Why are you running ground wire from the engine bay connected to the battery? If you are using an Amp...cut a piece of that ground wire approximately 3 to 4 ft. connect into your Amp.ground terminal and connect the other end in the chassis. Always use a ring terminal or spade for better contact.
Overall.....YOU ARE GOOD!
If you have any question fell free to ask...
Last edited by v6dreamer; June 4th, 2008 at 11:42 AM.
-
 Tsikot Member Rank 2
- Join Date
- Aug 2006
- Posts
- 2,320
-
 ACP Member
- Join Date
- Nov 2007
- Posts
- 715
June 4th, 2008 01:53 PM #12Thats right and most of the short circuit accident happen because of this. Imagine we are running a live 12V with more than 40 amperes without a relay or safety fuse, it could burn your vanzy bro Originally Posted by v6dreamer
 . My advice is you should put the fuse before the firewall.
The DIY job was very good, i like it when you use the hair blower to shrink the insulation. GOOD JOB..!
-
 Tsikoteer
- Join Date
- Oct 2007
- Posts
- 2,113
June 4th, 2008 02:14 PM #13Another excelent DIY presentation! Nice work Islaw
Next is DIY is power windows and interior upgrade of Avanza J.
Coming Very Soon!!!
Producer: Shadow3616931
Director: Marfin
Actor: Marfin
Supporting Actor: Shadow
-
Tsikot Member Rank 2
- Join Date
- Aug 2007
- Posts
- 623
June 4th, 2008 03:45 PM #14 Originally Posted by mge
Originally Posted by eabanilla
Originally Posted by meledson
Originally Posted by eyshmechanic
Thanks to everyone!
-
Tsikot Member Rank 2
- Join Date
- Aug 2007
- Posts
- 623
June 4th, 2008 05:11 PM #15Thanks for your very informative comment V6dreamer! Originally Posted by v6dreamer
Yes thanks! I'm aware of that, this is just temporary until such time that I already have a terminal binding post to replace the fuse position where I can tap my other 12V requirements in the future, in that case i'll relocate the in-line fuse outside near the battery. these serves as a reminder. Originally Posted by v6dreamer
Nice suggestion, however I just want the installation to be as simple as possible, anyway we are just dealing with a 12V DC (Direct Current) here so there's not much of an electrical noise compared to a distorted AC voltage source where harmonics are very much present. Originally Posted by v6dreamer
My idea is to lessen the ground loop resistance as much as possible between the built-in amplifier of the V12 Active Sub and the (-) terminal of the battery to avoid humming. Remember that the built-in amplifier of the V12 subwoofer has no adequate shielding and heat sinking compared to a full blown external amp with adequate aluminum casing (shielding) so it's very important to maintain a very good ground resistance since copper has less resistance as compared to steel (car chasis). Originally Posted by v6dreamer
Last edited by Islaw*Palitaw; June 4th, 2008 at 05:14 PM.
-
Tsikot Member Rank 2
- Join Date
- Aug 2007
- Posts
- 623
June 4th, 2008 05:26 PM #16Thanks bro for the reminder, yes this is just temporary...i'll upload an update as soon as i have installed the terminal binding post to replace the fuse. That's why I haven't put an electrical tape around the wirings from the engine bay. Excited na kasing mapa-andar yung subs kaya mabilisan ang kabit...Hehehehe. Originally Posted by Marfin

-
Tsikot Member Rank 2
- Join Date
- Aug 2007
- Posts
- 623
June 4th, 2008 05:30 PM #17Akala ko mauna muna yung DIY mo sa Ceiling Heat Insulation Material before itong next project mo? Tapos mo na ba yun bro? Originally Posted by shadow3616931

-
Verified Tsikot Member
- Join Date
- Sep 2007
- Posts
- 207
June 4th, 2008 06:48 PM #18yes sir. planning to setup 2 units of avanza J... hinihintay ko lang yung customized box... siguro paguwi ko ulit dito maumpisahan na... Originally Posted by eyshmechanic

-
one shot
- Join Date
- May 2007
- Posts
- 2,328
June 4th, 2008 09:31 PM #19We have the same built powered Subs and my ground connected directly into the chassis bolts.
Last edited by v6dreamer; June 4th, 2008 at 09:44 PM.
-
ACP Member
- Join Date
- Nov 2007
- Posts
- 715
June 5th, 2008 01:08 PM #20 Originally Posted by Islaw*Palitaw
Sir Islaw magkano ganyan? saan mo binili?
Ok ba yung bass sound nya?
Hindi ba tumatama sa back door?
Madami ba questions ko
Thanks

 Reply With Quote