

Results 1 to 10 of 7833
-

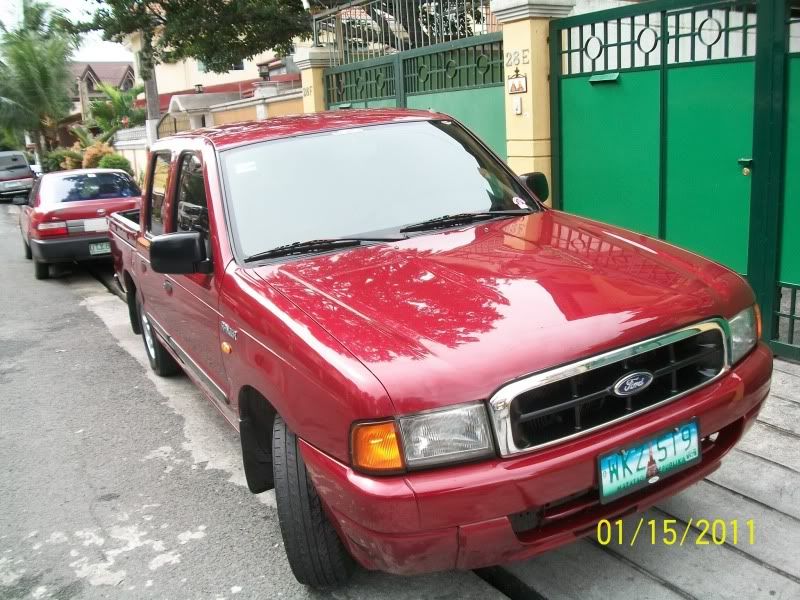
 I... see... RED!

- Join Date
- Jun 2007
- Posts
- 2,840
January 16th, 2011 08:34 PM #1Tamang OC lang - a newbie's guide to car appearance maintenance
FOREWORD.
First of all, I'd like to thank sir Edwin, ma'am madkatz and all the tsikoteers at the Detailing thread for sharing their knowledge and experiences about detailing. I got most of my methods based on their inputs, and this would never be possible without them.
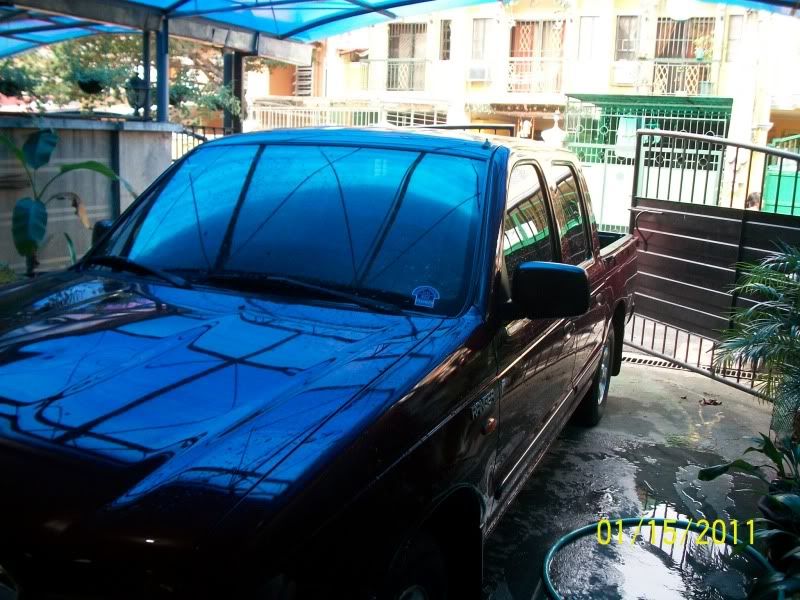
Like most of us, I came from using old t-shirts and whatever cloth available to clean our rides. I saw rain as a blessing since I could just wipe it down afterwards to clean it. Our Ranger attests to almost ten years of that. Now I am horrified whenever I see Bimmers and Mercs running around practicaly swimming in swirl marks.
This is not an end-all, be-all comprehensive guide to auto detailing, but rather a guide to a couple of common car care procedures for both enthusiasts and newbies.
I am also not in any way affiliated with Microtex, Mother's, Optimum, Collinite, Micromagic, Joy, or Perla.
Any comments or suggestions to improve this would be welcome!
WASHING:
Important concepts:
1) Clearcoat - automobile paint has a protective layer of non-pigmented resin over it. This is the clearcoat.
This is the surface that gets scratched during improper washing or correction.
Any kind of abrasive, such as rubbing compounds, and polishes will erode the clearcoat.
An intact clearcoat gives an "orange-peel" like appearance
Products that are "clear-coat safe" are non-abrasive
2) Swirl marks - these are small scratches that are not very apparent because they are usually found superficially. They can be seen using LED lights or Xenon lamps.
A typical black car during nighttime, when shined with headlights, will reveal these swirl marks.
3) Water marks - these are left by evaporating water. they may, or may not be superficial. Superficial marks, such as mineral deposits can be removed by claying or dissolution with an acid.
*note: don't wear watches, rings, belt buckles, or steel-buttoned shorts while washing or waxing. these can scratch and ding the surface
*note: don't wash in an open area on a hot day. it'll be a watermark farm.
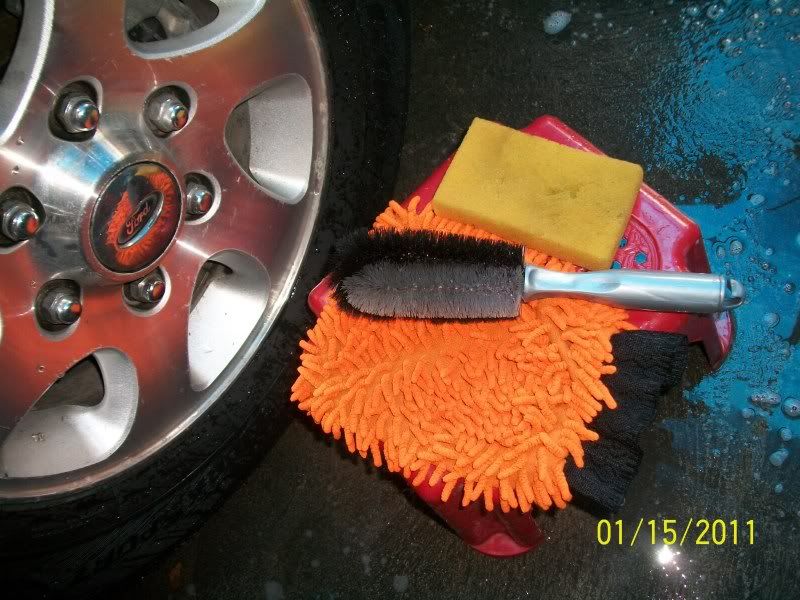
Must needs:
1)at least 2 buckets
Q: why 2 buckets?
A: one will be used for dissolving the shampoo in, the other will be a rinsing bucket.
2)car shampoo (Microtex Shampoo ~P150)
Q: why a car shampoo and not dishwashing liquid or powdered detergent?
A: dishwashing liquids, such as joy, are grease strippers, and the waxes that protect a car's paint is made up of oils. Using dishwashing liquids will strip these waxes. Powder detergents will leave unsightly streaks when they dry.
Q: why do I need shampoo at all? diba okay na water+chamois or water+washmitt?
A: water cannot lubricate the surface enough to prevent microscratches from occuring. a typical "driver-maintained" car (water+chamois) is guaranteed to have a ton of swirl marks.
3)microfiber washmitt (Microtex - ~P320, ACE - ~P90)
Q: why a washmitt and not a sponge?
A: a microfiber washmitt will pick up the dirt from the surface. A sponge will drag dirt across the surface, causing micro-scratches.
Q: are the cheap microfiber washmitts from ACE good for this?
A: they're okay for the job, but if you get these single-sided washmitts, you will need two of them. In comparison, a double sided washmitt can be flipped, so that the other side can be used for the bottom half of the vehicle
4)microfiber chamois (Microtex chamois: P250) or a microfiber drying cloth (Microtex Elite: P600-900, depending where, Water Magnet)
Q: why non-rubber?
A: like a sponge, rubber chamois will drag any residual dirt across the surface, causing microscratches. a microfiber chamois will pick them up.
*Rubber chamois can also strip wax.
Q: aren't microfiber chamois less effective than rubber ones?
A: microfiber chamois hold less water, and may take some time before "sucking up" water. They work more effectively when already damp (but not soaked)
*a microfiber drying cloth, such as the Microtex Elite is more capable than either kind of chamois (dries an SUV without needing a single squeeze) and will not scratch the surface (due to its wafer-like microfiber weave).
Q: what if I don't have a microfiber chamois or cloth?
A: "slapping" the car with a rubber chamois to dry it is safe for the clearcoat.
5)cheap microfiber cloth (i.e. the 3 for 88 pesos from micromagic)
Q:for?
A:drying the mags, the doorsills, the engine bay
6)sponge
Q:akala ko ba di kelangan ng sponge?
A:para sa wheel wells!
Others:
1)cheap microfiber washmitt for the mags. (i.e. the one available in ACE for less than 100)
Q: what if I don't have one?
A: a cheap microfiber (i.e. micromagic) will do
2)tire brush (Mr. Clean: P:250, Mothers: ~P200)
*note: the Mr. Clean brush can be used for the mags themselves
3)electric blower/leaf blower (900-1.5k in RAON, depending on the brand)
*note: this is for the crevices, crannies, door handles, and emblems to prevent formation of hard water deposits
Q:What if I don't have one?
A:you could manually blow at these areas with or without a straw, but be prepared to get light headed. Alternatively, you can just try to reach at these places with a microfiber cloth.
4)pressure washer
Q:are there any dangers to using pressure washers?
A: not really, but if the pressure is too strong, it can strip wax.
Procedure:
1)Prep the materials
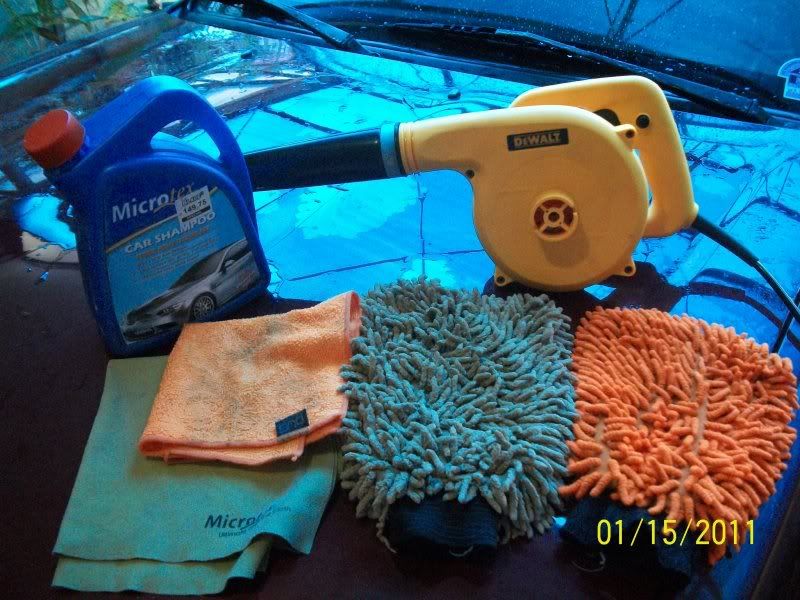
~Microtex Washmitt, ACE washmitt, Microtex Chamois, Micromagic microfiber, Leaf Blower
2)Prep the buckets
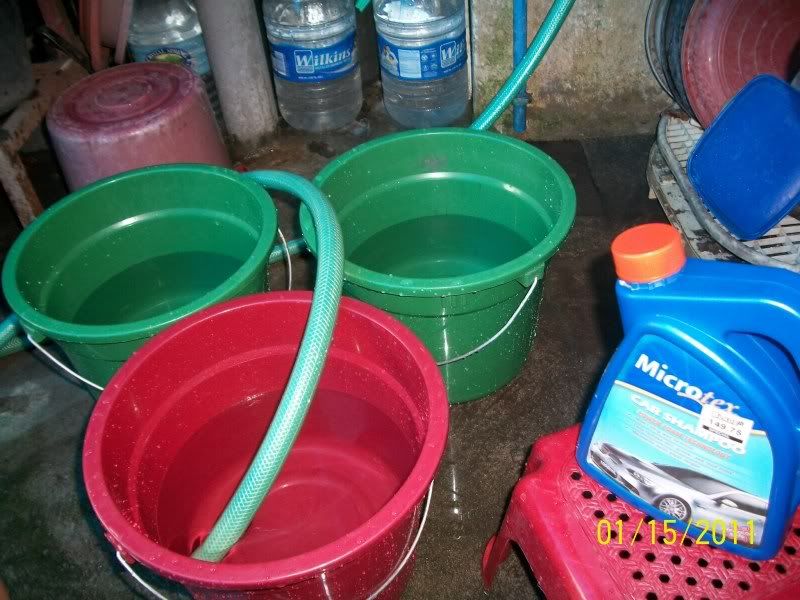
Q: why three?
A: personal preference, I put a rinse bucket on each side of the car for easy access. Half a bucket each to conserve water.
Q: why is one red?
A: to prevent confusion, the red one is for the shampoo-containing water.
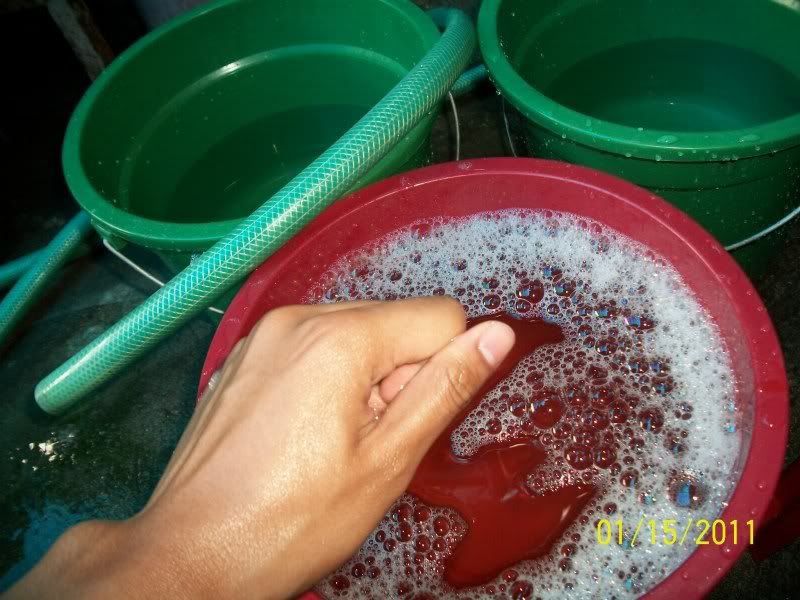
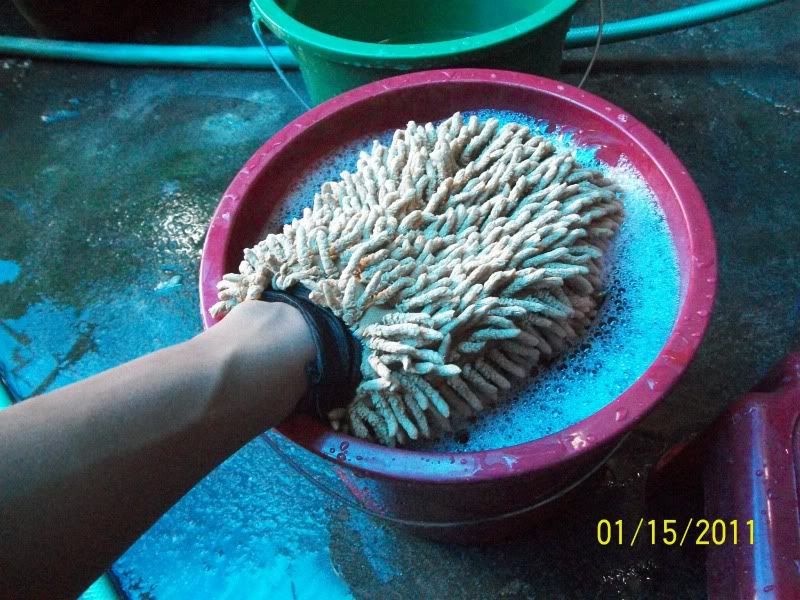
3)Prepare the shampoo.
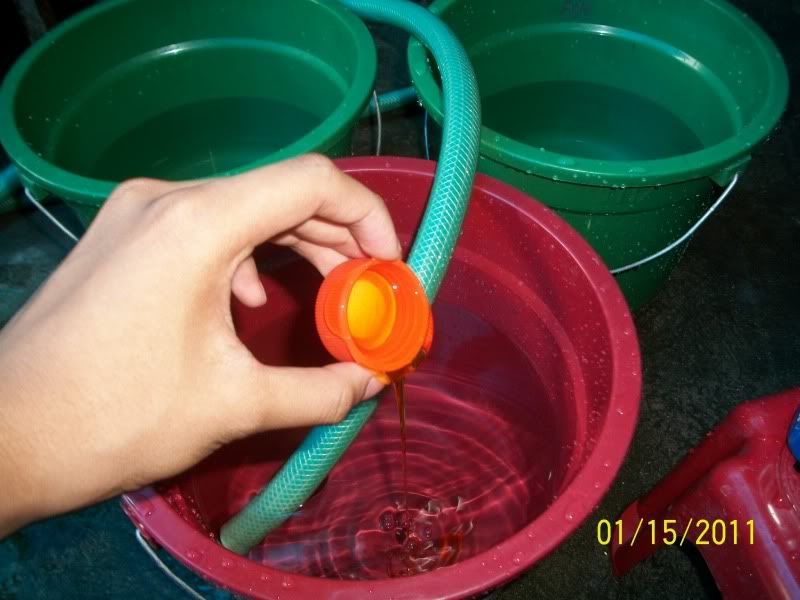
Q: how do you know how much capfuls to use?
A: stir the mixture, then try to feel it between your fingers
if it is slippery, it's good to go. In a bucket of this size, I usually use three capfuls
Q: does it need to be bubbly?
A: no. lubricity (how slippery it is) is more important
4)Wet the car
if using a pressure washer, you can use it to clean the wheel wells.Last edited by scharnhorst; January 16th, 2011 at 08:52 PM.
-
I... see... RED!
- Join Date
- Jun 2007
- Posts
- 2,840
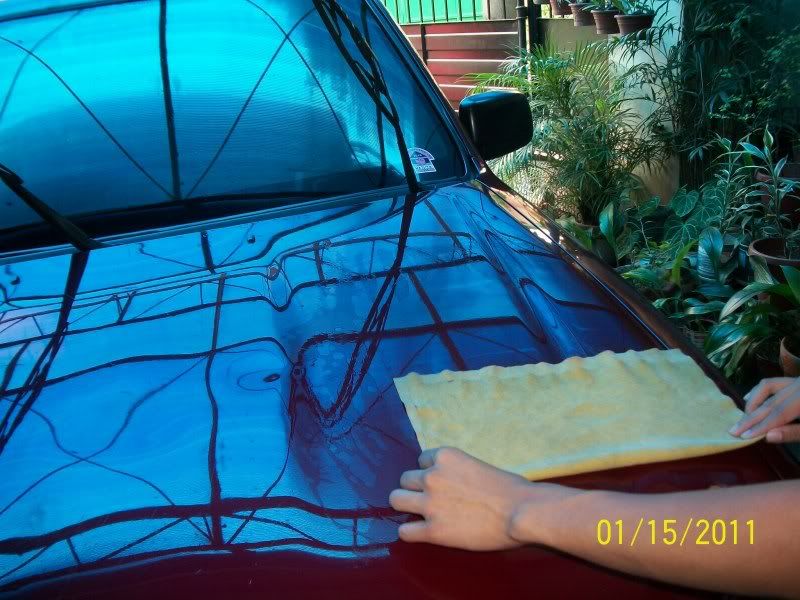
January 16th, 2011 08:34 PM #25)Cleaning the Body
i. dip the half-surface to be used onto the shampoo+water solution. No need to immerse the entire mitt. Just make sure the entire thing is damp before dipping it into the bucket
ii. wipe it across one panel. Let the washmitt's weight apply the pressure onto the surface.
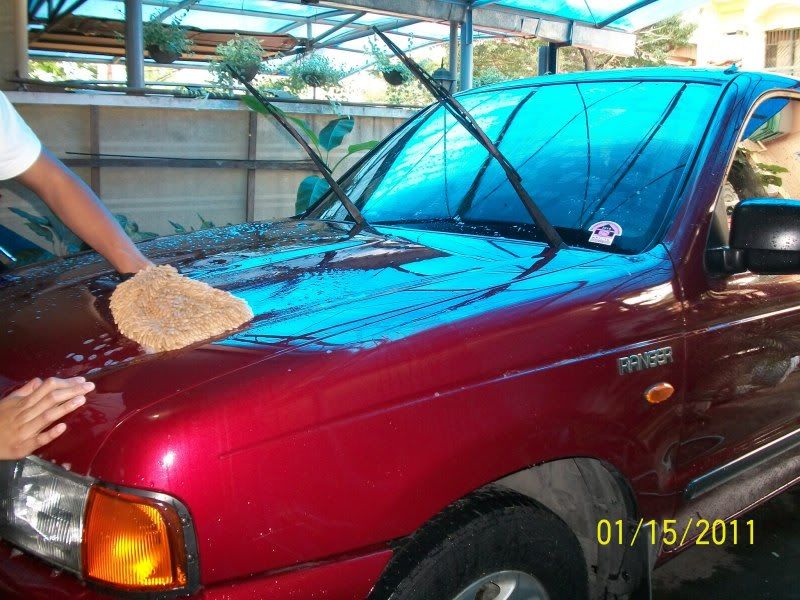
iii. rinse the washmitt with the rinse bucket after one panel.
*Remember: Kusutin ang washmitt!
REPEAT i-iii for all the other panels. Yes. shampoo-panel-rinse-shampoo-panel-rinse-shampoo-panel.Last edited by scharnhorst; January 16th, 2011 at 08:55 PM.
-
I... see... RED!
- Join Date
- Jun 2007
- Posts
- 2,840
January 16th, 2011 08:35 PM #3*REMEMBER: TOP to BOTTOM! That means: the hood, roof, and bootlid before everything else.
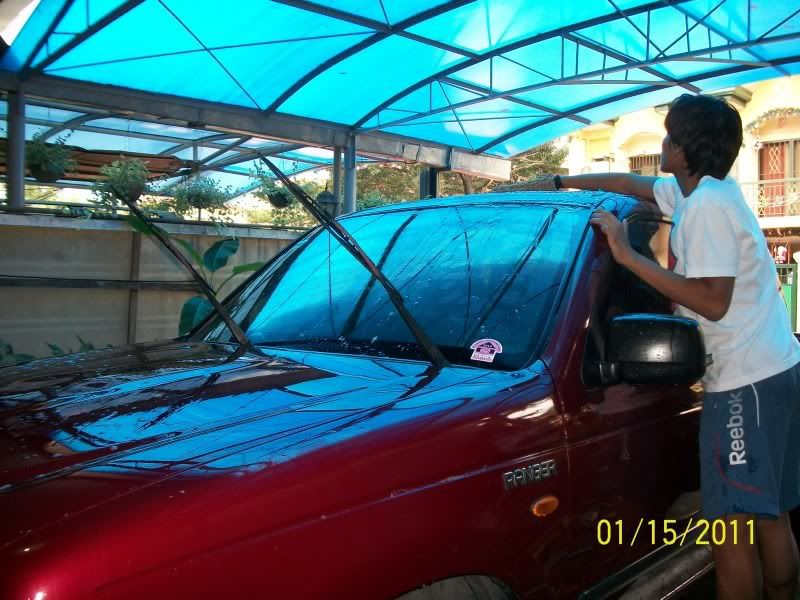
*Above the beltline
*NOTE: before proceeding to under the beltline, FLIP the washmitt if it's double sided, or use another one.
-
I... see... RED!
- Join Date
- Jun 2007
- Posts
- 2,840
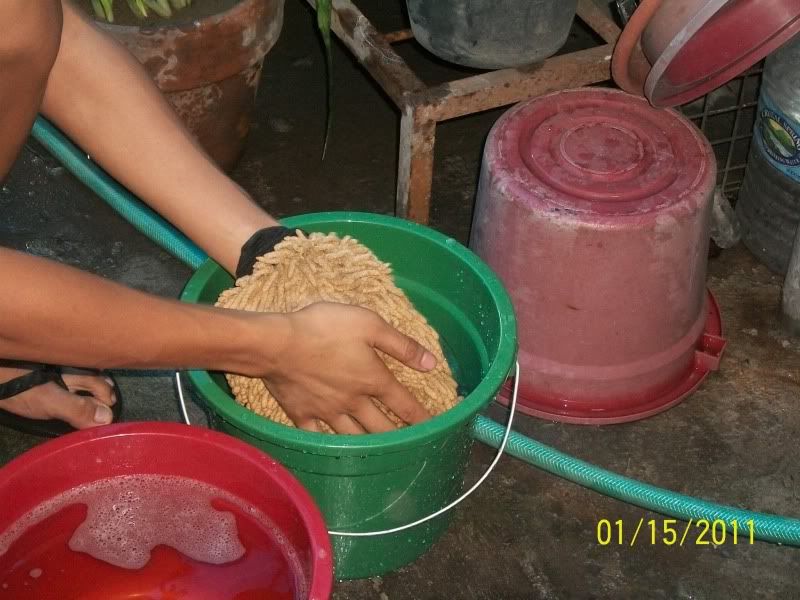
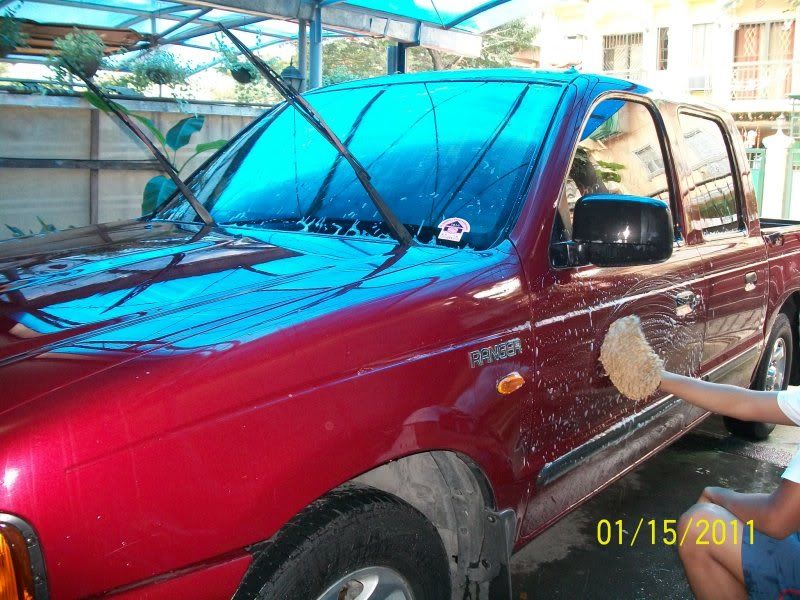
January 16th, 2011 08:36 PM #46)Cleaning the Mags and wheelwells
i.Materials
~ACE washmitt, Mr. Clean tirebrush, sponge
*You will most probably still have shampoo+water mix leftover from cleaning the body. Otherwise, make another, smaller batch.
ii. Washmitt for the mags. Remember to clean in between the spokes.
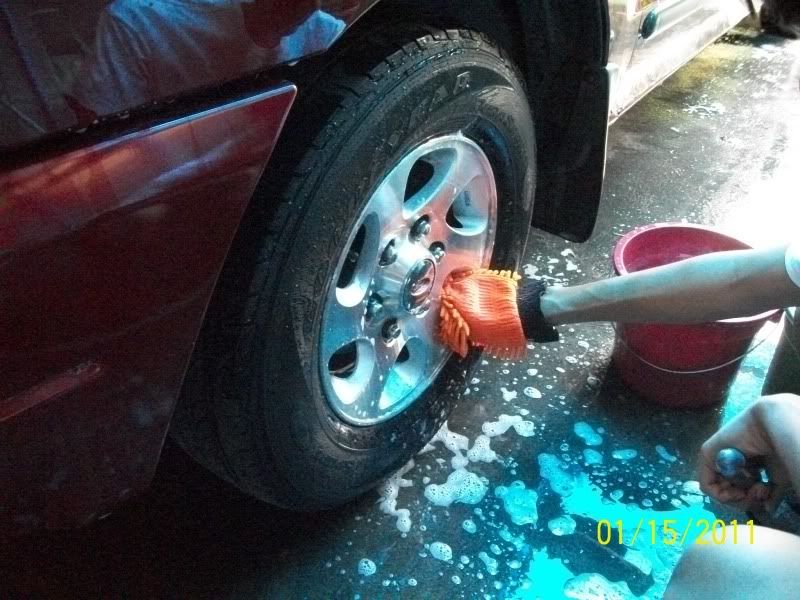
iii. Tirebrush
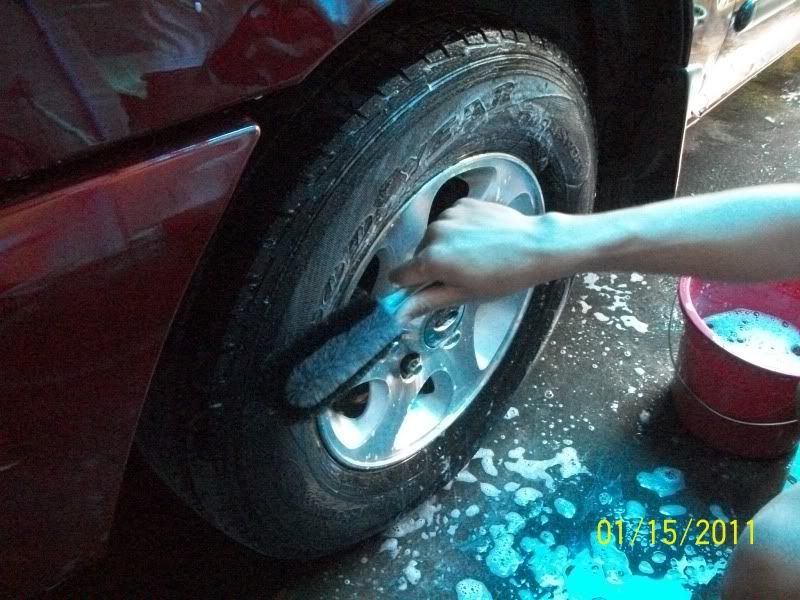
iV. Sponge for the wheelwell plastics
Q:Why a sponge?
A:A brush will scratch the plastic parts of the wheelwells. But a brush is fine on the other areas.
*REMEMBER: shampoo-surface-rinse-shampoo still applies here. Expect the rinse water to turn pitch black by this time.Last edited by scharnhorst; January 16th, 2011 at 08:55 PM.
-
I... see... RED!
- Join Date
- Jun 2007
- Posts
- 2,840
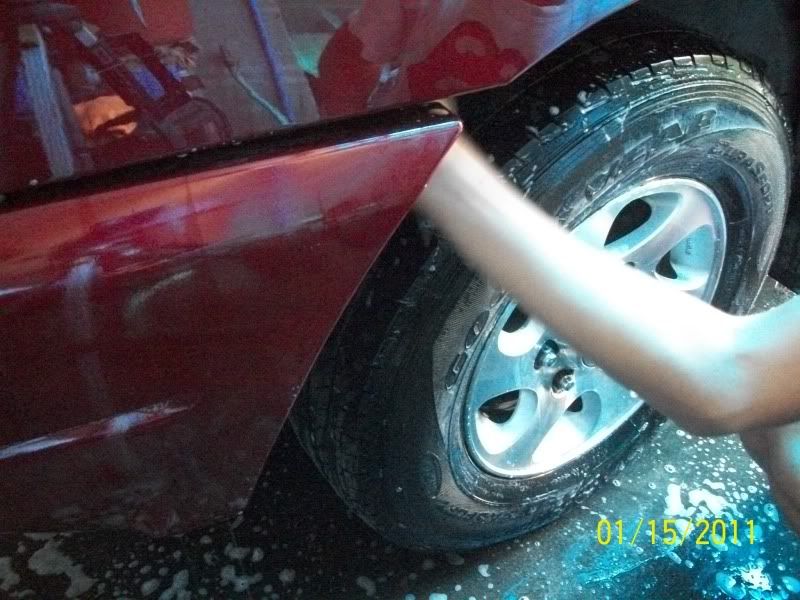
January 16th, 2011 08:37 PM #57) Rinsing and Drying
i. spray off any residue.
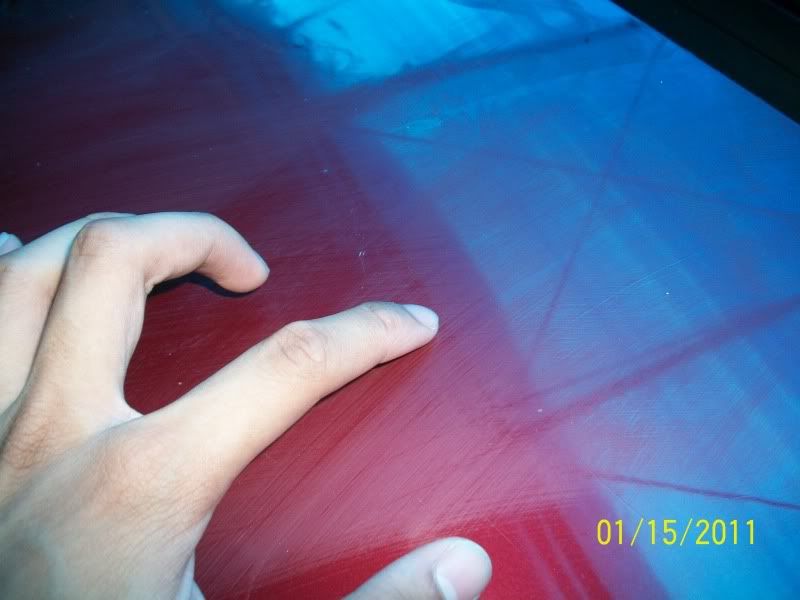
Q:How do you know if the wax is still alive?
A:Beading occurs if there's still wax. It looks like this:
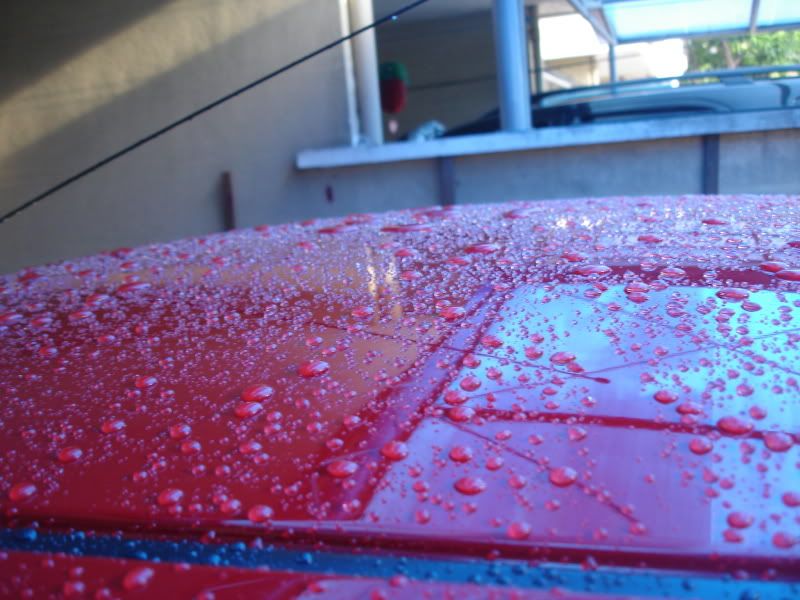
Otherwise it will look like this:
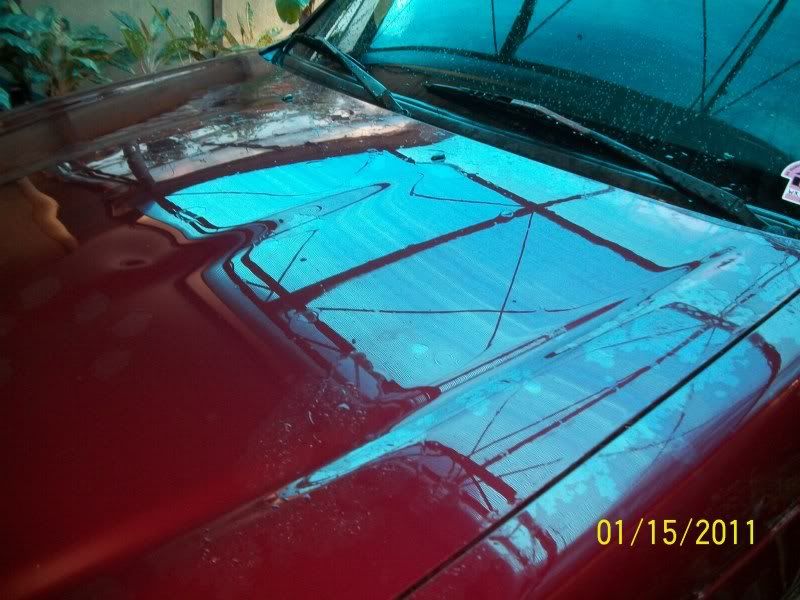
ii. flood the areas with smooth-flowing water from a hose. In waxed cars, this will significantly decrease the amount of water left on the surface
iii. Fold the (microfiber)chamois/drying cloth, and let its weight drag it across the surface for the horizontally-oriented panels
Last edited by scharnhorst; January 16th, 2011 at 08:56 PM.
-
I... see... RED!
- Join Date
- Jun 2007
- Posts
- 2,840
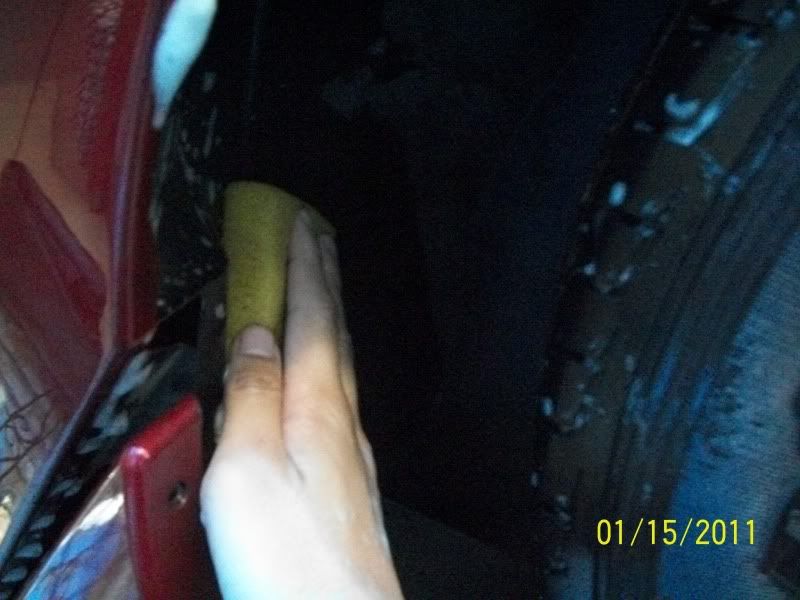
January 16th, 2011 08:38 PM #6iV. For the side-panels, Apply light pressure - enough only to press it lightly against the surface) whilst dragging it along
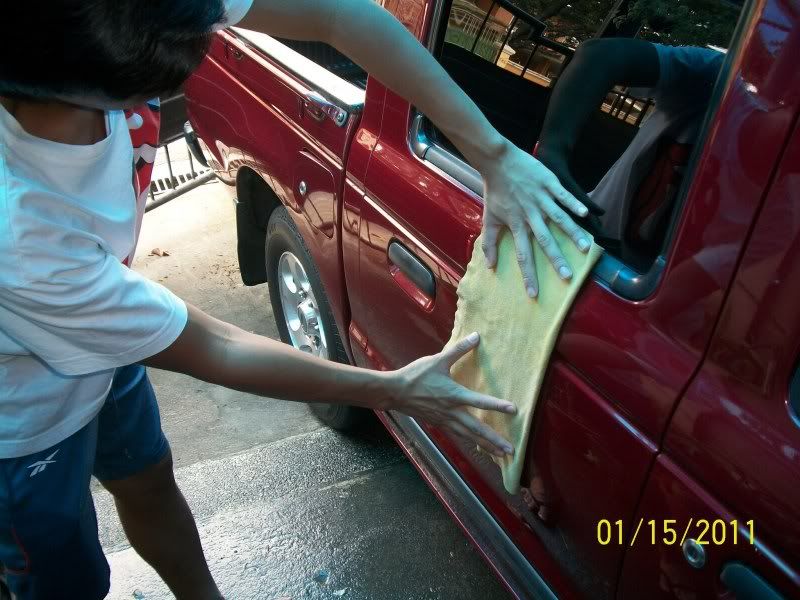
*NOTE: if it squeaks, check if the microfiber is dirty. Use another side if possible.
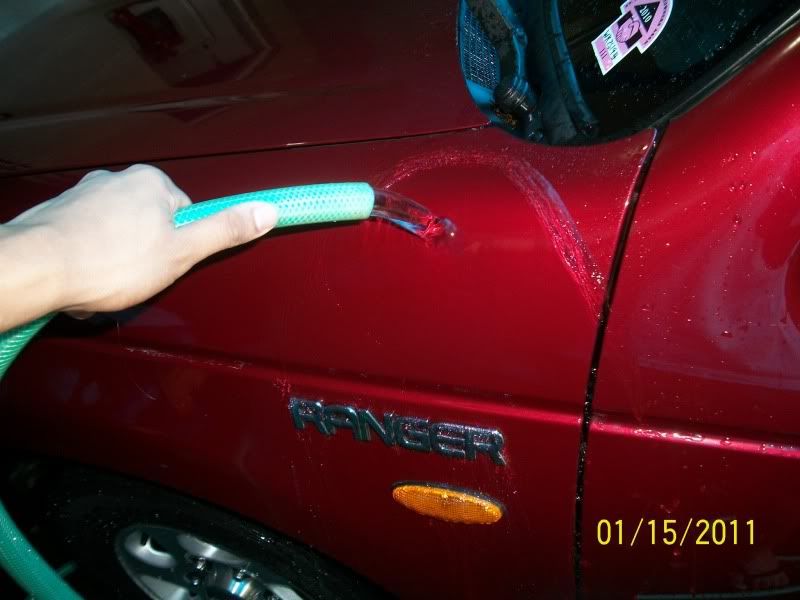
v. Dry the crevices, corners, lights, emblems, door handles, and any hard to reach areas with a blower, manual blowing, or a microfiber
*NOTE: make sure to sling the power cable on your shoulder, and that the extension cord outlet and plug are not touching the water.
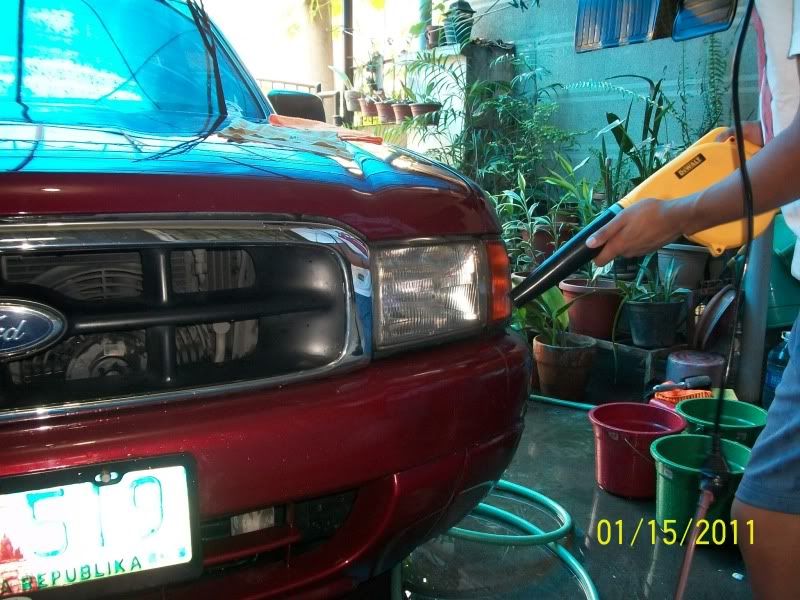
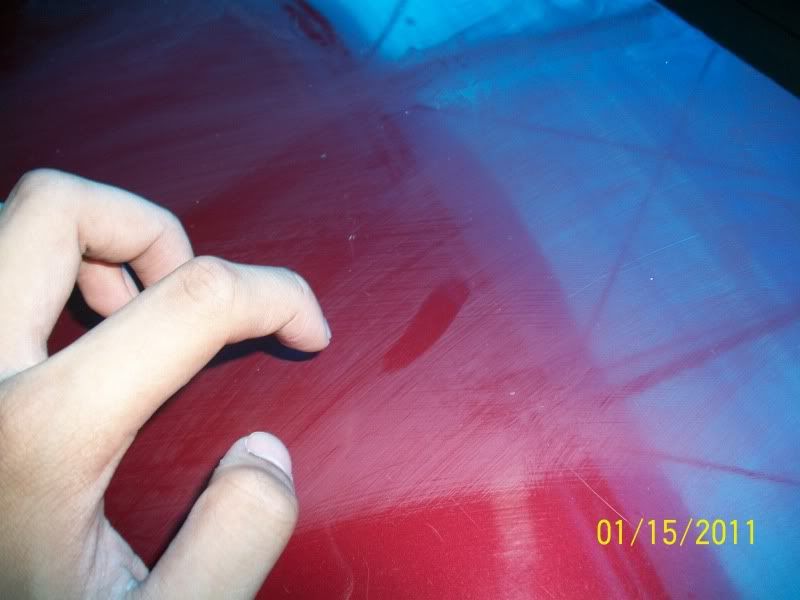
*in this picture, I secured the junction between the blower plug and the extension cord outlet with electrical tape and let it dangle above the water.
vi.Dry the doorsills and mags and the engine hood underside with a cheap MF cloth.
-
I... see... RED!
- Join Date
- Jun 2007
- Posts
- 2,840
January 16th, 2011 08:38 PM #7WAXING
Important concepts:
1) Layering - generally, products with oils (such as most waxes) cannot be layered over with another product (i.e. a sealant, or another wax), since the second product will not bind.
Certain products, such as sealants, glazes (mothers step 2), or certain waxes (microtex nanoglos) can be layered over with a wax.
It is necessary to wait for the product to cure before attempting to layer
2) Finger test - a test to see if the wax is ready for buffing
i. flick your finger on the wax residue
ii. it's ready if it readily comes off
4) Glazes vs. Sealants - sealants are protection-biased products and are generally more durable than waxes. However, they are best used in conjunction with waxes to prolong the life of the sealant. The most commonly known one are the Klasse/Carlack Twins (2.6k at bigberts).
-Sealants have a curing time.
-glazes, such as mothers step 2 (P500), are aesthetics-biased products, filling swirls and enhancing the shine. However, they will not last long on their own without a protective wax.
*note: waxes can be layered over most sealants and glazes in order to improve their lifespan
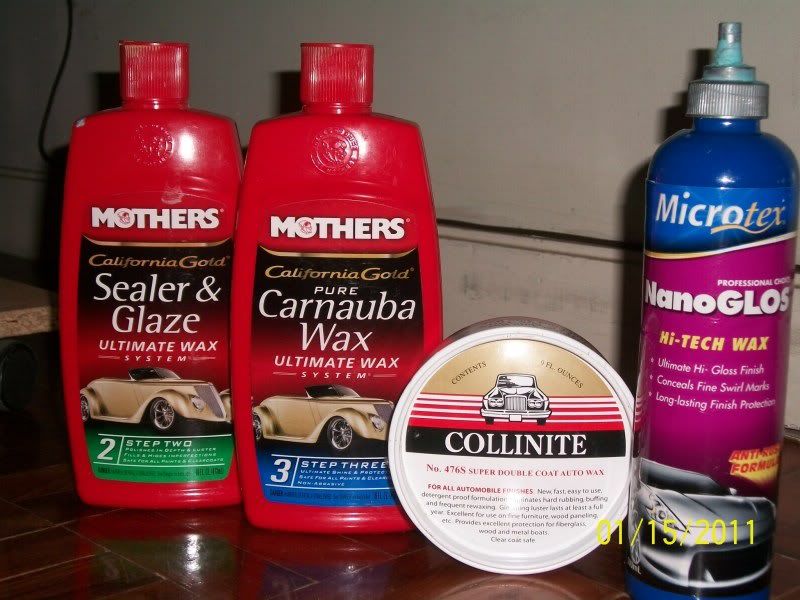
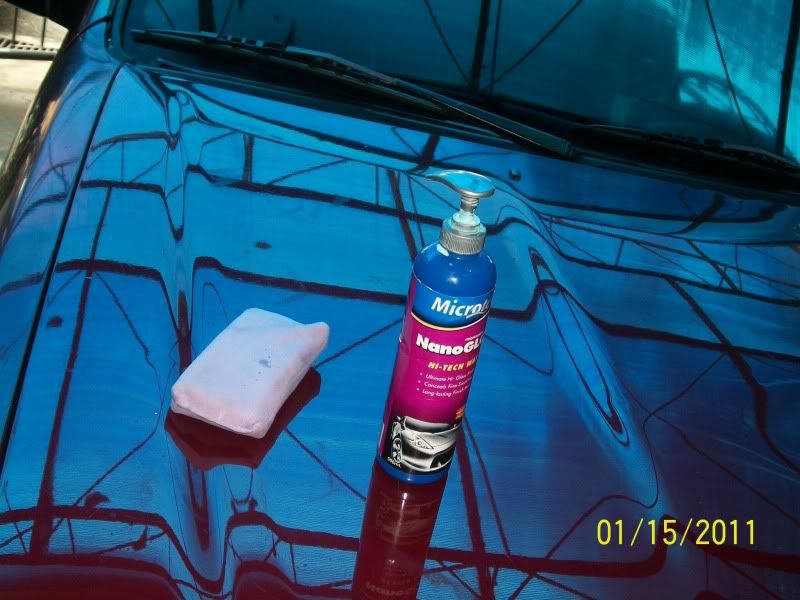
Materials
1) Wax (of course!)
here are certain waxes that I've had firsthand experience and their general impressions
a) Microtex Nanoglos (~P350 for the big bottle. P40 for the sachet): easy-on, easy off liquid wax. Fills swirls very very competently. Best partnered with Nanosliq. Durability: gone after a single wash
b) Collinite 476s (~P700 at autobisyo): Paste wax. Hard to remove if multiple panels are allowed to set before buffing. One of the most durable waxes locally available. Able to resist a couple of weeks of rain or several washes before fading away.
c) Collinite 915: Paste wax. Better shine than 476, but slightly less durable. Still more durable than most Over the counter waxes
d) Collinite Fleetwax (~P1600): used for boats. even tougher than 476.
e) Mothers Step 3 (~P695): Liquid wax. Doesn't fill swirls as nicely as Nanoglos, and nowhere near durable as 476 (lost after a single wash or rain)
f) Turtle Wax: Contains abrasives. Avoid.
2) Applicator pads. Most common are the microtex applicator pad (~P80) and the 4 for 88 pesos micromagic applicator.
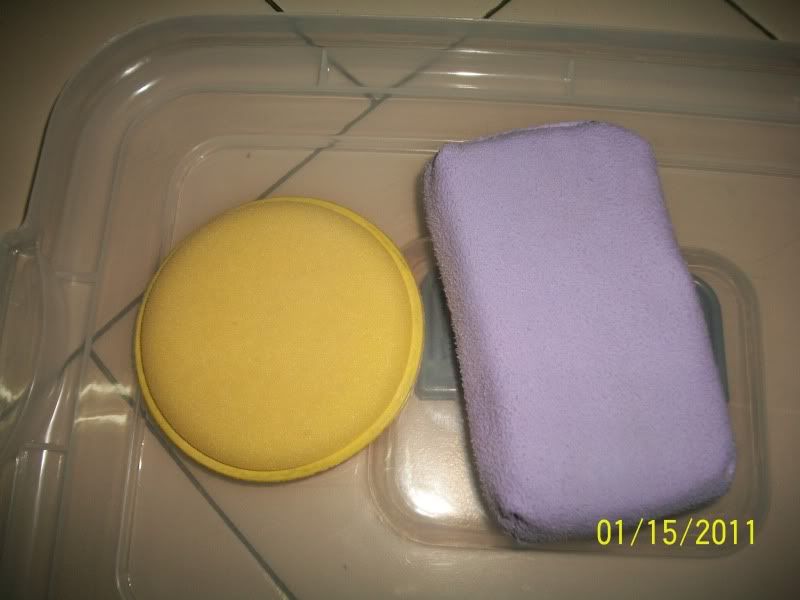
*the violet is the microtex applicator pad. the yellow round foam thing is the micromagic applicator
3) Microfiber cloths (Microtex)
Terry (orange, P120), Plush (pink P200), Ultra Plush (green ~P250)
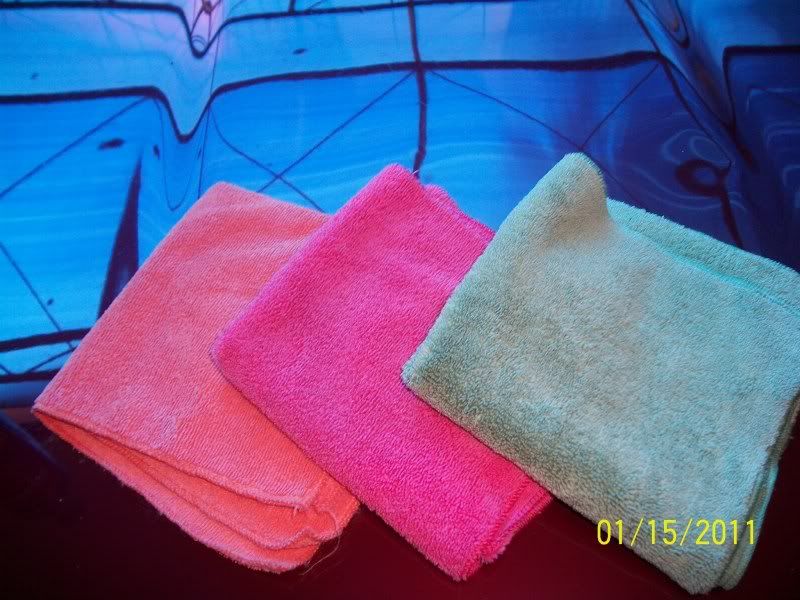
the Terry is ideal for applying QDs and drying surfaces
the Plush and Ultra Plush are ideal for buffing off waxes and QDs
*NOTE: the MF cloths were folded twice to give 8 buffing surfaces to work with.Last edited by scharnhorst; January 16th, 2011 at 09:10 PM.
-
I... see... RED!
- Join Date
- Jun 2007
- Posts
- 2,840
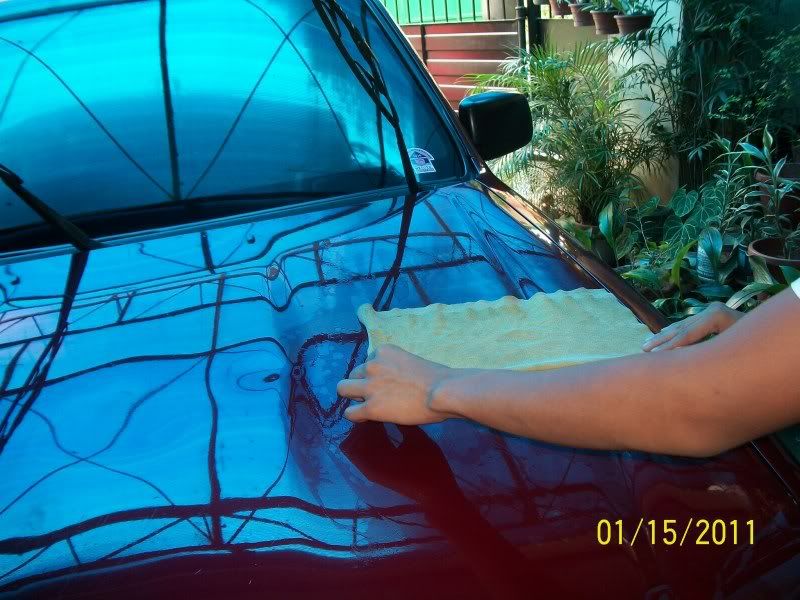
January 16th, 2011 08:39 PM #8Procedure
1) Prep materials - in this case, a microtex applicator and Nanoglos
2) Apply wax onto a panel using a linear pattern (following how the wind strikes the car). Make sure to put the wax on the applicator, instead of on the panel.
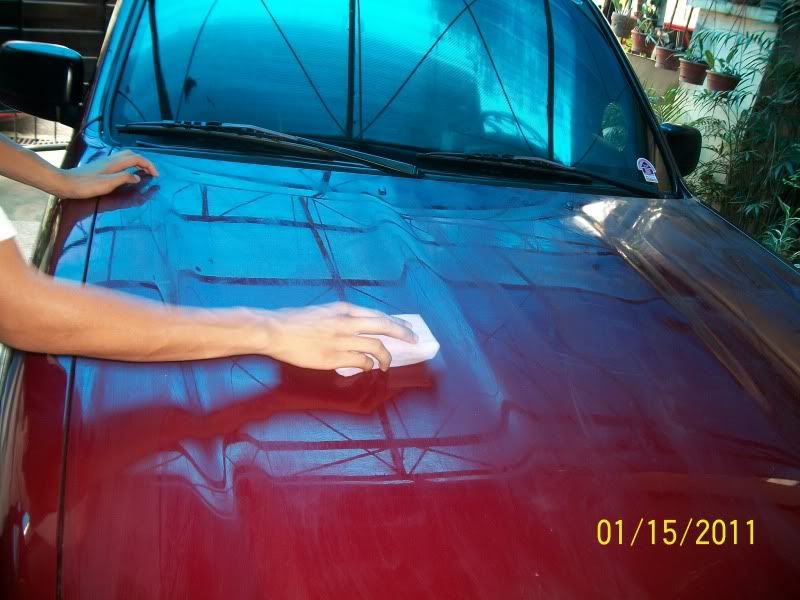
Q:why not a circular motion?
A:if a mistake is made, a circular swirl mark is visible from every angle. A linear mark is visible from only one.
Q:How much to apply?
A:There's no need to turn the panel white with wax residue. Remember that only a very thin layer is actually going to stick to the paint -all the rest is wasted.
As long as there's some haze, it's good to go.
Q:I put wax onto the trim! how do I remove it?
A:use a damp sponge or a cloth with joy, or any other degreaser
3)Allow wax to dry on panel, then test using the "Finger Test" as described above
4)Buff off wax using a linear motion
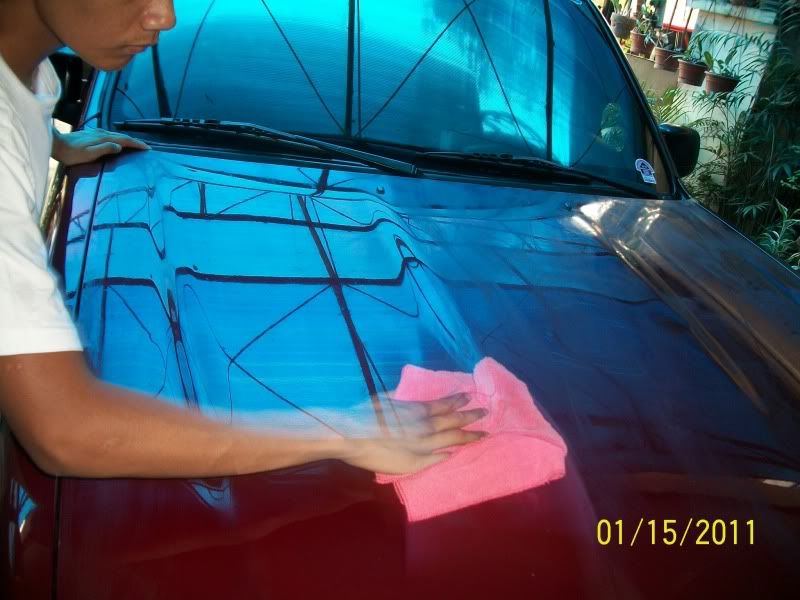
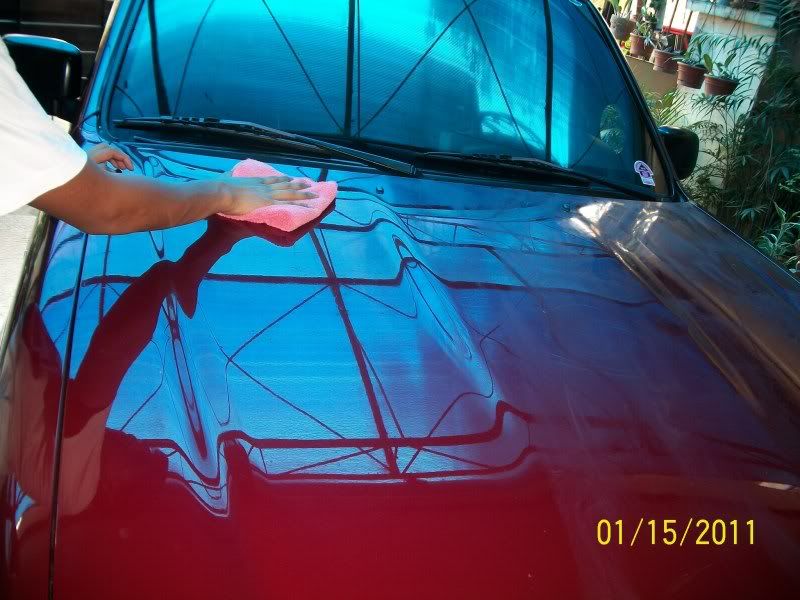
Q:Why linear?
A: see explanation for applying it in a linear fashion
Repeat steps 2-4 for all the other panels.
5)Buff off any residue.Last edited by scharnhorst; January 16th, 2011 at 08:48 PM.
-
 High & Dry
- Join Date
- Jul 2007
- Posts
- 56,747
January 16th, 2011 08:40 PM #9Wow! This is very informative!!!
Thank you very much sir!Last edited by _Cathy_; January 16th, 2011 at 08:44 PM.
-
I... see... RED!
- Join Date
- Jun 2007
- Posts
- 2,840
January 16th, 2011 08:40 PM #10TIRES
Materials
1) Tireblack. Avoid Rain-harry and similar products, these cause brittling of the tire sidewalls, leading to burst tires
2) Sponge
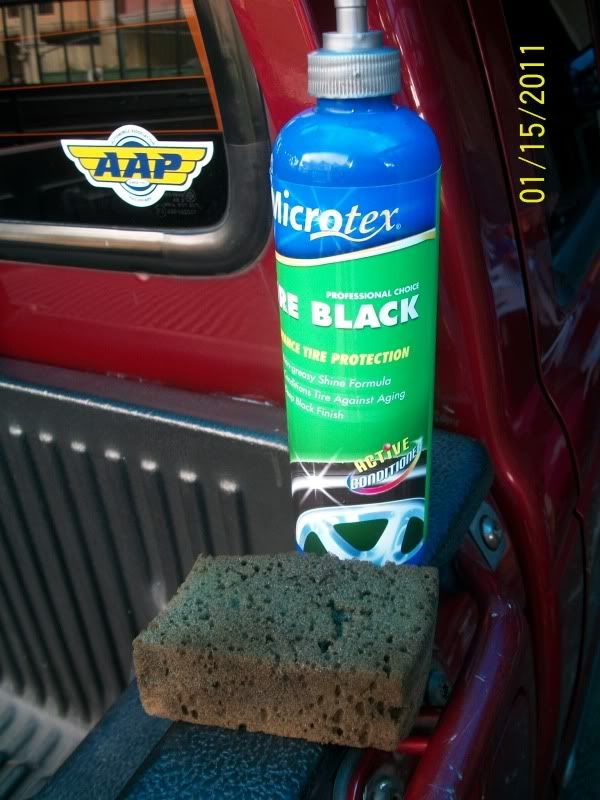
Procedure:
1) Apply tireblack onto the sponge. In this case, I am using Microtex tireblack (~P250)
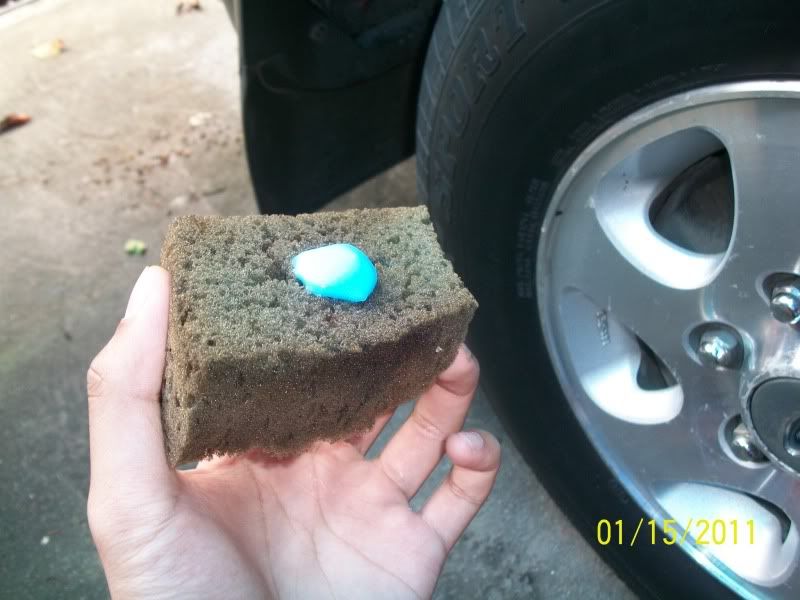
2) Squeeze sponge to distribute tireblack
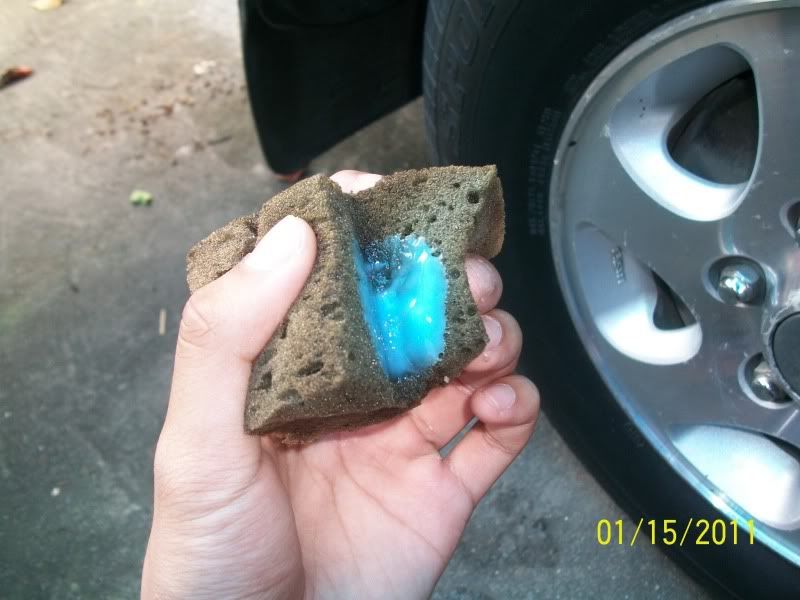
3) Apply to tire
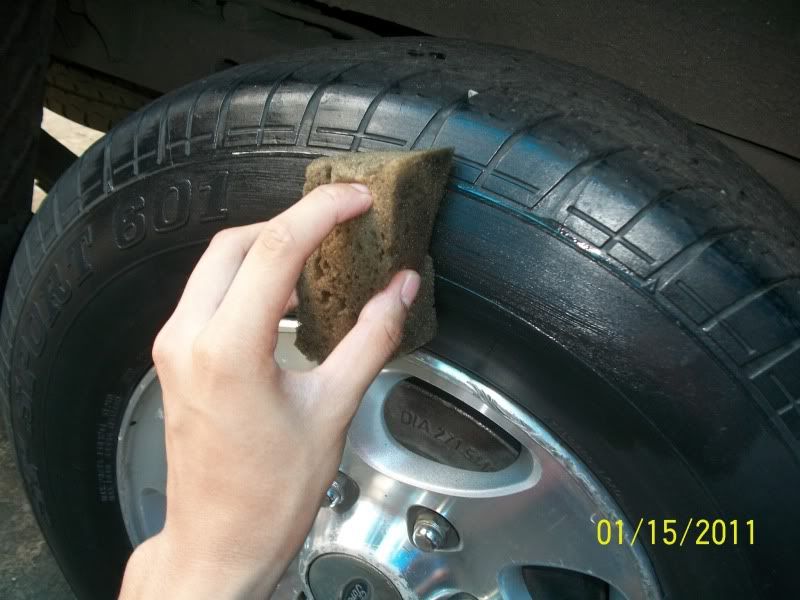
Repeat for all tires.
*note: you can use tireblack for the exterior plastic trim.
Last step: enjoy how it looks before it rains... again.
Last edited by scharnhorst; January 16th, 2011 at 08:48 PM.

 Reply With Quote


Panasonic Lead Acid is now under GS Yuasa. Sent from my SM-S901E using Tsikot Forums mobile app
Which is better? Amaron or Panasonic Battery?